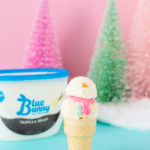
DIY Reindeer + Snowman Ice Cream Cones
Servings: 0
Ingredients
- For the Reindeer:
- Blue Bunny Cookie Butter Ice Cream
- Small Gumballs or Hard-Shell Chocolates
- Candy Melts in Desired Colors/Chocolate
- Cake Cones
- Piping Bag + Piping Tip
- Wax Paper
- For the Snowman:
- Blue Bunny Vanilla Bean Ice Cream
- Candy Melts in Orange + Other Desired Colors/Chocolate
- Cake Cones
- Two Sizes of Ice Cream Scoops
- Round Fruit or Other Round Object For molding the scarf
- Plastic Wrap
- Piping Bag + Piping Tip
- Wax Paper
- Paring Knife
Instructions
- For the reindeer: Melt whatever color candy melt(s) you want to use for the antlers. Let cool slightly and fill a pastry bag with the melted chocolate.
- On a piece of wax piper set on top of a cookie tray, pipe small antler shapes.
- Place in fridge and let set for about 20 minutes (may vary depending on size!).
- Remove from fridge and peel off of wax paper.
- To assemble to cones: Place a large scoop of Blue Bunny Cookie Butter Ice Cream onto a cake cone. Place two antlers in the top of the scoop and finish with a gumball nose right in front!
- For the snowman: To give the scarves a rounded shape, so they fit perfectly on your snowmen, find any sort of round object in your house that is similar in size to your bigger ice cream scoop. We used clay and made our own, but you could use a lemon or toy ball, etc. Wrap whatever it is in plastic wrap.
- Melt whatever color candy melt(s) you want to use for the scarves. Let cool slightly and fill a pastry bag with the melted chocolate.
- On top of the plastic wrapped object, pipe out a scarf shape. See photo above!
- You can pipe several on one or use a few different objects, then place in the fridge to harden for about 20 minutes.
- While they're setting, melt the color you want to use for the buttons. Let cool slightly and fill a piping bag.
- Place a piece of wax paper ontop of a cookie sheet and pipe tiny dots of the chocolate. Place in the fridge.
- Remove from the fridge and carefully pull the scarves and buttons off of the plastic wrap/wax paper.
- Finally, take orange candy melts and cut them into tiny triangles. These will be the nose!
- To assemble: Use your larger ice cream scoop and place a large scoop of Blue Bunny Vanilla Bean Ice Cream onto your cake cone. Then use the smaller scoop to place a second scoop right on top. Place the scarf on top of the larger scoop. Then add two buttons to the bottom scoop and a nose to the top one. Done!
Tried this recipe?Mention @studiodiy or tag #studiodiy!