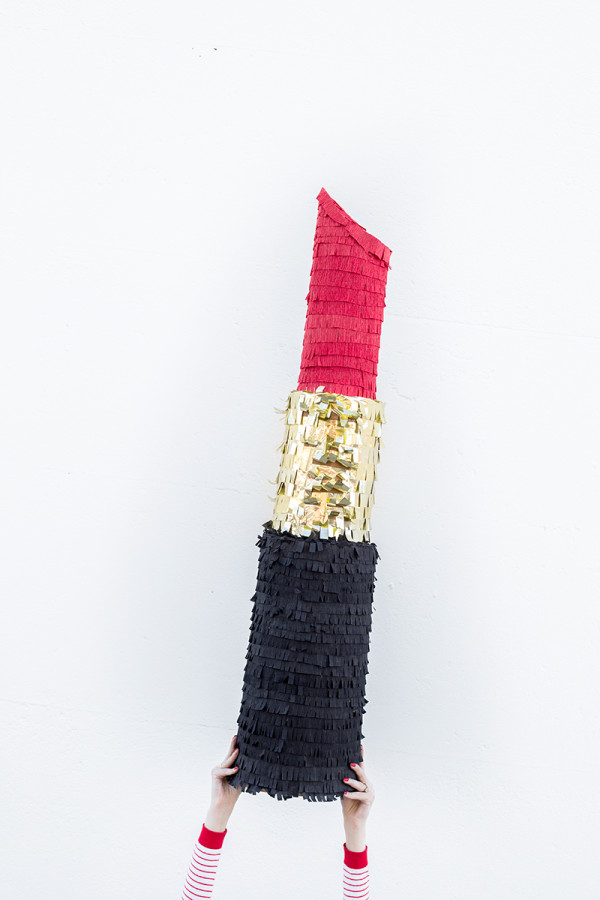
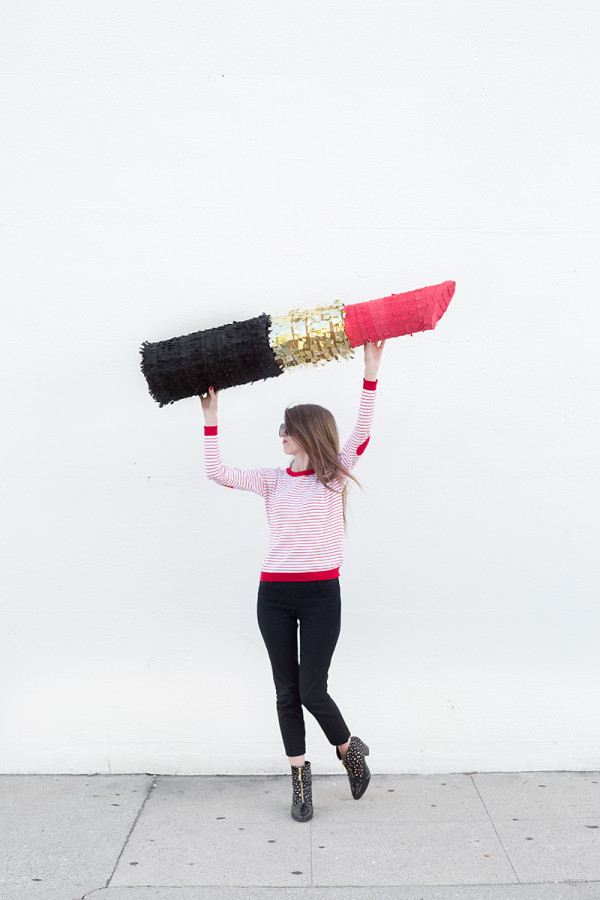
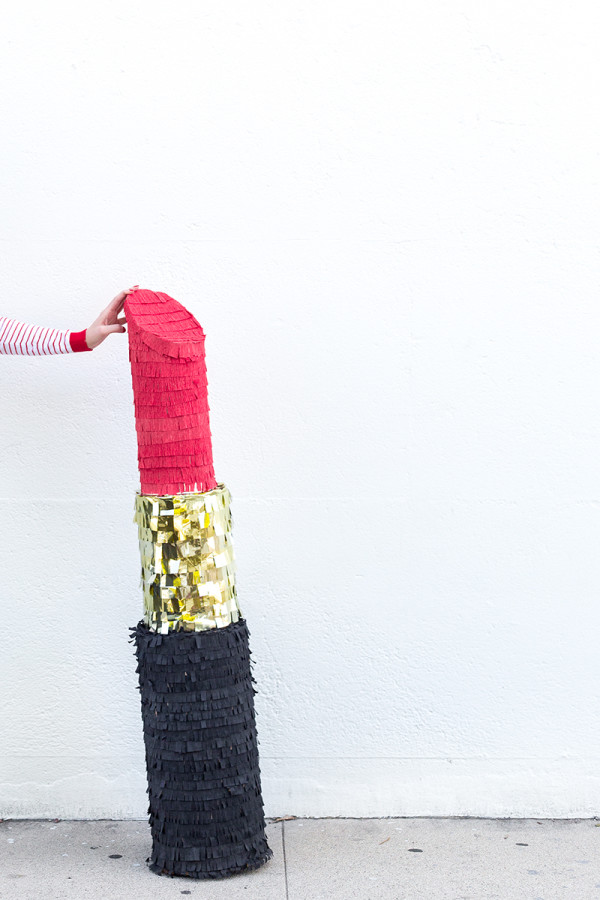
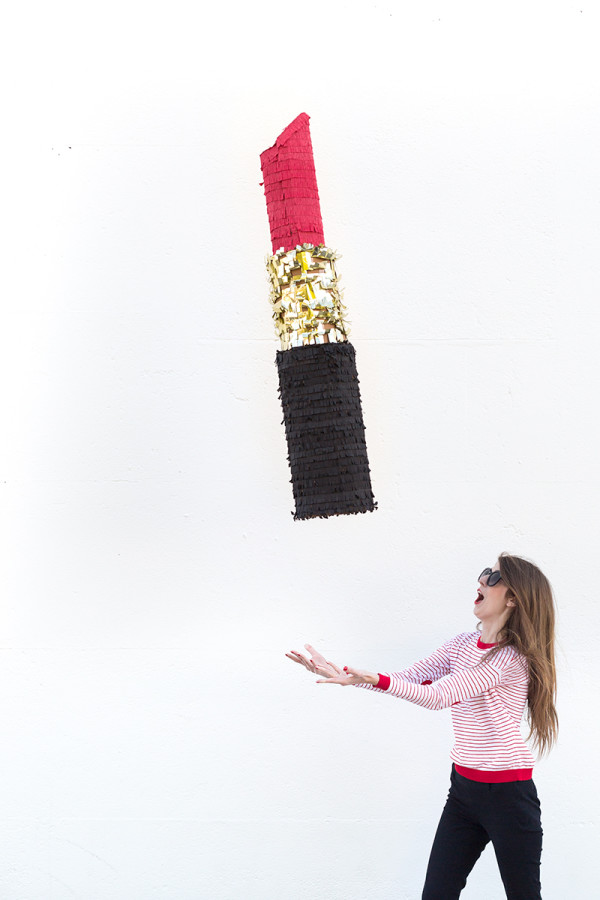
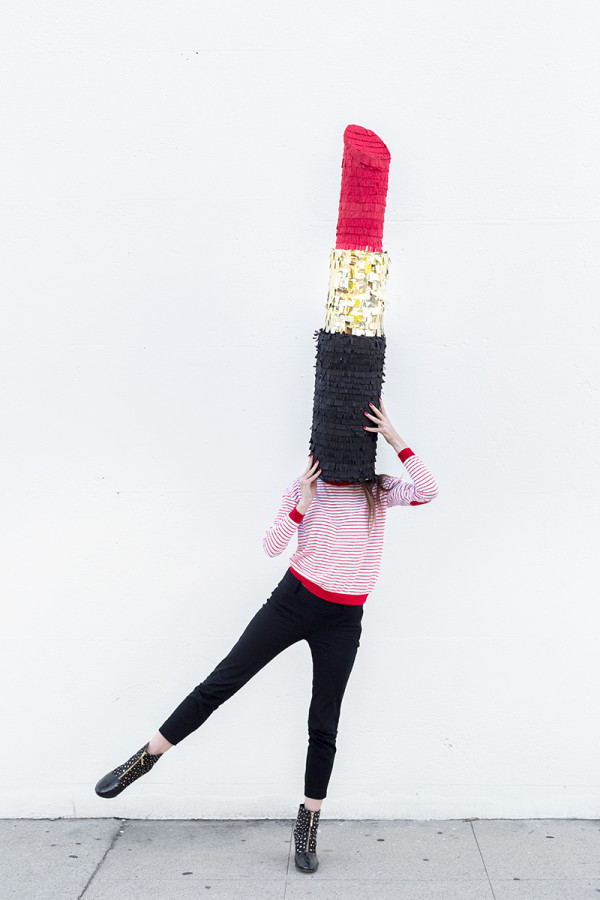
I don’t know about you, but I happen to think a lipstick piñata is now necessary in everyone’s life. For Valentine’s Day, bachelorette parties, birthdays, girl’s night out. You just NEED one. Could you imagine if you filled it with lipsticks!? Ok, that might be extreme, but it would be amazing. Regardless of what you plan to fill it with, make one… make one NOW!
Cardboard (I used two large 40×60″ sheets from an art supply store!)
Crepe Paper (or Streamers) in Black and Red
Gold Mylar
Scissors
Pencil
Hot Glue Gun
School/Craft Glue
Clear Tape
Fishing Line
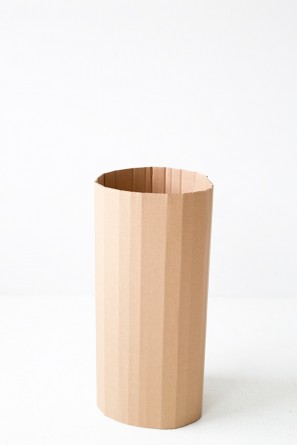

1. You are going to make 3 cardboard tubes. The bottom one will be the largest. Cut out a rectangle of cardboard (mine was about 20″ by 40″). Cut a second, smaller, rectangle (mine was about 15″ x 35″) and a third rectangle (mine was about 20″ x 30″). Bend and crease your largest cardboard rectangle so it begins to curve. Hot glue the two shorter ends of the cardboard together forming a tube.
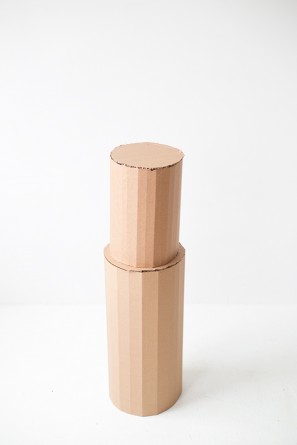
2. Repeat the steps to form a tube with your middle rectangle. Trace the bottom of your largest tube onto cardboard (twice) and cut out two circles. Also trace the bottom of your middle tube and cut out one circle. Hot glue the larger circles to the top and bottom of your largest tube. Then, hot glue the middle tube to the top circle and glue the remaining circle to the top of your middle tube.
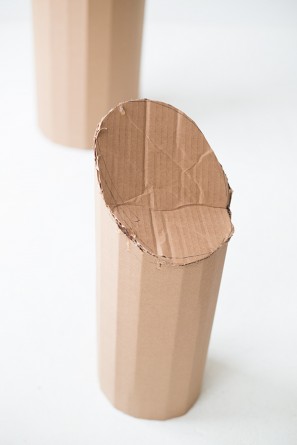
3. Form a tube with your final cardboard rectangle. Using the photo as guidance, cut the top of this tube to form a curve, just like real lipstick! Trace the curved top onto cardboard and cut out (you will have an oval shape). Bend this piece in several places so it curves inward. Poke two holes just above the center of the oval, about an inch apart and string a piece of fishing line through, tying in a knot to form a loop. (This is for hanging the piñata!) Hot glue the oval to the top of your final tube.
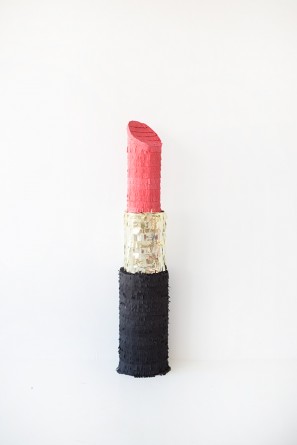
4. Glue your final tube to the top of your stack forming your completed lipstick shape!
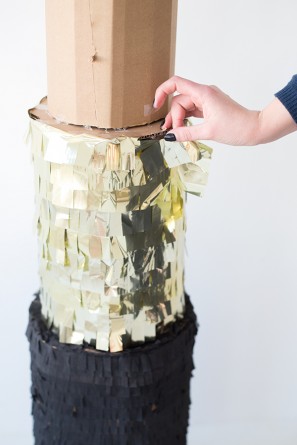
5. Cut your red and black crepe paper and your mylar into long 1.5″ wide strips and fringe them. I explain how to fringe mylar here. Start with your black fringe at the bottom of your piñata and use craft glue to glue strips ’round and ’round the tube, about 1/2″ apart until it’s covered. Then move to your middle tube and use your clear tape to tape strips of mylar ’round and ’round the tube, 1/2″ apart until it’s covered. It is important to use regular clear tape on the mylar. Glue and double stick tape does NOT hold.
6. Finally switch back to your craft glue and glue strips of red fringe ’round and ’round your top tube (from bottom to top) until it is covered. Finally, glue short strips of fringe over the top oval of the tube. DONE!
Photos by Jeff Mindell
Craft Assisting by Morgan Wynia, Concept + Creative Direction by Studio DIY
On me: Heart Elbow Patch Sweater from ASOS
Now any Valentine that receives THAT is going to be pretty darn impressed. Pucker up!
For more Valentine’s Day projects, click here. And for more piñata ideas, head here.


Brittni says
I have never loved a piñata more than I love this one right now…And don’t really even wear lipstick. Haha. Seriously though, this is awesome!
Jamie says
OH MY GOD!!! *spoken like Janice
stephanie@babasouk says
So so so so cute! Kel you are the piñata queen! 🙂
Monique | WritingMonique says
You are incredible: how do you come up with them! Seriously: I adore all your pinatas!!
Karla says
THis is funny and cool!
Micki, the Avon Mom says
Pucker up, Buttercup! This is SO brilliant. I am always looking for creative ways to incorporate lips, lipsticks and kisses into my world. Kelly, you are amazing. I <3 your style!
Katie says
In LOVE with you site! I am getting married in June and I want to have a piñata at my reception! Anyway you would create a diy wedding piñata???
cathy says
Hello Your idea is so original that I have pinned to my Pinterest !!!
See you very soon!
https://fr.pinterest.com/SoLovelySweet/coup-de-coeur/
ΠΙΝΙΑΤΑ says
great pinata. I ‘ll try to make it. Children gonna love it for sure.