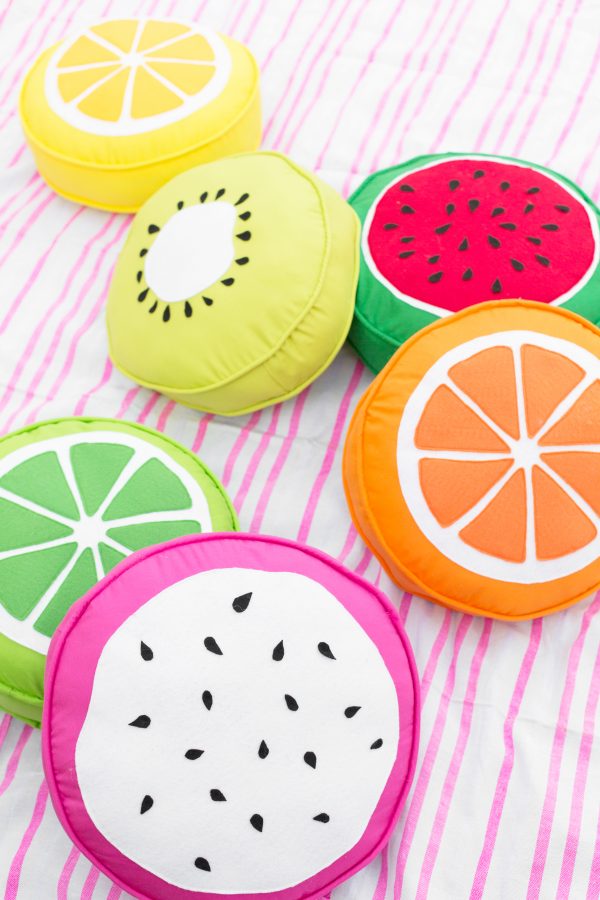
OK this is probably my favorite DIY from our ENTIRE Palm Springs adventure, not just the fruit party. DIY fruit slice pillows!!!!!! *insert all the crying emojis* I decided to take this one up a notch with the sewing-skills because I’ve been seeing lots of awesome velvet cushions with piping and was kind of into that vibe for these. But! You could totally do a simplified version too. These would be awesome as floor pillows for a kid’s room or to toss outside on your patio for a little extra color when having guests over!!
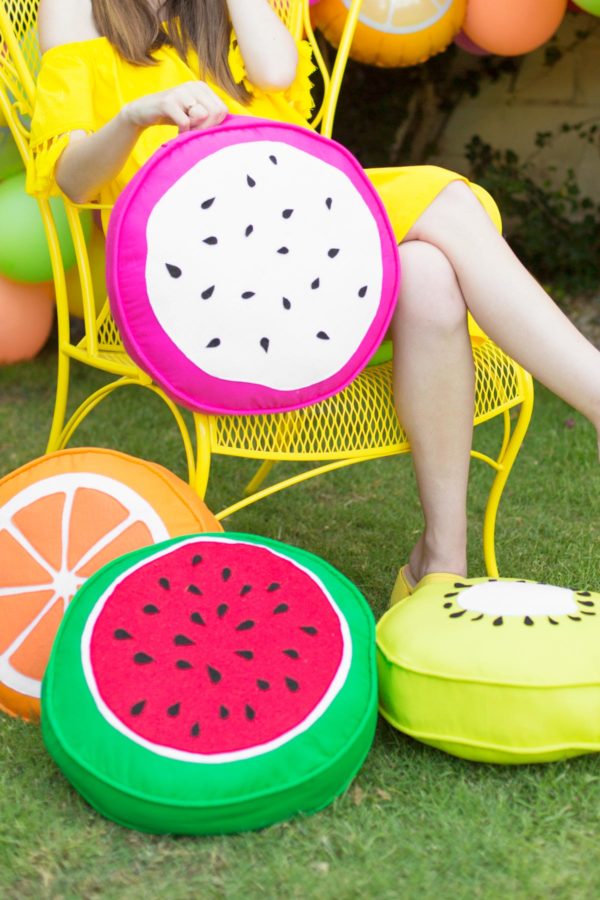
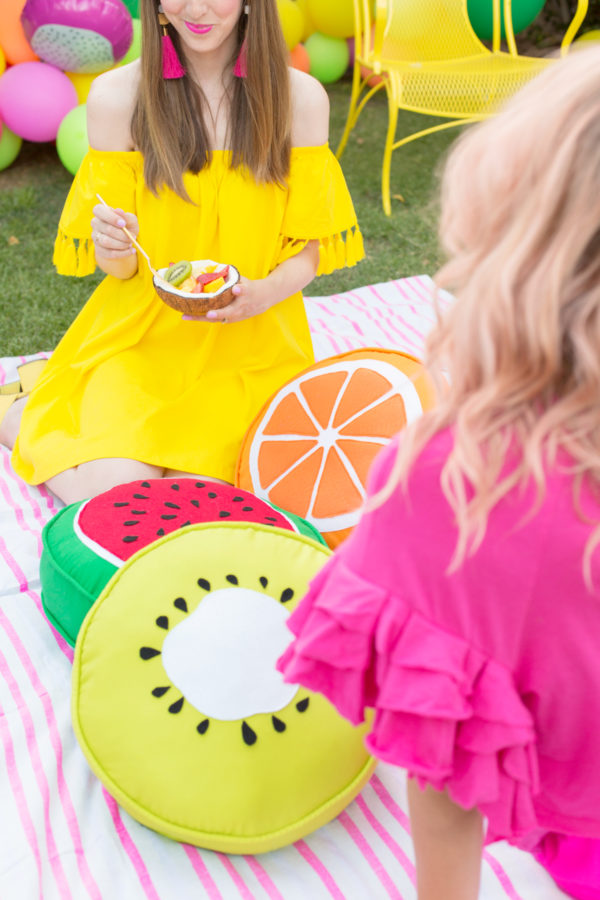
DIY Fruit Slice Pillows
Total Time: 1 - 1 1/2 Hour per Pillow (Shorter or longer depending on sewing experience!)
Supplies
1 1/2 Yards Cotton Fabric in Color of Choice
1/2 Yard White Felt
1/2 Yard Orange, Green or Yellow felt For Citrus Slices or 1/2 Yard of Red Felt for Watermelon
Sheet of Black Felt for Seeds for Watermelon, Kiwi or Dragon Fruit
Cotton Cord (For Piping)
Scotch Tape
Sewing Machine
Needle and Thread
Directions
1. You'll need to cut the following pieces, two 14" circles, two 2" x 4" strips and then four 22"x2" strips cut on the bias! So how I did it was I folded my fabric in half and cut out my circles at the very top and then my 44x4 strip along the fold right beneath. Then, I opened my fabric and cut four shorter 22"x2" strips on the bias (that means on a diagonal). I did this because I didn't want to buy too much excess fabric, but if you bought more than 1 1/2 yards you could cut the longer strips more easily!
2. Cut out the corresponding fruit pieces from your felt:
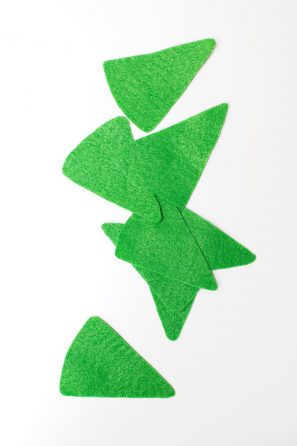
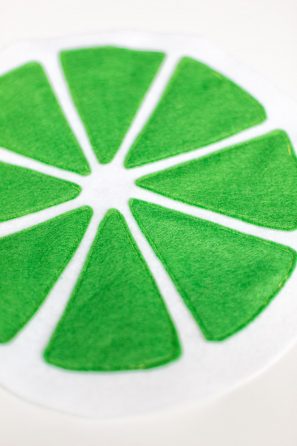
Citrus Slices: One 10" white circle and eight wedges from the color of your choice
Watermelon: One 10" white circle, one 9" red circle, a bunch of black seeds
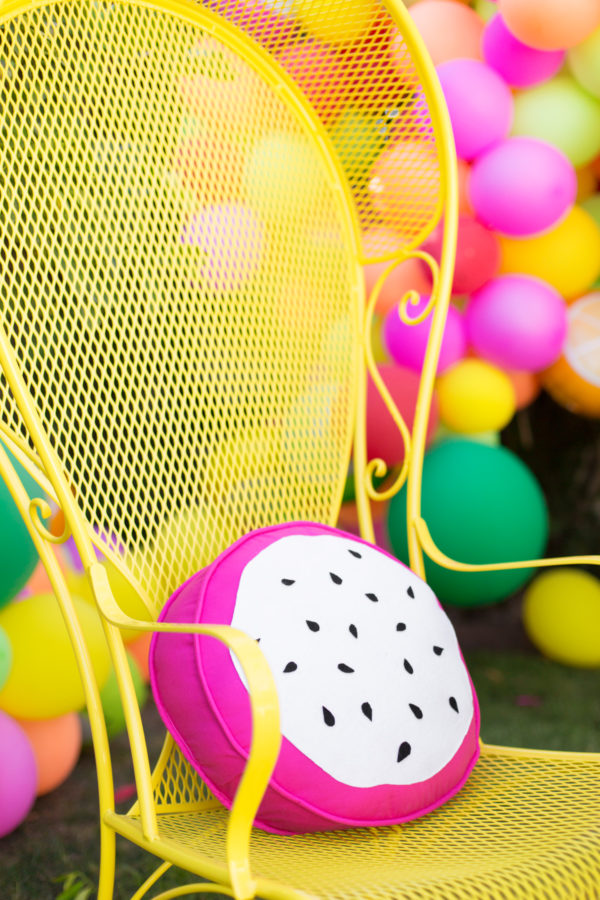
Dragonfruit: One 10" white circle with a wavy edge, a bunch of black seeds
Kiwi: One 6" white circle, a bunch of black seeds
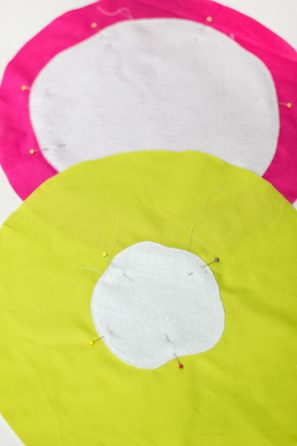
3. First you'll want to stitch your felt pieces together using your sewing machine and then your felt pieces to one of your fabric circles. This will be your front piece. You'll stitch along the edge of your felt pieces, you can use the edge of your foot as your guide for an even stitch, or go closer to the edge if you are more experienced and comfortable doing so! Stitch as follows:
Citrus slices: Stitch wedges to the white circle, then stitch the white circle to the fabric circle.
Watermelon: Stitch seeds to red felt (I did this at the end and it was annoying, definitely recommend starting first!), stitch red felt to white felt, stitch white felt to your fabric circle.
Dragonfruit: Stitch seeds to white felt, stitch white felt to your fabric circle.
Kiwi: Stitch your white felt to your fabric circle, stitch the seeds to the fabric circle, surrounding the white felt.
4. Now prep your side piece by stitching the two 22"x4" pieces together to form one long piece. Set aside.
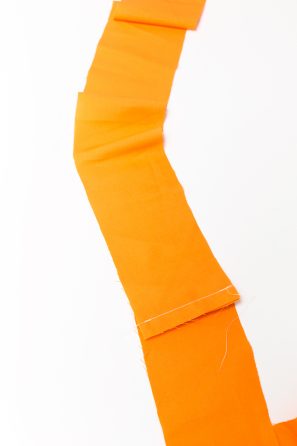
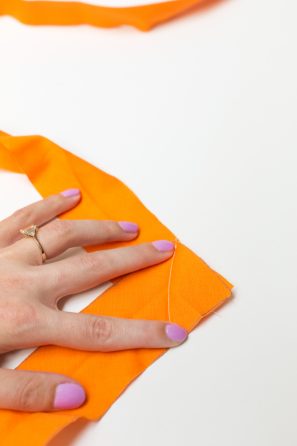
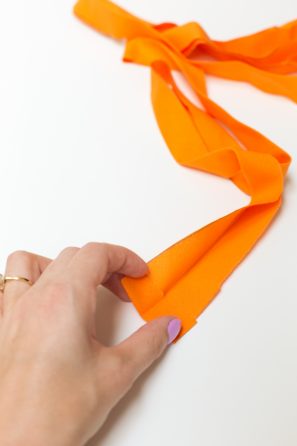
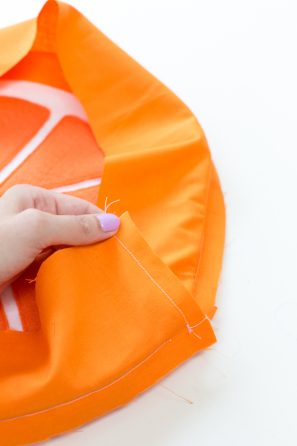
5. And now it's time to make your bias tape! Start with two of your pieces cut on the bias. Line them up at the corners (as pictured above) and stitch diagonally as shown. Open the seam and iron flat plus fold over one inch on one of the short edges and iron that down as well. Then fold the strip in half longways and iron that as well, it'll make things easier! Repeat all steps with the other two strips!
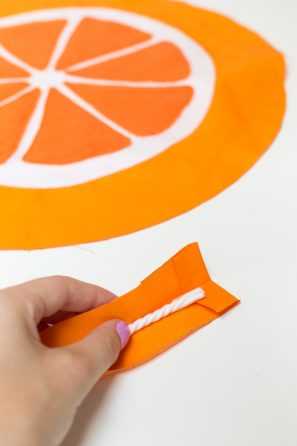
6. Place your cord into the long fold you just created. It should start at the bottom of that 1" piece you ironed down.
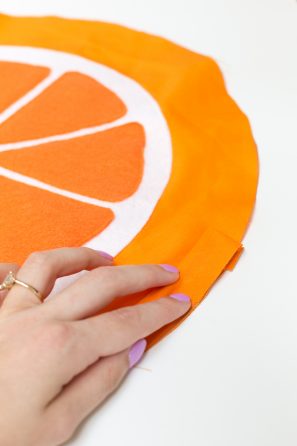
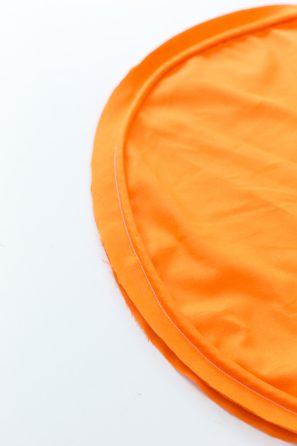
7. Pin the raw edges of your piping you just created to the right side edge of one of your circles. Using a zipper foot, baste the trim in place, stopping about one inch from the end. Trim the excess cord off so the two cord ends meet perfectly. Use a piece of scotch tape to secure them together. Then stick the raw fabric end inside the end that you folded over and finish basting closed. Repeat with the other circle and piping piece.
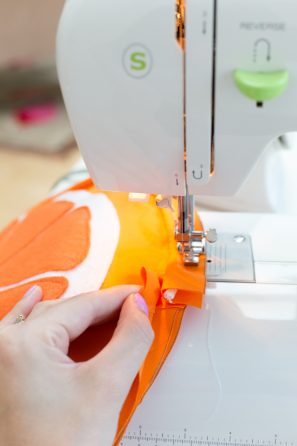
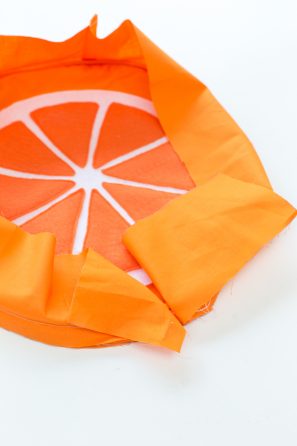
8. Now to sew it all together and complete the pillow! Grab that side piece you had previously stitched and pin it overtop the piping you just sewed to your front piece. It won't fit perfectly and it's not supposed to! Leave the excess hanging off (don't cut it yet!). Start about one inch from the short edge and stitch all the way around the circle.
9. Pull your pieces away from the machine and pin the short edges together. This will perfectly fit the siding to the circle piece! Stitch a straight line down the side edge with a 1/2" seam.
10. Now pin and stitch the back piece, right side facing in, to the other end of the side piece. Leave about 4 inches unstitched for turning.
11. Turn your pillow right side out and stuff!
12. Hand sew the final few inches together using a slip stitch. Done!!
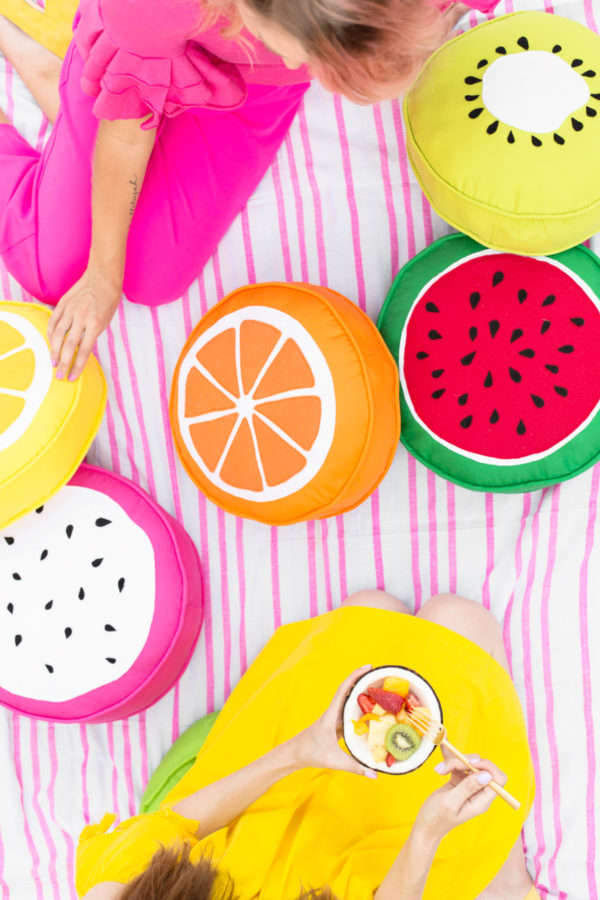
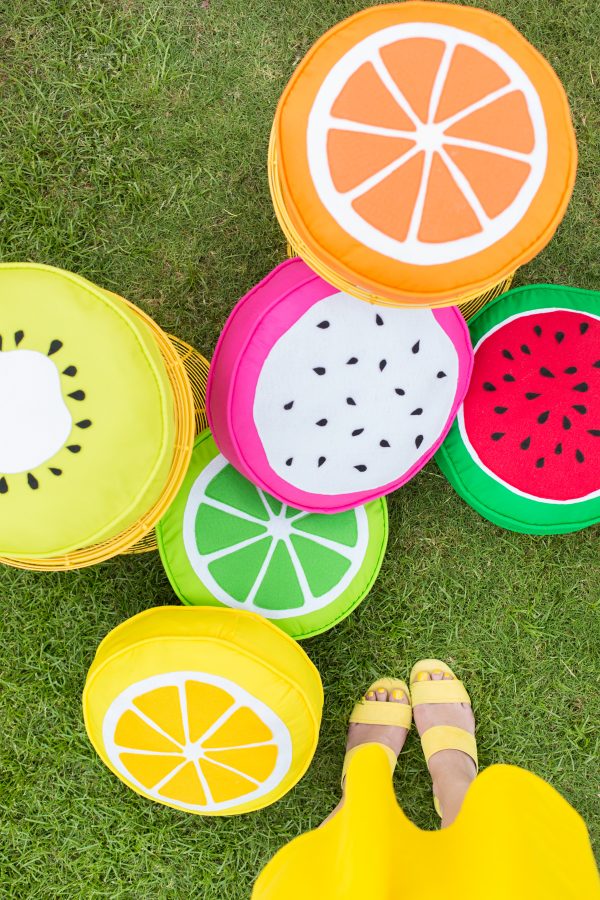
Photos by Jeff Mindell
SOURCES
Palm Springs Rental Home: The Harlow House
Balloons:
Watermelon | Lime | Dragonfruit | Lemon| Kiwi | Orange | Fruit Combo Pack
17″ Yellow | 17″ Deep Jade | 17″ Watermelon Red
Frankly, I Love Rainbows Party Pack | Make It Rainbow Party Pack | Make Life A Party Party Pack
Decor:
Yellow Chairs | Striped Blanket | Gold Flatware
GOSH I LOVE ‘EM SO MUCH! Definitely one of my favorite pillow DIYs to date. The piping really took them to the next level!!!! Right!?
p.s. Fruit Slice Cakes!


Paige Flamm says
These pillows are adorable! I’m obsessed!
Paige
http://thehappyflammily.com
Kelly says
Thanks Paige!!!
Michelle says
They are soooo cool! I want the melon pillow, and the kiwi pillow!
https://www.makeandmess.com/
Kelly says
Thanks Michelle!! The watermelon is one of my faves! =)
Élodie says
Perfect choice of colours! These are great 🙂
Kelly says
Thank you!!! I love how vibrant all the colors are too! =)
Indya | TheSmallAdventurer says
I have never sewed before in my life, but this project really makes me want to learn! I love these so much. They are so fun and bright and make me happy just looking at them! You’ve done an amazing job as always. Can’t wait to see more from the fruit party!
Indya || http://www.thesmalladventurer.blogspot.com.au/
Kate says
THAT KIWI PILLOW!!! I now want to swim in a pool full of fruit pillows. I really need to learn how to sew ASAP
Joanna says
I LOVE these! Please could you tell me or link to the stuffing you used? In the uk the stuffing we get is a bit rubbish and it wouldn’t make the pillows all plump like these! It flattens really quickly 😣
glass beads says
They are so cute and pretty. Great choice of colors! These pillows are awesome.
gina says
thanks for the fun DIY!! my daughters and i are going to make some. i wasn’t able to get the print icon the work with your neat instructions in rectangle but printed from your post. Thanks again!!!
Elaina King says
I love these cute fruit pillows! These look super simple to sew with our machine, if we just find some bright material to make them with. I am going to have my daughter help me sew some of these on her new kids sewing machine. The watermelon pillow just screams summertime! Thanks for the fun sewing idea!
Cinzia says
Great! Juicy and colourful. 🙂
Natasa Dzaleta says
So freaking cool! 🙂
http://www.unpretentiousme.com/en
Mauryn says
Thanks for this! Looking forward to making it. There seems to be a typo in the instructions though. In step one you wrote, ‘1. You’ll need to cut the following pieces…two 2″ x 4″ strips…’
But further down in step four you wrote, ‘4. Now prep your side piece by stitching the two 22″x4″ pieces together to form one long piece…’.
I’m thinking step one should be, 22″x 4″?.
Anyways I’m going to give this a try. Thanks again!
Naama says
These look amazing. I find the instructions for stages 5-7 really confusing. Is there a video that could help?
Josyane says
I would love to see zoom picture of one with pepin, just to figure it out how you fix them ! thanks ! My little girl would love the dragonfruit *-*
Danice says
The pillows are so adorable! ‘ Will definitely be sewing some of these pillows. Thanks so much for the tutorial and the great photos.