
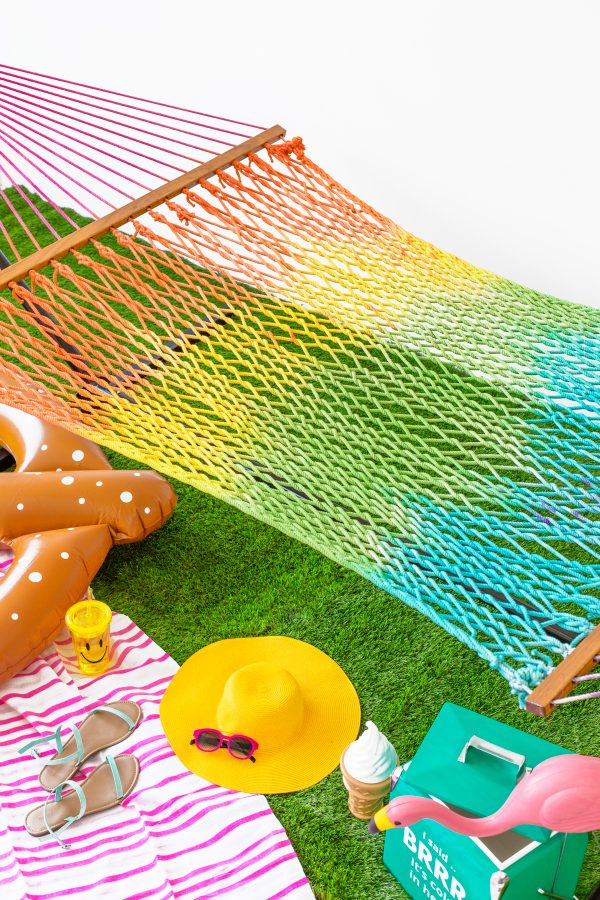
I let you in on the news last week that I’m working with True Value over the next couple weeks to help you bring some color to your home this summer using a few of my favorite True Value finds! And, we figured we’d kick things off with a BANG! A rainbow tie dye hammock kinda BANG! Yes, this hammock started off as a plain ol’ white one before we made it over, so if you’ve been thinking about investing in one for your backyard… allow us to help you add a little color!



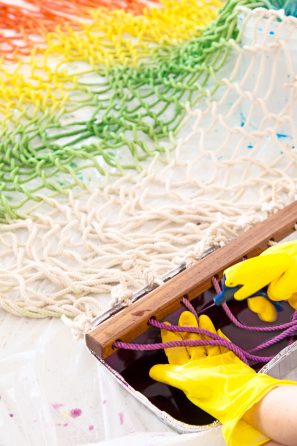
DIY Rainbow Tie Dye Hammock
Total Time: 6 Hours + Dry Time
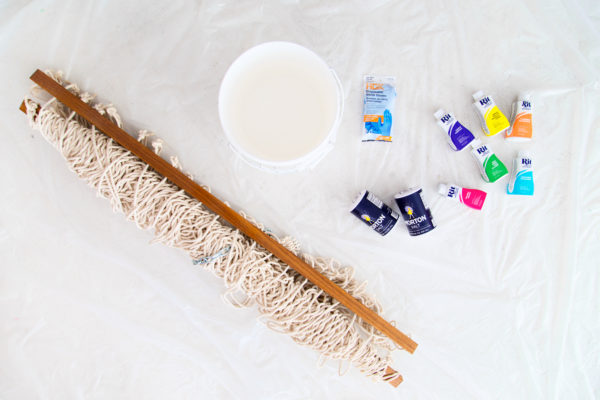
Supplies
Cotton Rope Hammock
Fabric Dye (Like Rit) in Pink, Orange, Yellow, Green, Aqua and Purple
Salt
Six 2 Gallon White Plastic Buckets
Hot Water
Thick (or multi layers of) Plastic Sheeting
Rubber Gloves
Spray Bottle or Squirt Bottle
Disposable Aluminum Foil Pans (At least 3-5)
Ideally, access to a hose and plastic kid pool (for rinsing!)
Directions
1. This project is best done outside, where you have a lot of space and easy access to a hose. Lay out the tarp over the surface you're going to work on.
2. Lay out the hammock flat over the tarp. Prepare two of your colors. We started with pink and orange. Fill each two gallon bucket about 2/3 full with hot water, then add 1/2 cup liquid dye and 1 cup salt and stirred until the color was evenly distributed.
3. Start at one end (pink, in our case) and dip the end of the hammock into the bucket, letting the wood bar sit on top of it. Don't worry that some pieces close to the wood don't fit in the bucket, you'll hand spray those later. Allow to sit in the bucket for about 10 minutes, then check the color. If it's not as vibrant as you would like, allow it to sit for about 10 minutes longer.
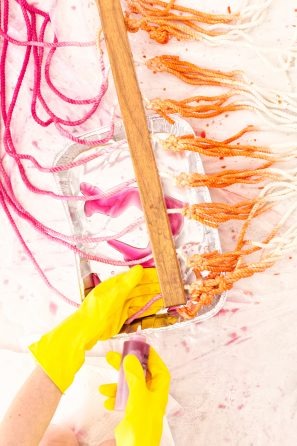
4. Once it's sat for 10-20 minutes, remove the end of the hammock from the bucket. Now you'll need to dye any of the rope that sits above the wood bar and is still white. Scoop some of the dye from the bucket into your spray bottle. Working in sections, lay the wood bar over an aluminum pan, and spray the white rope until well saturated. Try to aim the spray over the pan so it catches the excess. Continue along the wood bar of the hammock until all the white rope is dyed.
5. Now, it's time to move on to the large center section of the hammock. You are going to work in rows of color If you're using the same color pattern we did, you'll need to fit four colors in this center section, so divide it evenly (in your mind). Since the hammock is so wide you'll need to dye about three different sections for each row. Start with your first color (orange in our case) and dip the first section into the orange bucket. Let set for 10 minutes, check, and let sit up to 10 minutes longer if necessary.
6. While this sits, you can prepare your next two colors of dye in the same manner you prepared the first.
7. Once your first section is dyed, you're going to gradually move the dye bucket across the hammock, dyeing the remaining sections of your row until it has been dyed all the way across.
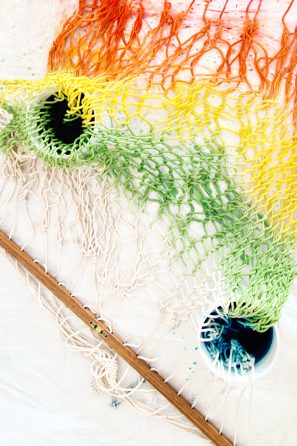
8. Then, you can start on your next row. If you'd like, you can work two rows at a time (from opposite sides, see photos) to speed up the process. Repeat all the above steps until the entire center section of the hammock is dyed with your desired colors.
9. For the final end of the hammock, repeat the same steps we did with the pink.
10. Let dry for a full 24 hours. After 24 hours, The best way to rinse the excess dye out is with a hose. We rinsed ours over a plastic kid pool to catch all the dyed water and the disposed of it. Make sure you rinse until the water runs clear. Let dry again, for another 12-24 hours. Now it's ready to be hung as desired!
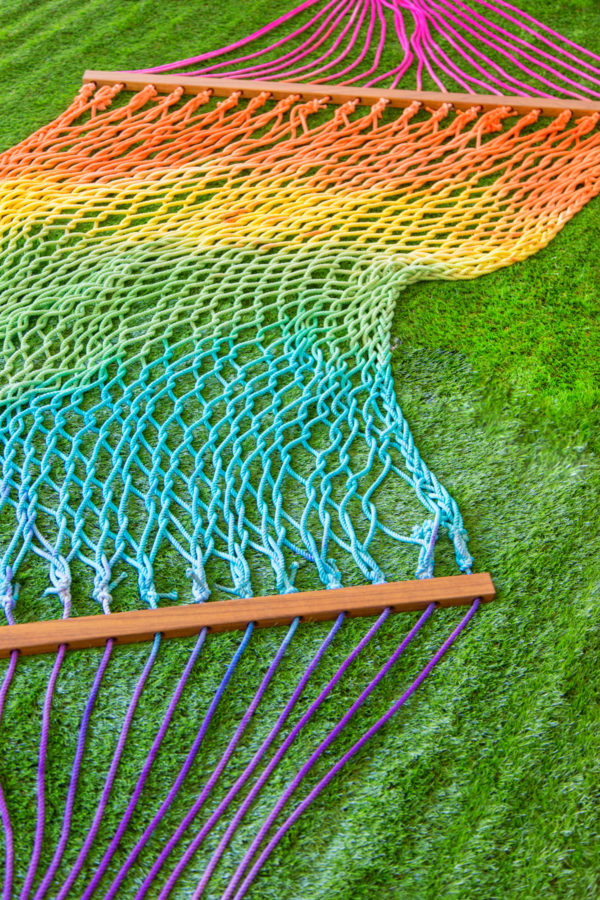


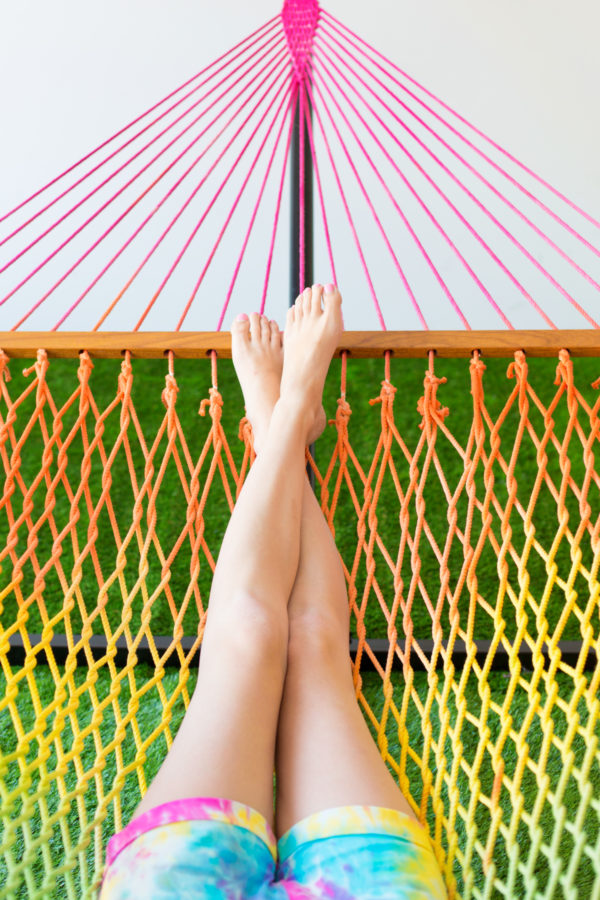


Photos by Jeff Mindell
It’s very important to relax, you know, and is there ANYTHING else out there that’s gonna call your name like a tie dye hammock!??! “Helloooooo, let’s hang!” Haha, couldn’t resist.
Stay tuned for our next fun DIY summer makeover and in the meantime, check out True Value on Facebook, Twitter, Pinterest and Instagram, or visit TrueValueProjects.com for more DIY ideas and projects!
This is a sponsored conversation written by me on behalf of True Value. The opinions and text are all mine.




Amanda says
Love this! Just an FYI, the link for the hammock throws over to the DIY beach bag post for me!
Kelly says
Weird!! Just fixed it, thanks for the heads up! =)
brittni says
You did an amazing job on this! It looks so good.
Kelly says
Thanks B!!!
Monique | WritingMonique says
I love this! So fun.
Michelle says
This looks so wonderful, I wish I had a place for a hammock (I’ve always wanted one)!
https://www.makeandmess.com/
Julia says
STOP! This is too awesome. I can just imagine hanging this in someones backyard casually in the burbs and how in shock all the neighbors would be. I don’t have a yard, but if I did I would definitely make one of these!
Julia – http://bunnybaubles.com
Kelly says
Haha, yes!! Giving the neighbors something to talk about, one tie dye hammock at a time! 😉
Helen says
This is so amazing! I wish I had space for a hammock!
xo Helen @ www.KaleidoscopeSpinning.com
Amanda says
Love it!
Véronique says
Wow! I don’t know how you do it Kelly, it’s amazing. I wish I had your skills. Thanks for sharing 🙂
carrie says
What a fun idea! So colorful.
Carrie
www.wearwherewell.com
Molly says
I LOVE this DIY! Its so colourful and awesome! Where did you get your dungarees from? Or did you make them? (If so, how?)
Jessica says
THIS HAMMOCK IS GOALS?. It’s supe cute and I love the colours. Where did you get the overalls from?
Stephie McCarthy says
Adorable tutorial. Good job, you all!
Wasif Ahmed says
WOW ! How crazy it is ! I am a hammock lover And I liked this so much. The idea is unique.Bye
Top Hammocks says
Wow! Wow! and Simply Wow! I am stunned seeing the most beautiful transformation from nothing to best. You simply transform white colored hammock into something appealing and most eye catchy…..Keep it up, I will surely share it with others as well!