Every year our school hosts a Trunk or Treat and it is my favorite event of the year! It’s such a fun way for kids to trick or treat with friends from school that don’t live in their neighborhood, dress up in costumes and getting to decorate just a trunk instead of an entire house means you can really have fun with a theme! Last year we did an Inside Out Trunk or Treat and it was SUCH a hit!
Here, I will break down everything we did to make this awesome trunk or treat display, from the decor to the treats to the costumes.

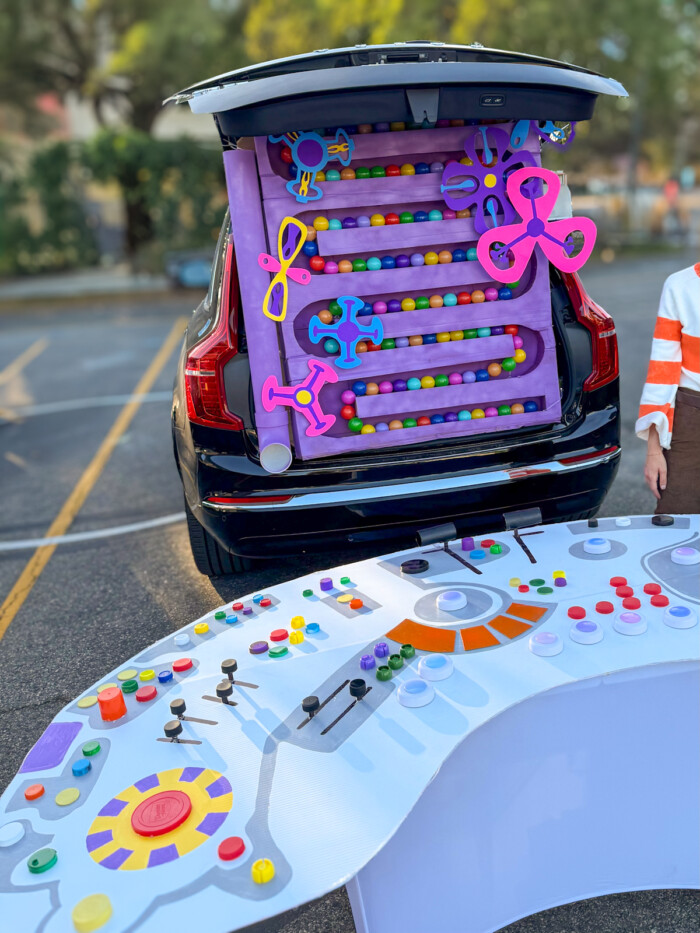
How To: Inside Out Trunk or Treat Memory Display
The memory orbs of Inside Out headquarters make the perfect backdrop for your trunk and it’s easy to make with cardboard! Fill it with plastic ball pit balls and they look exactly like Riley’s memories.
If you want to hand out your treats in a creative way, you can even add a PVC pipe “recall tube” to drop them through!
You’ll need:
- 2 large sheets of cardboard
- Purple spray paint
- Poster board in bright colors
- Small wooden dowels and flat wooden beads (that the dowels fit into)
- Plastic ball pit balls
- Battery powered tube lights
- Wide PVC pipe + 90 degree PVC elbow (I’d look at your hardware store for the best size and price options!)
- Pencil
- Utility or craft knife
- Hot glue
- Zip ties and/or command hooks
Step-by-Step Tutorial
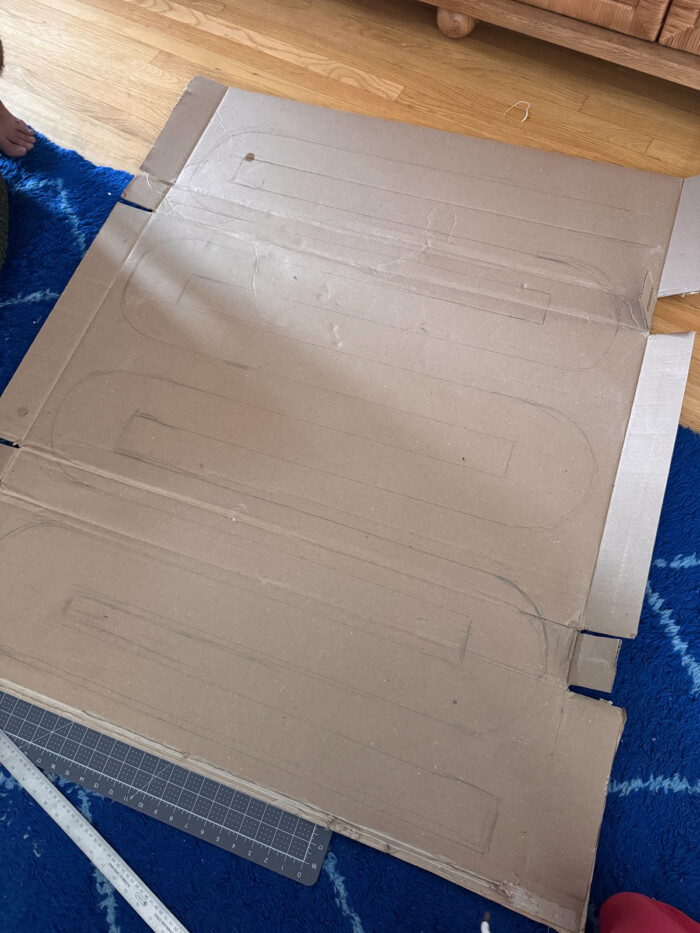
- Cut one cardboard sheet to be just big enough to fit inside the back of your trunk. Cut the second piece of cardboard into 4″ wide strips.
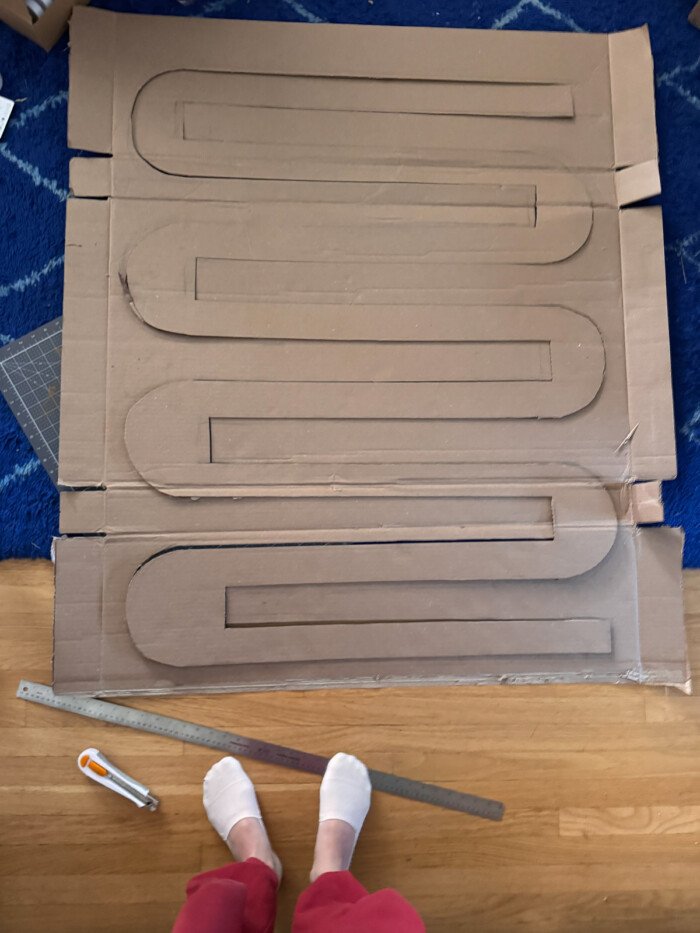
- Take your cardboard sheet and draw a curved “zig zag” pattern to form the tunnel the memory orbs will sit in. I made mine about 3.5″ wide and equally spaced. Cut out. Save this piece, you’re going to reuse it as the back of the tunnel!
- Hot glue your 4″ wide strips along the curved tunnel you just cut out, bending the cardboard to follow the curves.
- Hot glue the piece you cut out to the back of the strips to form the back of the tunnel.
- Glue your two PVC pipe pieces together.
- Spray paint the entire thing purple, along with your PVC pipe pieces.
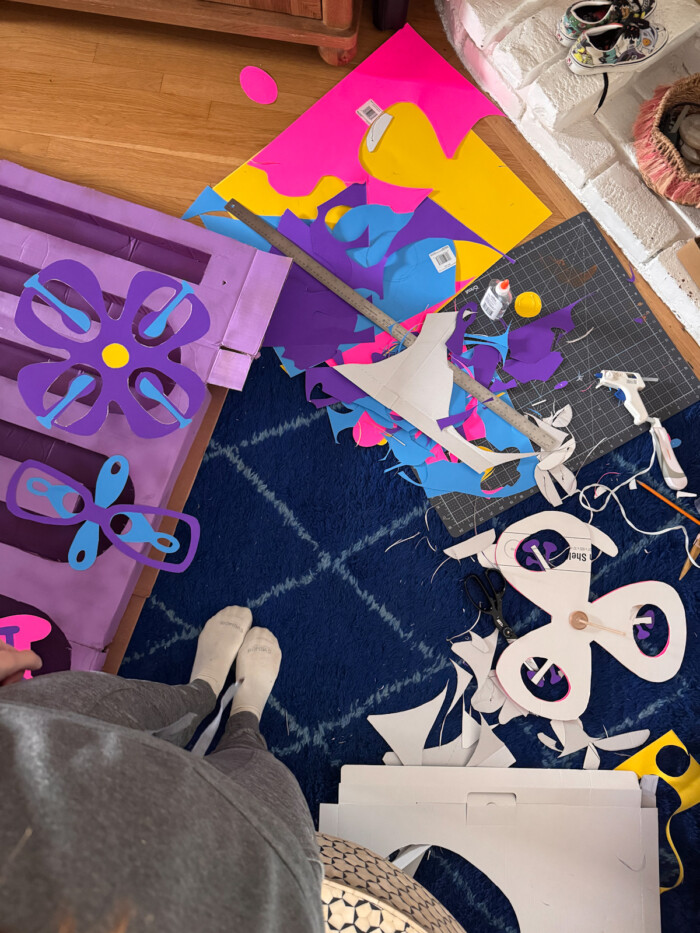
- Cut out various gear shapes from colorful poster board.
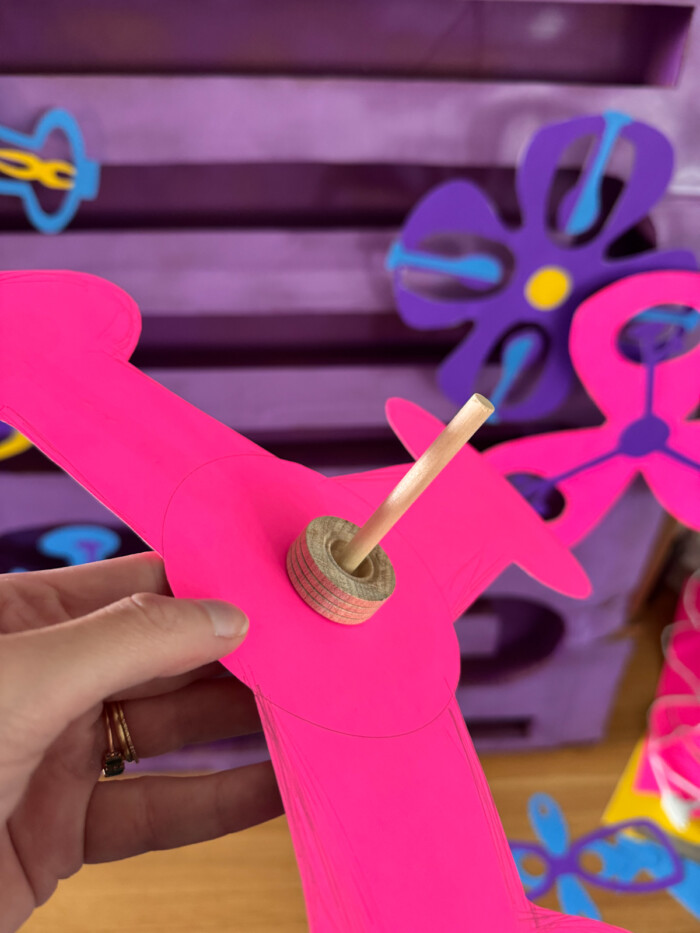
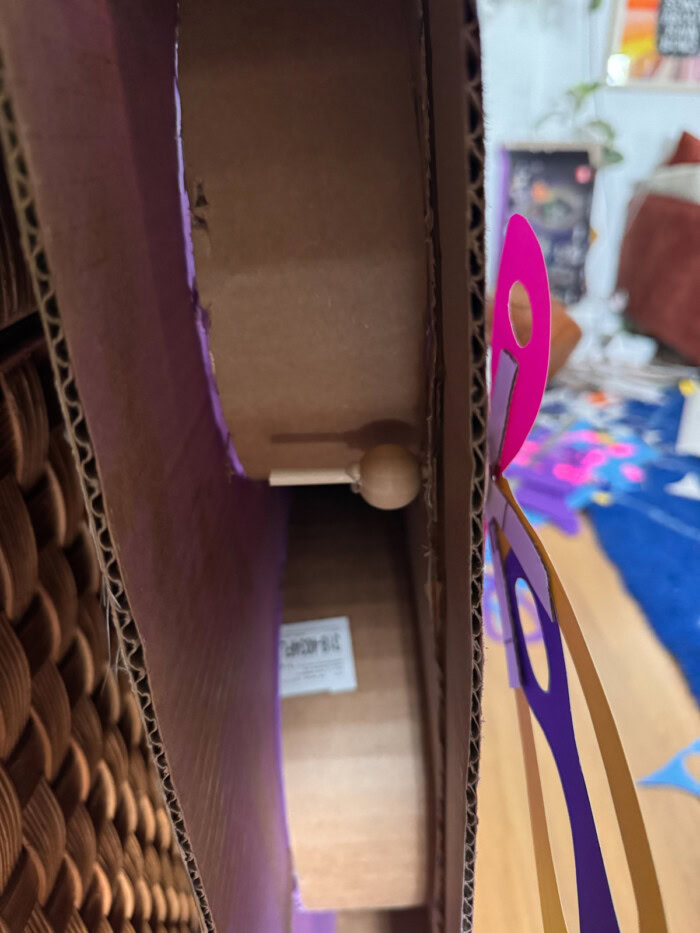
- IF you want your gears to be able to move, glue a wood bead to the back of each and glue a dowel inside each. Then, poke a hole in your cardboard and insert the dowel through. Glue the back end of the dowel inside another flat bead at the back but do NOT glue the bead to the cardboard. This will allow it to turn. If you want them to be stationery, simply glue the poster board to the cardboard.
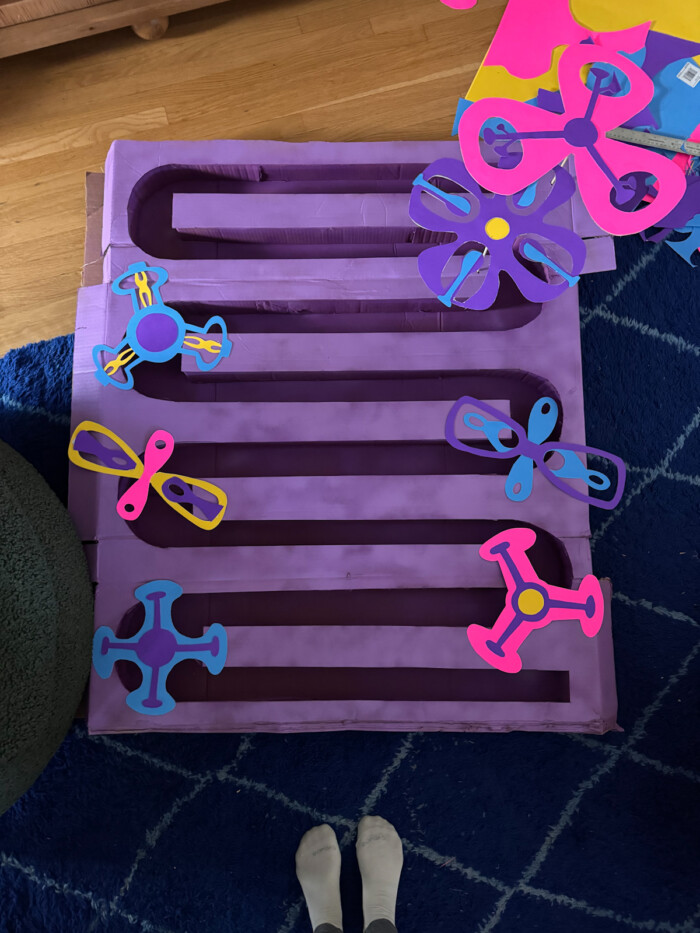
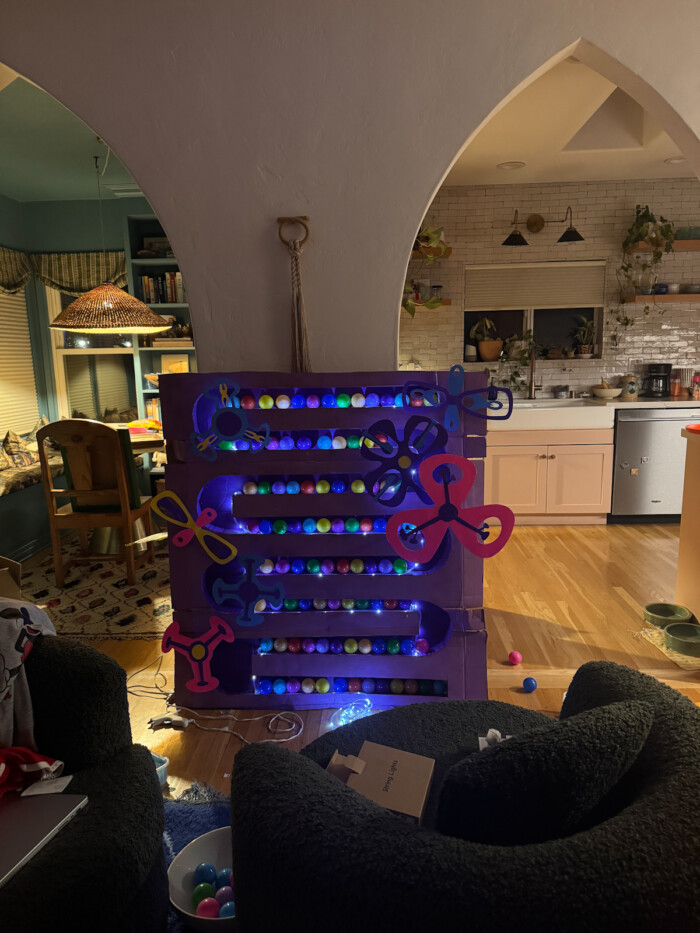
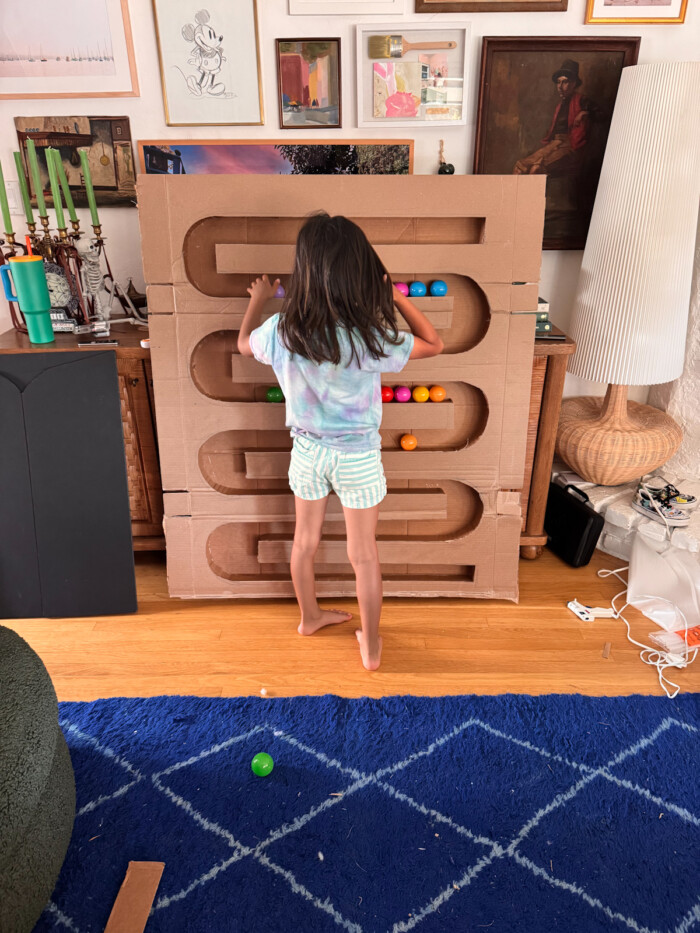
- Hot glue your plastic balls in place all along the tunnel. If you want to be able to re-use the balls, use a strong removable adhesive like butyl.
- Secure your tube lighting along the tunnel. You can do this with glue, command hooks or zip ties, depending on if you want to reuse the lights for another purpose afterwards or not.
- Hot glue or zip tie your PVC pipe to the side of your cardboard.
- Your done! Place in your car and zip tie to the hooks or hinges of your trunk for extra security.
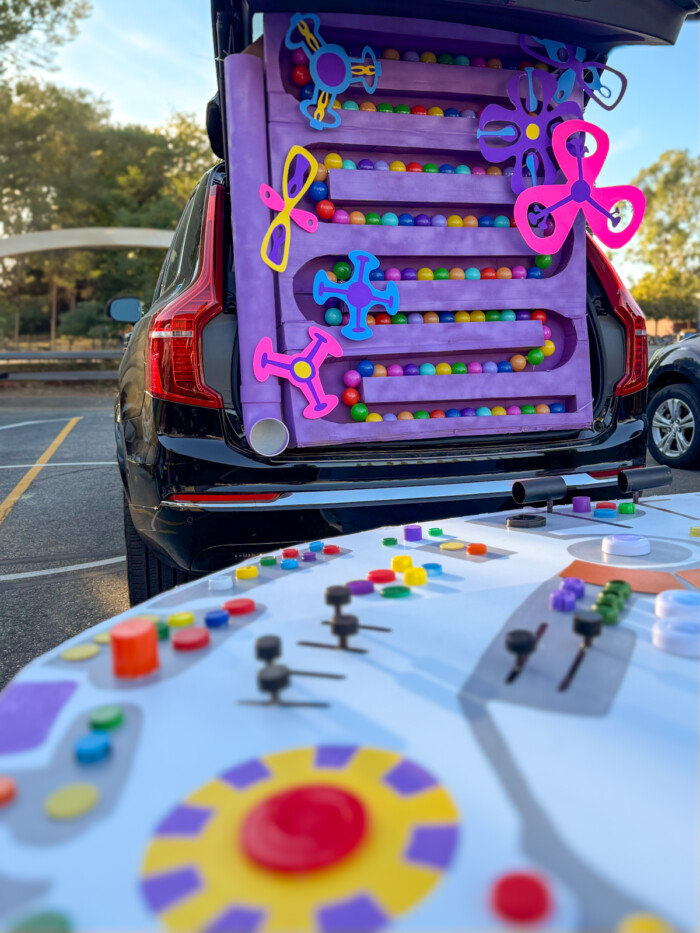
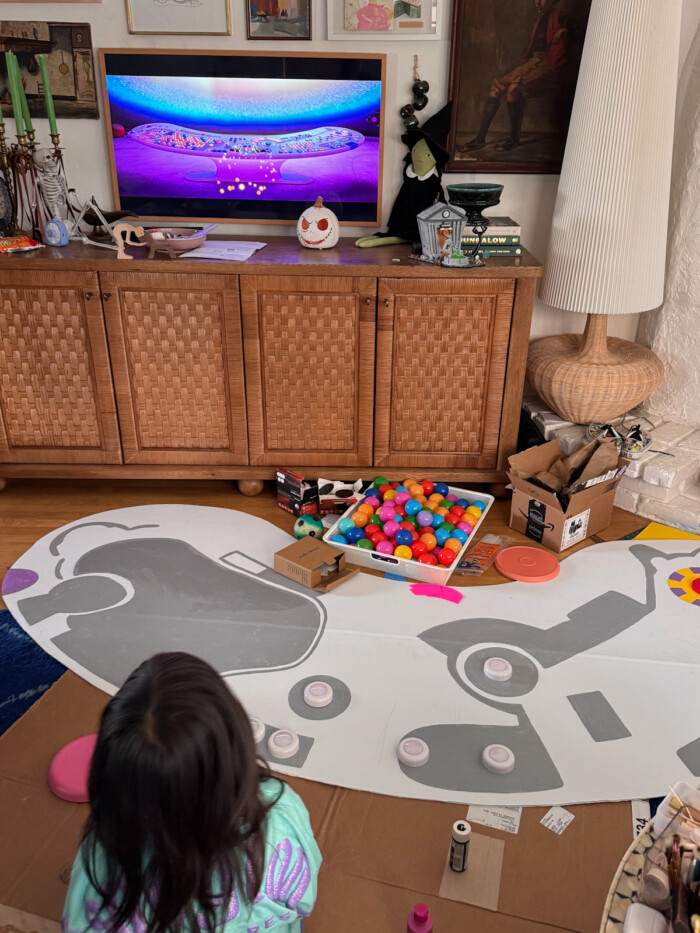
Creating a Life Size Inside Out Console
The star of Inside Out’s headquarters has to be the console and you can make your own for Trunk or Treat if you can just collect enough bottle caps! This also makes for a great interactive moment, where you can include light up puck lights that kids can actually press!
What You’ll Need:
- Large white corrugated plastic, cardboard or foam core. Size needed will depend on the space you have, mine was about 7 feet wide in the end. (Note: Make sure you can fit this into your car to transport it before deciding on your final size!)
- Lots of bottle caps in all sizes and colors (I did a post in my local buy nothing group and asked a local coffee shop to save me their caps. It worked out great!)
- Silver and black paint or permanent markers
- Cardboard Scraps
- Mini wooden dowels
- White battery puck lights (optional) and colorful tissue paper
- Pencil
- Craft or Utility Knife
- Hot Glue Gun
- Spray Paint (To paint some of your caps, if desired)
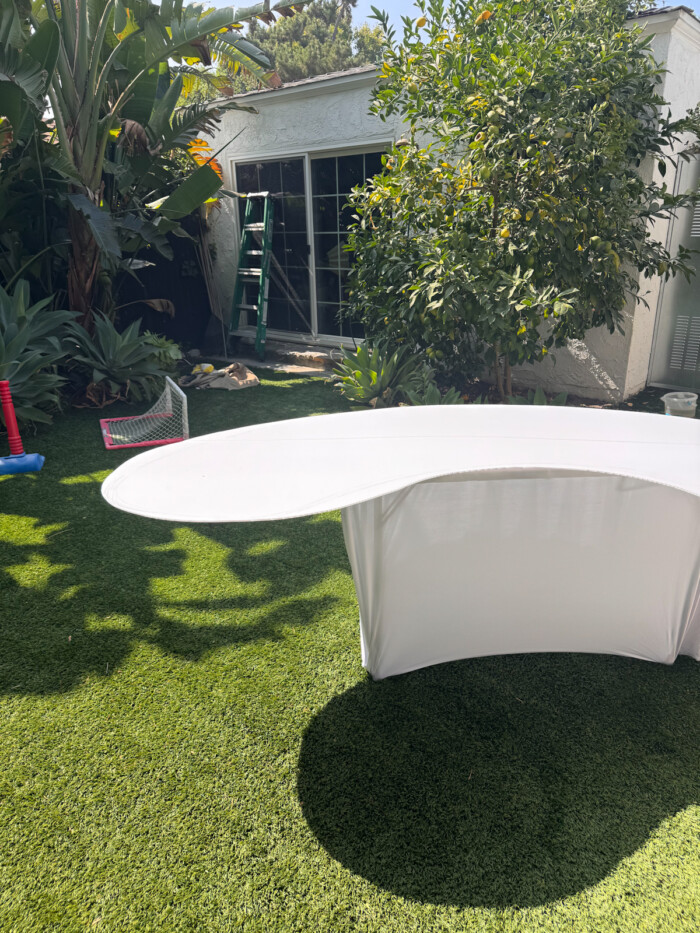
- Folding table (big enough to support your console but ideally narrow enough not to stick out on either side)
- White Spandex Table Cloth
- Velcro command strips, zip ties or tape (to secure your console to the table/tablecloth)
Step-by-Step Tutorial
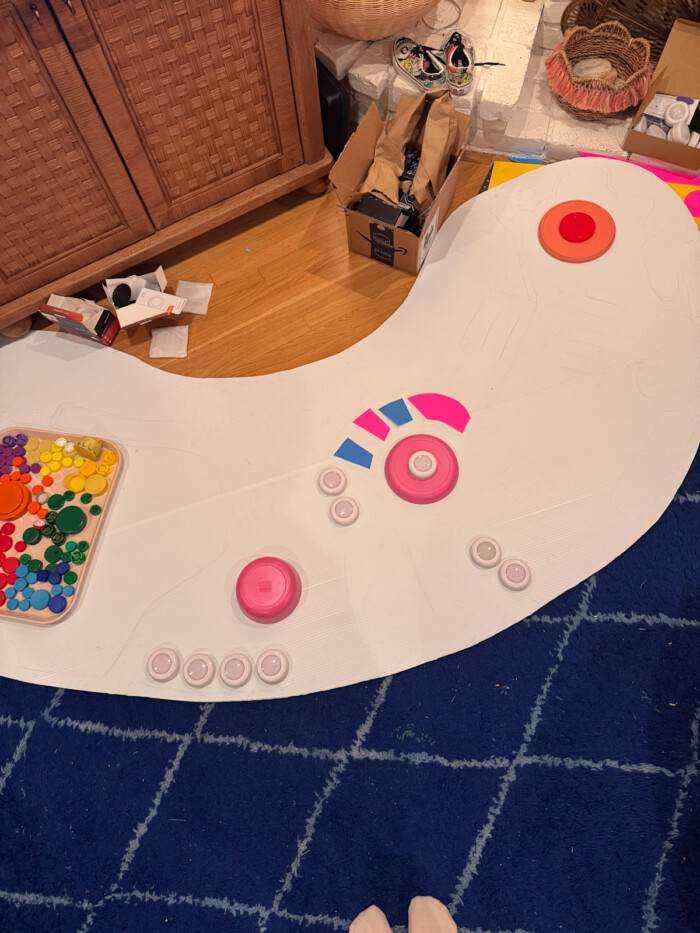
- Cut out a large “kidney” shape as shown to create the console.
- Sketch out where you want your buttons and silver “sections” to be based on the original Console. (I based mine off of the Inside Out 2 console, but you can base yours off of either!)
- Paint or color in any areas you want to be silver. This creates a “spot” for some of the buttons to live, just like on the real console.
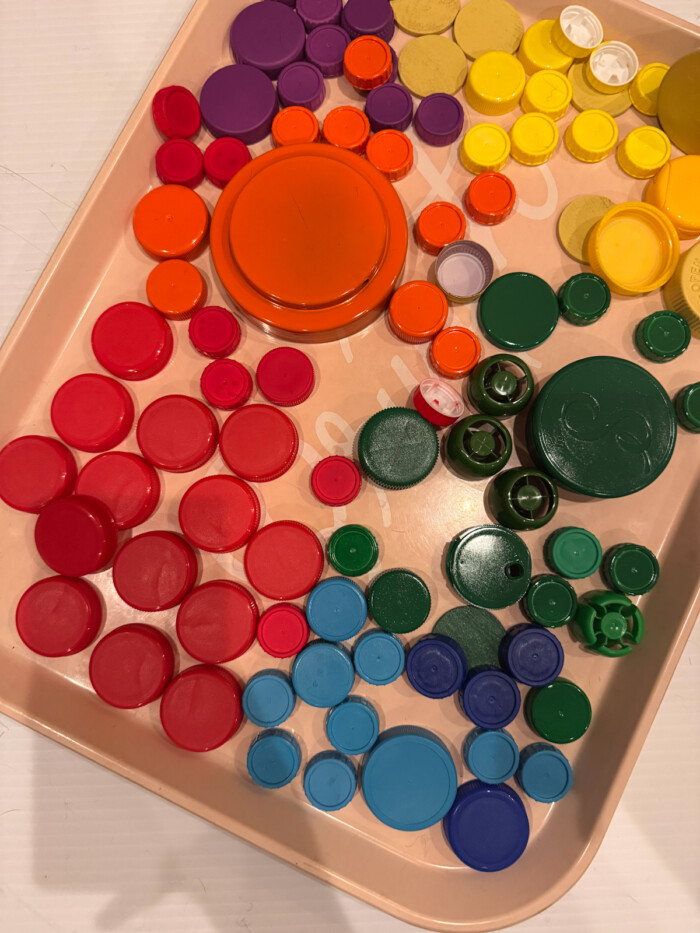
- Spray paint any caps, if desired. I had a variety of colors: black, white, red, yellow, green, orange, blue and purple. I also cut out a few cardboard pieces to create larger buttons and spray painted those. Get creative here and let the kids help!
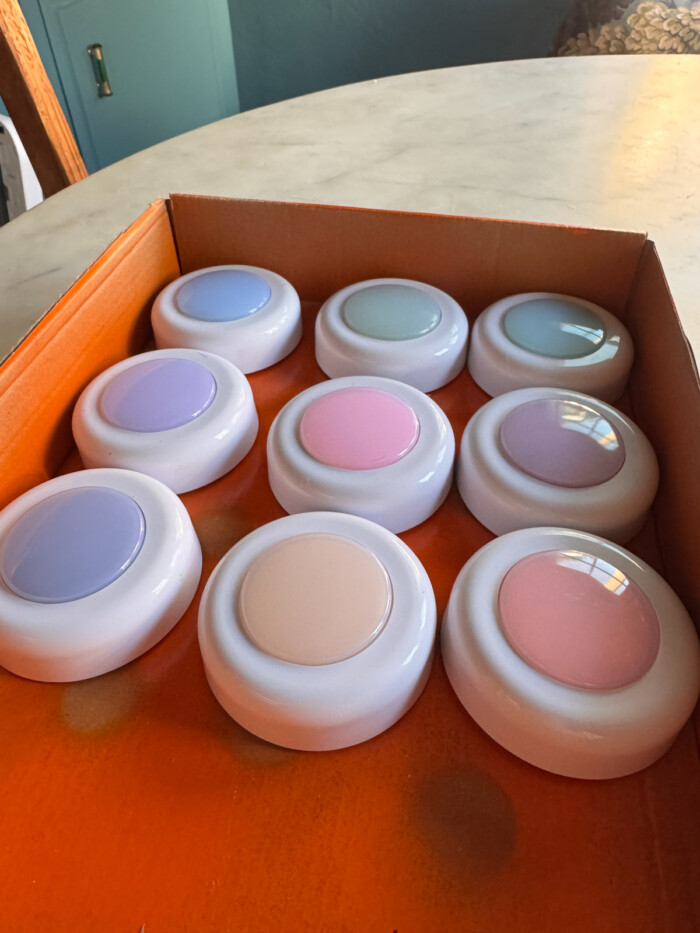
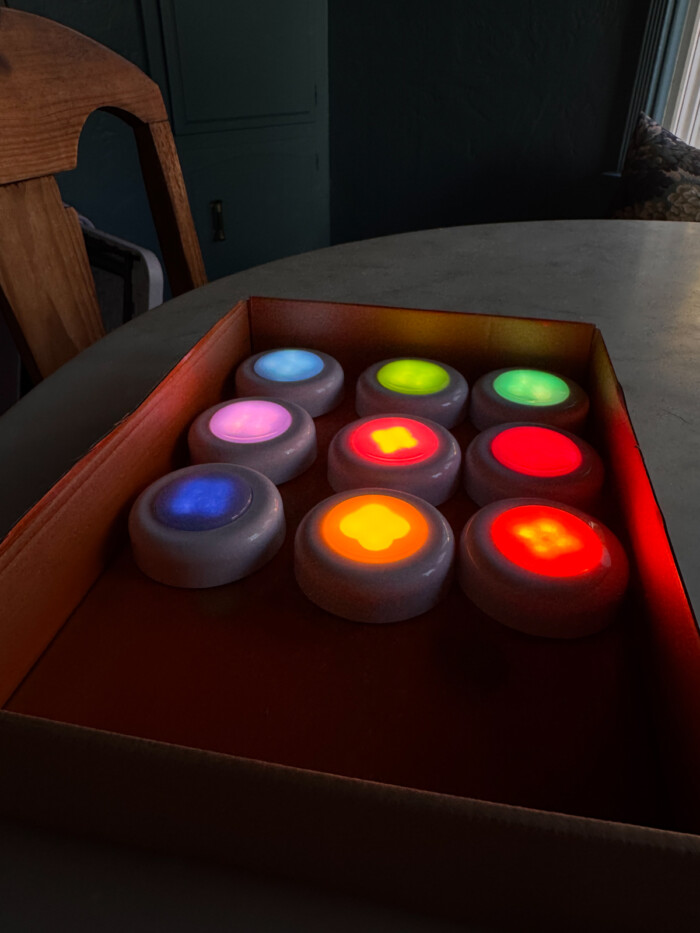
- IF you want to use puck lights, unscrew the light and place a different color tissue paper in each one just under the dome. Put them back together.
- I wanted a few buttons to look more like “levers” so I glued them to a mini dowel first.
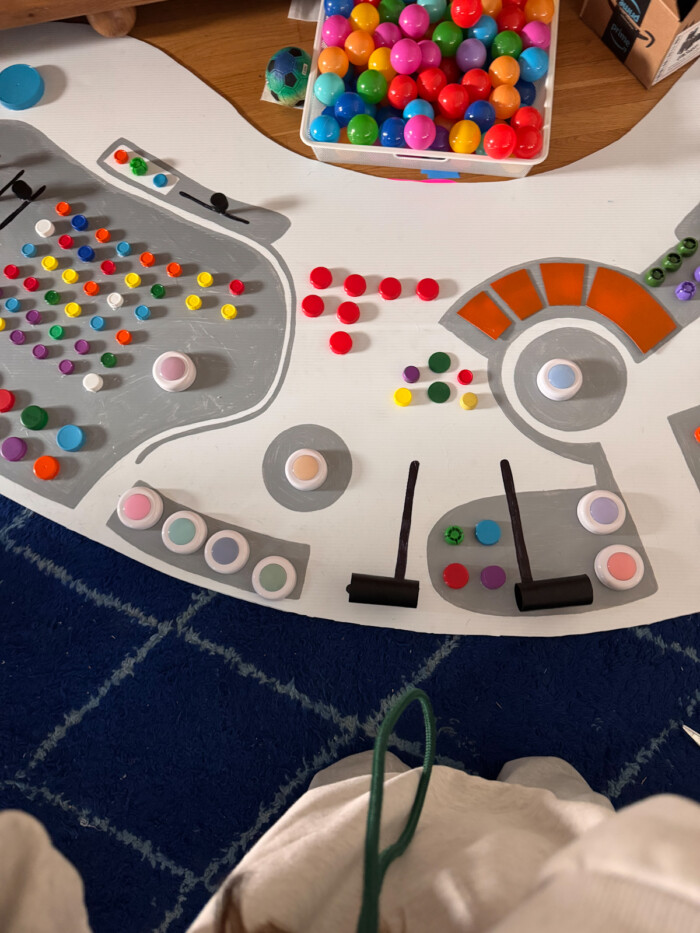
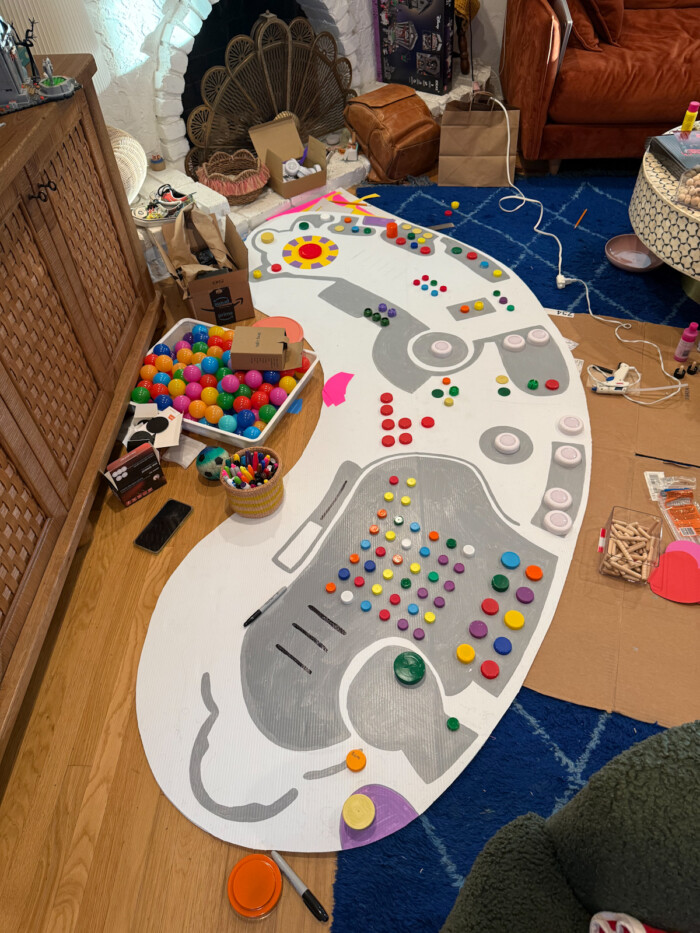
- Start laying out your buttons. I kept the puck light buttons that the kids would hit towards the center where the console would be more stable and placed the bottle caps all over. Once you’re happy with your design, hot glue in place. My puck lights came with adhesive on the back so I just used that for those!
- When the event time has arrived, set up your folding table. Cover it with the spandex table cloth. This makes it REALLY look like the real console!
- Set your console piece on top and use tape, command strips or zip ties to secure your console to the table.

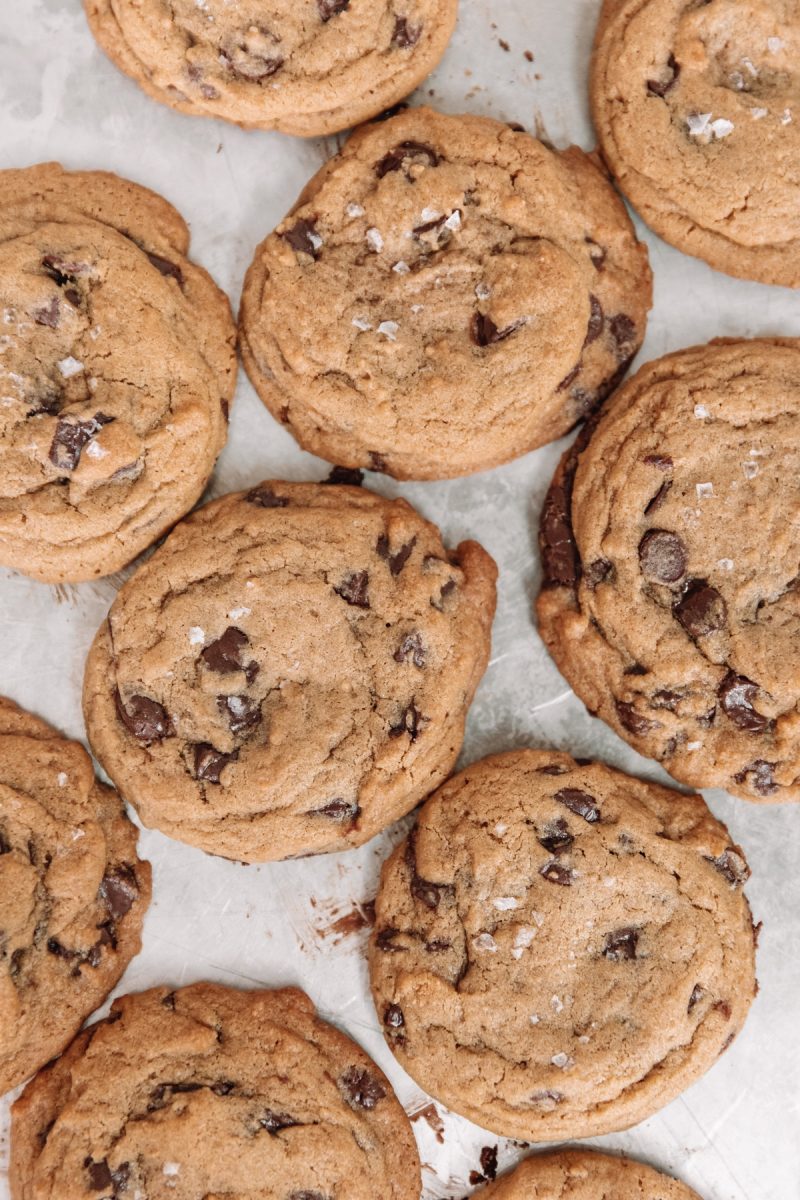
Candy and Prizes for an Inside Out Trunk or Treat
We love making our trunk or treat booths interactive! To do this for our Inside Out Trunk or Treat, we let each kid hit one of nine puck lights (one for each character in Inside Out 2) on the console and then they got to choose a color coordinated prize from a specific bucket.
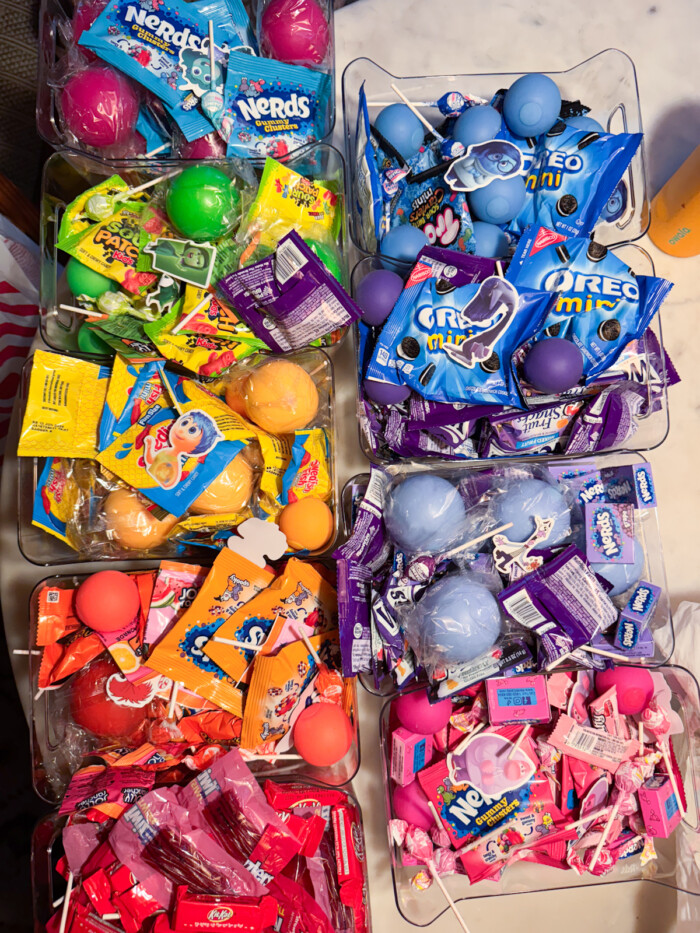
We hid our buckets behind the console but if you have more room, you could have them displayed next to your trunk!
Here are candy ideas for each character, based on the color of the packaging:
- Joy: Swedish Fish, Laffy Taffy
- Sadness: Mini Oreos, Sour Gummy Worms, Blue Airheads
- Anger: Kit Kats, Twizzlers, 100 Grand Bars, Skittles
- Fear: Nerds, Fruit Snacks,
- Disgust:Sour Patch Kids, Caramel Apple Lollipops
- Envy: Nerds Clusters, Tropical Skittles
- Embarrassment: Nerds, Nerds Clusters, Laffy Taffy
- Ennui: Mini Oreos, Fruit Snacks
- Anxiety: Jolly Rancher Lollipops, Nerd Clusters, Reeses
We also bought the following items that worked for multiple characters:
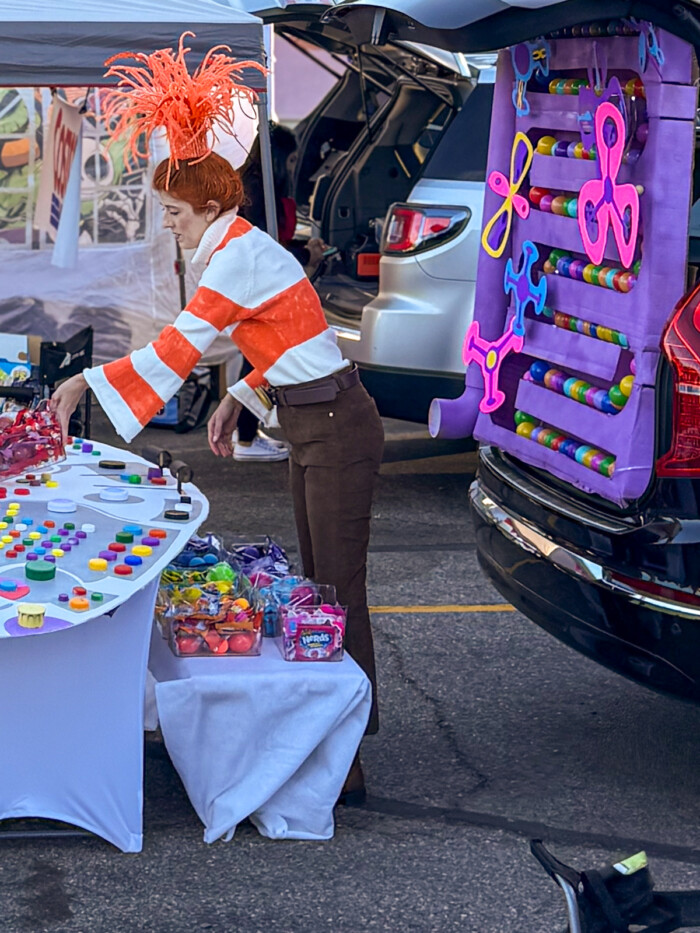
Setting Up Your Trunk or Treat Display
Place your memory orb display inside the back of your trunk. Turn on the battery powered lights.
Set up your folding table in front of your trunk and cover with the spandex table cloth.
Attach the console to the folding table.
Set up your treats off to the side or on a small table or bench behind the console.
Use your phone to play the Inside Out or Inside Out 2 soundtrack. You’re ready to go!
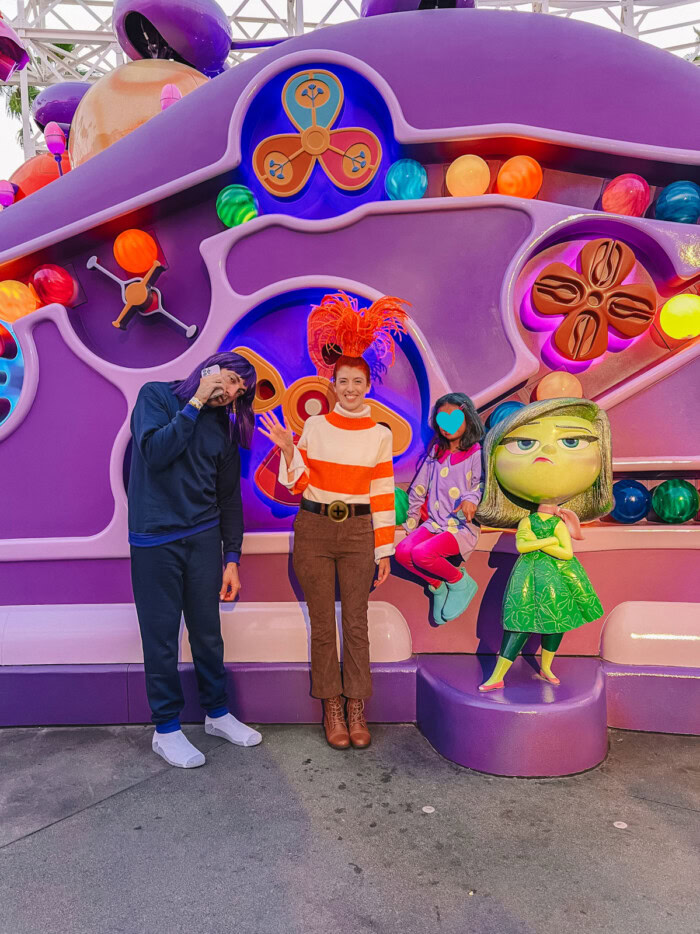
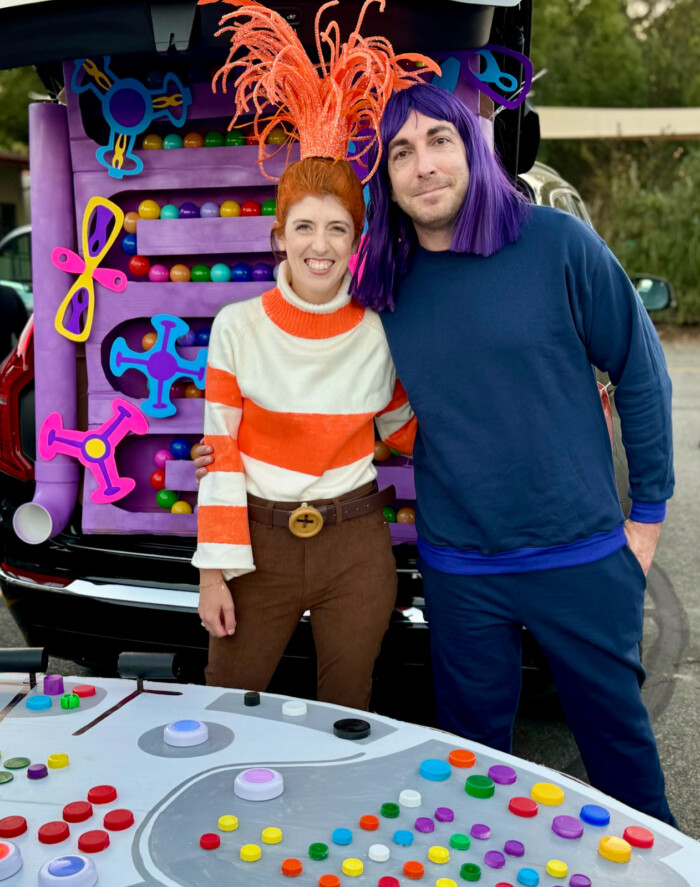
Inside Out 2 Costumes
Need something to wear to your Inside Out Trunk or Treat? Learn how to make these Inside Out 2 costumes for your whole family!
Dressing up as the characters REALLY gets kids excited, it looks just like HQ in Riley’s brain!
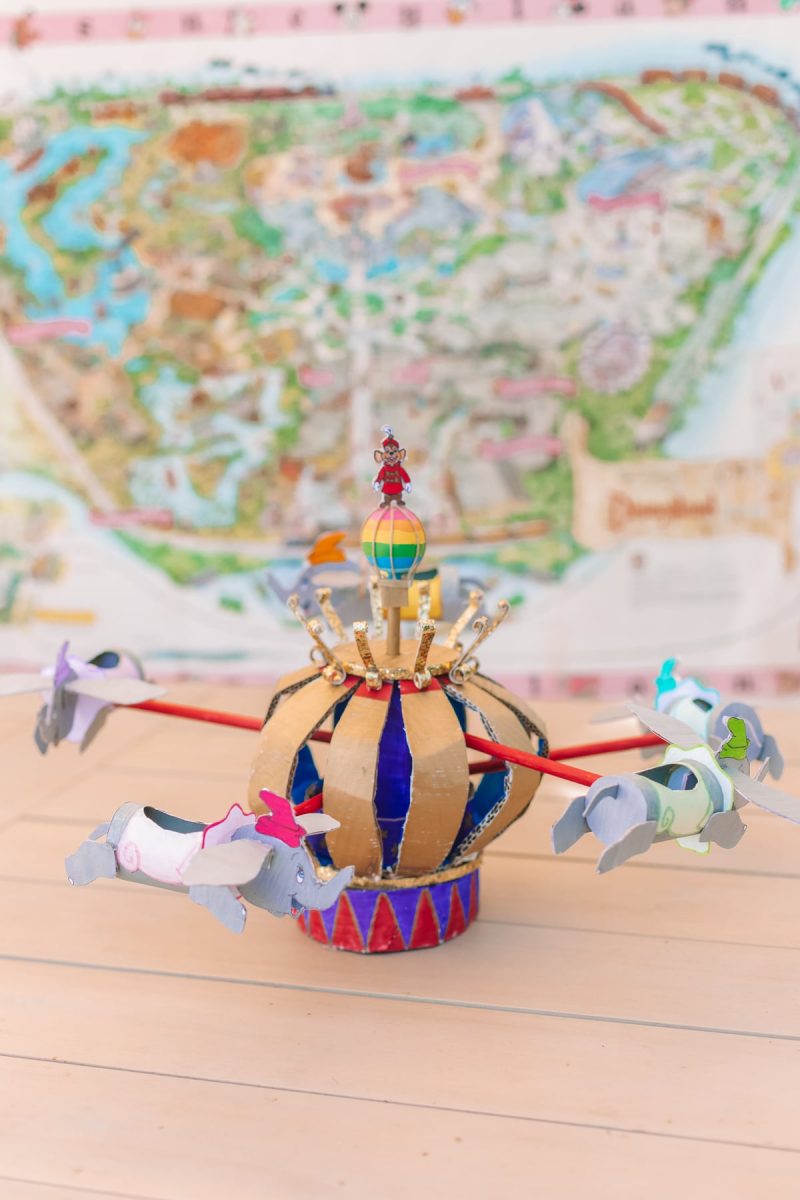
Inside Out Birthday Party Ideas
Want to be able to re-use your Inside Out projects again? Use them for a birthday party! Here’s a ton of ideas for throwing the coolest Inside Out birthday party ever!
I hope you have a blast at your Trunk or Treat with these ideas!


Leave a Reply