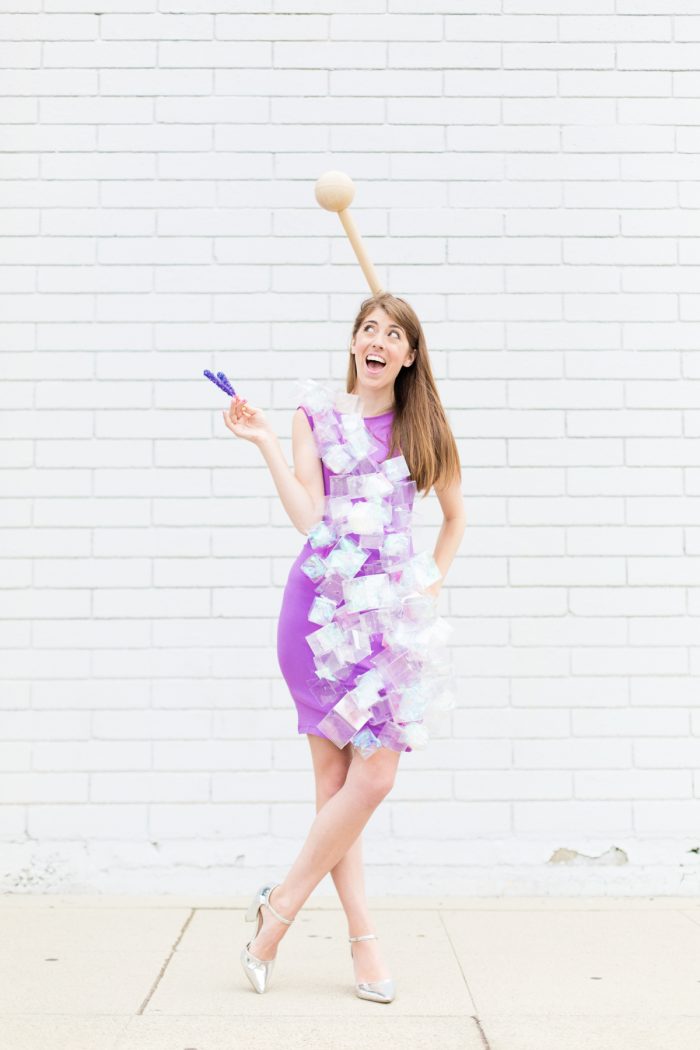
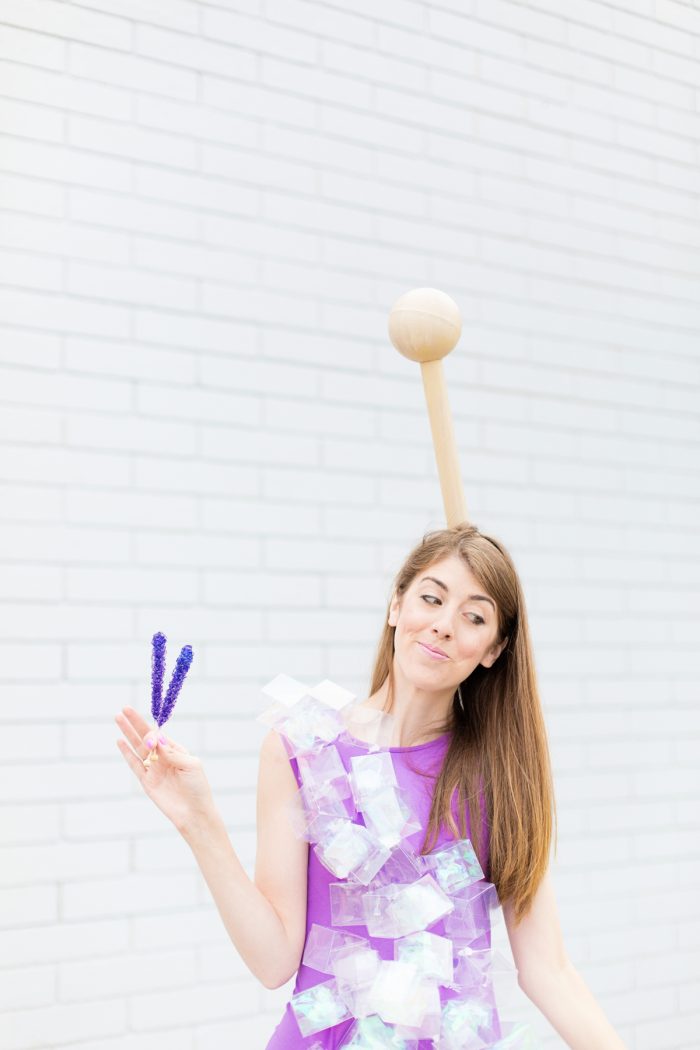
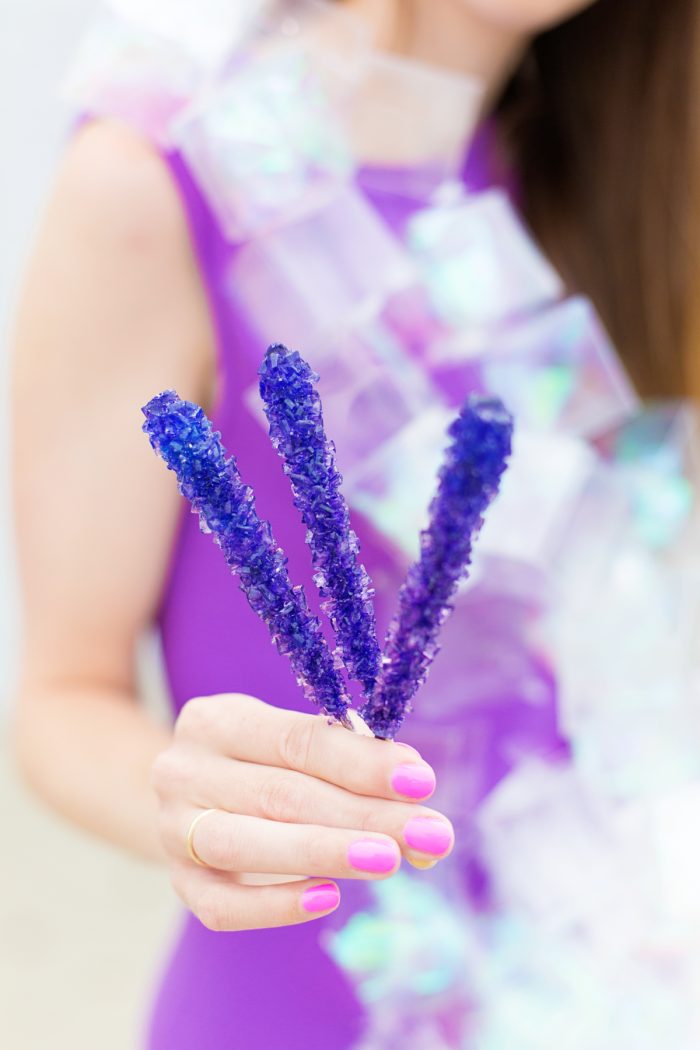
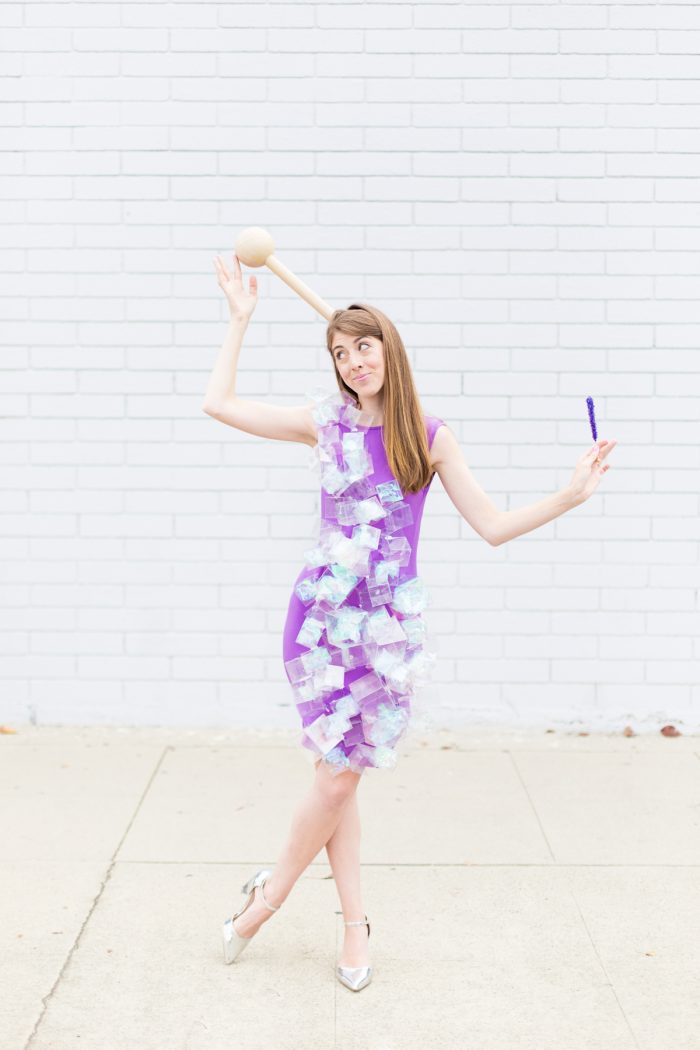
A food themed Halloween costume is always a hit. This DIY rock candy costume is no exception! Turn a dress our outfit into an exaggerated candy costume with a simple supply: clear plastic boxes!
Rock candy because it’s so iconic and recognizable, but the hat really seals the deal. Imagine if you walked around handing out rock candy in it!? You’d be making dreams come true!!!!
Supplies Needed
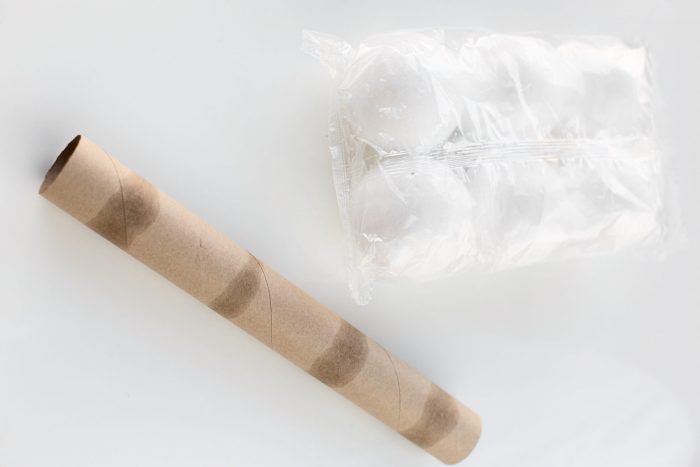
- Thick Cardboard Tube (Like a heavy wrapping paper roll or aluminum foil roll)
- Scrap Cardboard
- Smooth Foam Sphere
- Tan/Brown Craft Paint
- Paint Brush
- 20 – 2″ Clear Gift Boxes
- 40 – 3″ Clear Gift Boxes
- Iridescent Mylar
- Thick Plastic Headband
- Hot Glue Gun
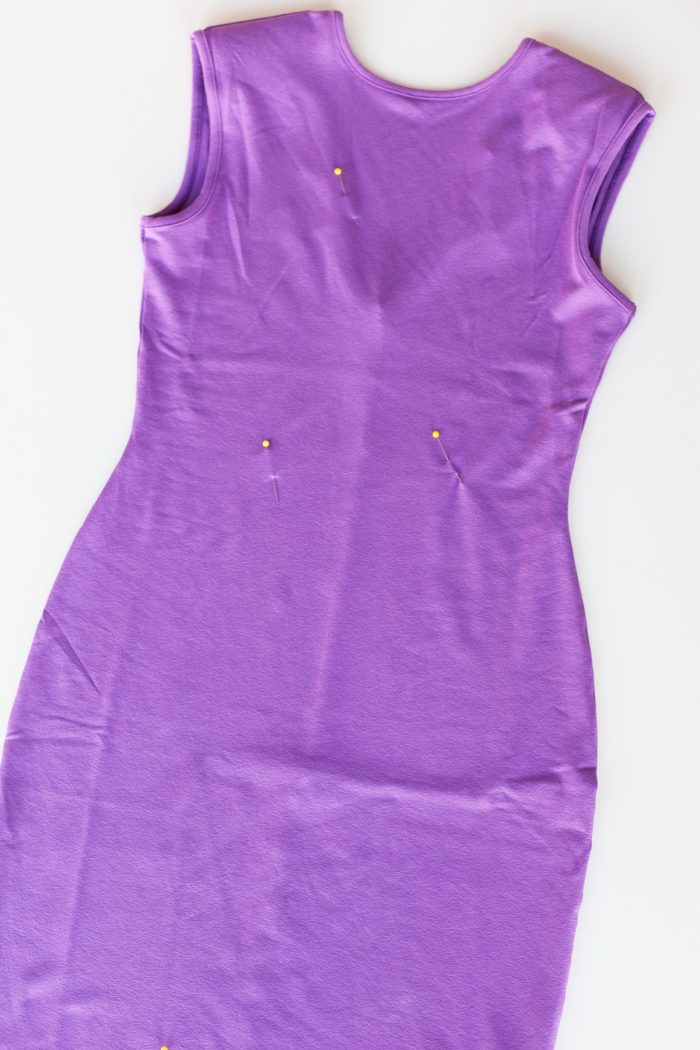
- Pins or Safety Pins (To help mark where you want your boxes to go on the dress)
- Purple Dress (or other color, for some reason everyone in our office thought purple for rock candy!)
- Silver Shoes
- Cardboard (or other scrap item to stuff your dress with so you don’t glue the front to the back!)
Step-by-Step Rock Candy Costume Tutorial
Here’s how to make these creative rock candy costume!
- Cut your cardboard tube to the desired size. Ours was about 8″.
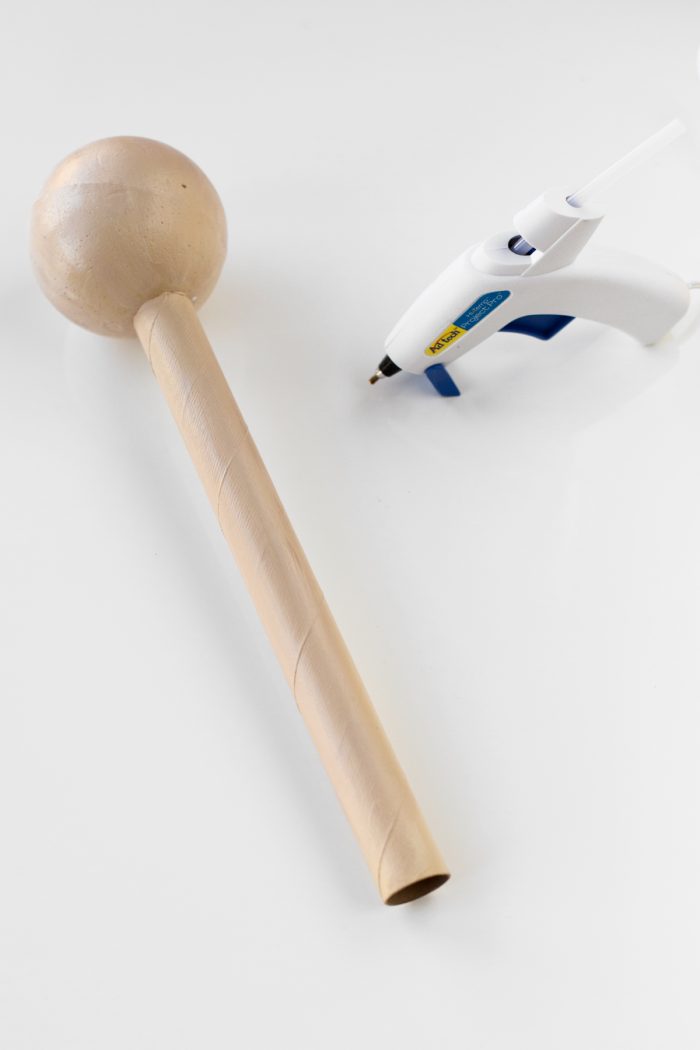
- Paint your cardboard tube and foam ball tan to look like wood. It’s ok to leave some “streaks” to give it a more realistic look! Let dry.
- While it’s drying, put together all your boxes. It’s super easy, just fold ’em up!
- Stuff about 10 small and 4 large boxes with a piece of iridescent mylar. This adds some dimension to the dress!
- Try your dress on and use safety pins to mark a general outline of where you want the boxes to fall. We narrowed ours around the shoulder and then made it wider to swing around my hip a bit at the bottom.
- Take the dress off and put something in the center of it (between the front and back) like scrap cardboard. Heat up your hot glue gun!
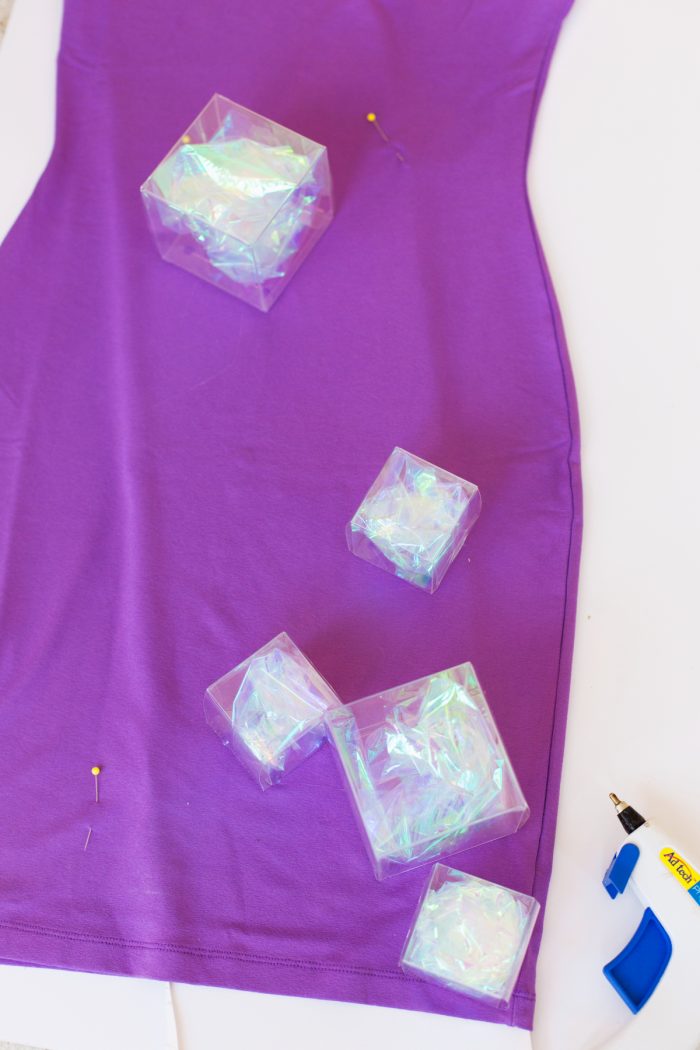
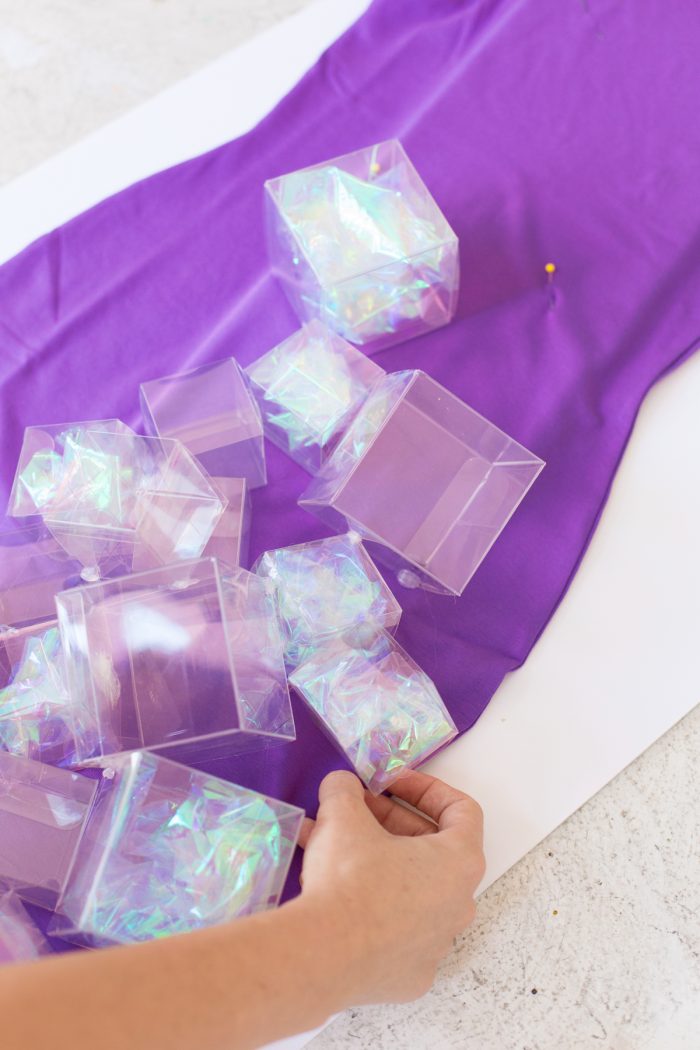
- Start gluing on your boxes. Anchor the dress with several of the large ones, placed sporadically across the dress. Then begin filling in with the smaller ones, using primarily ones that don’t have mylar inside but evenly distributing the mylar-filled ones in between.
- You can try the dress on a couple times as you go as it will look a little different on (if it’s a stretchy dress) then when it’s flat. Then continue building and layering the boxes until you have the look you want!
- To finish the hat, glue the painted sphere to the top of the cardboard tube.
- Glue the bottom of the cardboard tube to the headband. You may need to bobby pin or clip the headband to your head to keep it in place while wearing!

Photos by Jeff Mindell
Wouldn’t it be cute to do all different colors of this and go as a group!? Yes. It would. 😉
p.s. IF you make a Studio DIY costume, please share with #studiodiyincostume on Instagram! Every year I do a HUGE roundup of all your versions of our costumes that I find there and I’d love to include yours!!
")
")


Michelle says
The idea with the boxes is brilliant! I love how it turned out!
https://www.makeandmess.com/
brittni says
So clever Kel. I love it.
Cat says
The mylar inside the boxes is brilliant! This DIY makes me smile so much 🙂
Kristina B says
This is HILARIOUS!!!!! I am in love with the stick hat for reals.
Bethanie Connelly says
Wow, such an axing and cute costume it is. I am a big fan of this blog for sharing these amazing clothes ideas with us. So try to follow and visit this edubirdie and get yourself updated with the funky content to read and watch amazingly.
Valeria says
You have some amazing diy crafts. I absolutely love the necklace. I want to try this🥰
Jessica Shipley says
I love your costume ideas soo much! You’re so inspiring and have such fabulous ideas. I made the pool noodle candy necklaces last year and everyone loved them. This year I think I’m gonna do your rock candy idea. It’s so brilliant! Thank you for the ideas.