DIY friendship bracelets are a classic summer activity! They are easy to make and fun to trade (especially if you’re headed to the Taylor Swift concert!
I used to spend HOURS making friendship bracelets. I’d go to the craft store and buy oodles of thread and just go to town making bracelets for everyone. Today, I’ve got three different designs to share with you, using some tried and true techniques… and some new ones too! All in the brightest colors of course, with some fun embellishments too. Let’s get started!
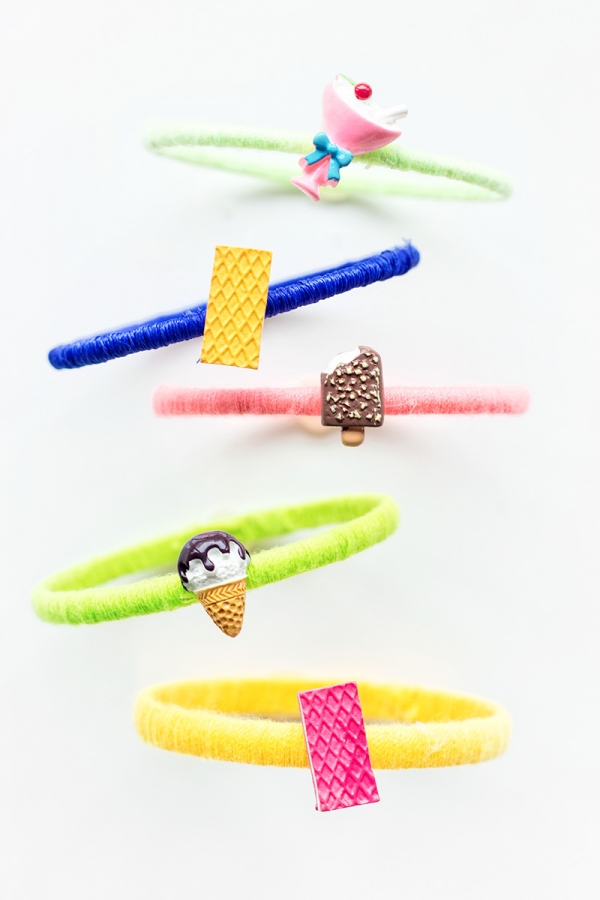
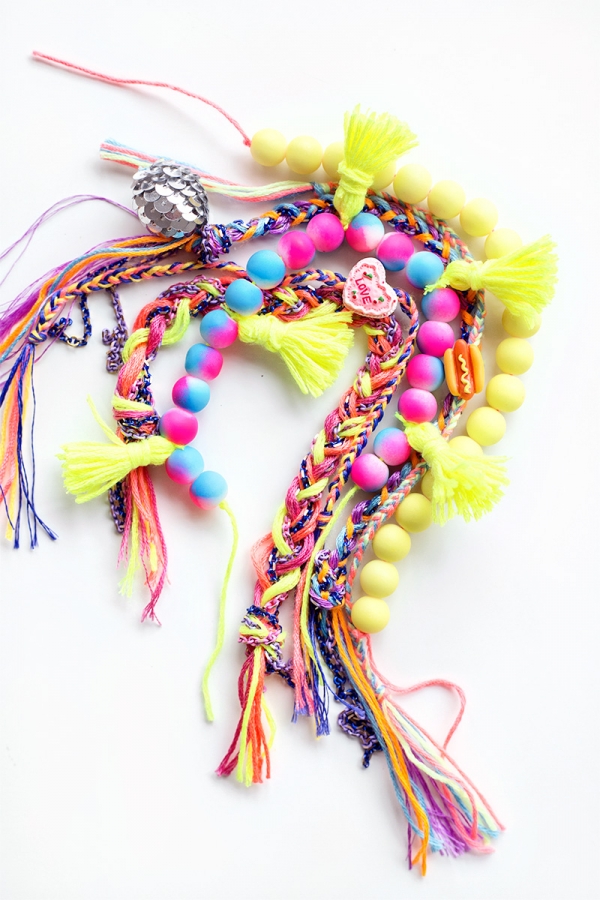
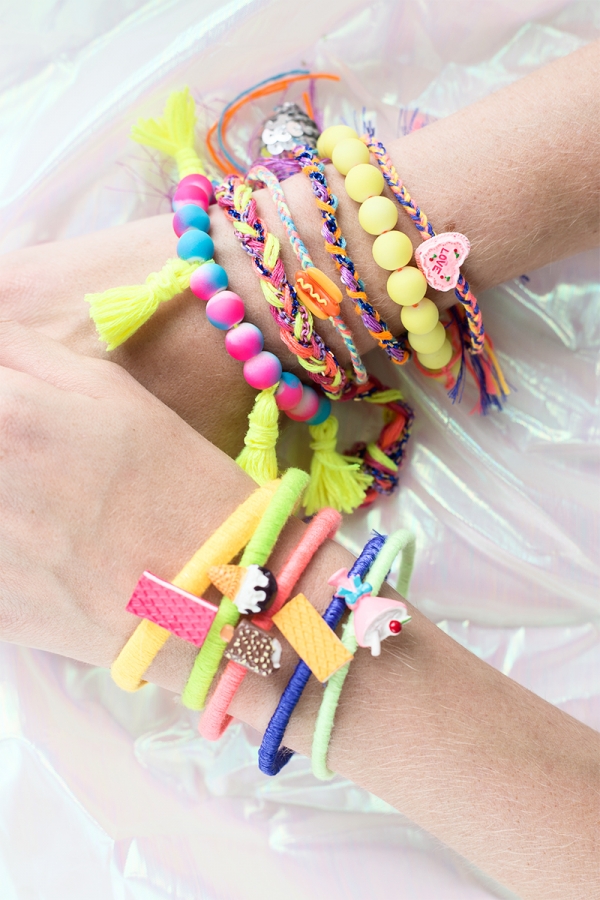
We’ll teach you how to make the most well-known style of DIY friendship bracelets, a braided one! Plus, a beaded version that you can jazz up with some easy-to-make tassels and even a bangle variety for a more unique option!

Supplies Needed
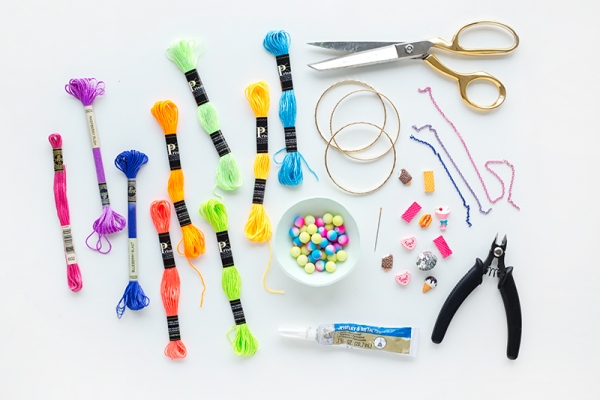
Here’s what you’ll need for each style of DIY friendship bracelet.
For the beaded tassel bracelet:
Matte Beads or Neon Beads
Craft Thread (We love this neon collection!)
Needle
Scissors
Scrap of Cardboard
For the braided bracelet:
DMC Embroidery Thread
Colorful Chain
Scissors
Charms or Cabochons for Embellishment (We used cute food ones, similar to these, plus some mini disco-like beads!)
Jewelry Glue
For the bangles:
Plain Bangle Bracelets
DMC Embroidery Thread
Scissors
Cabochons (We used cute food ones, similar to these!)
Jewelry Glue
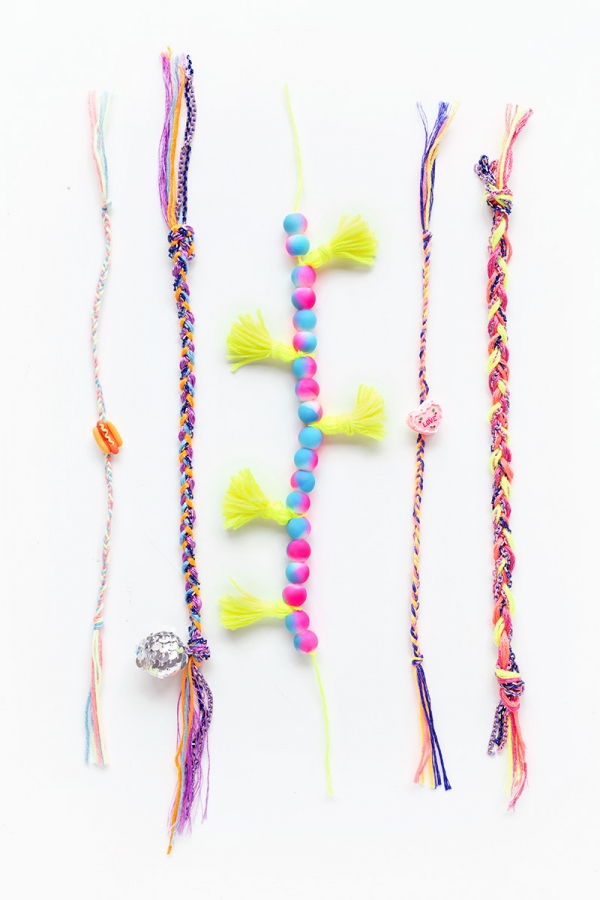
Beaded Friendship Bracelet Tutorial
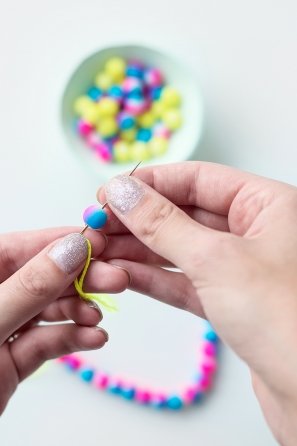
- Cut a piece of thread the length of your wrist plus four to five inches (for tying).
- Tie a knot about two inches into the thread and string on as many beads as fit around your wrist. Tie a knot in the other end.
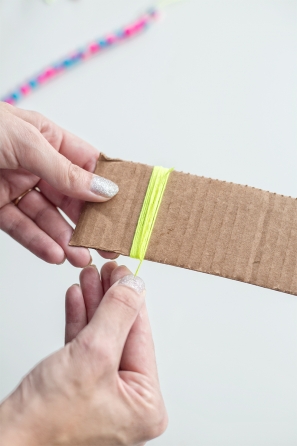
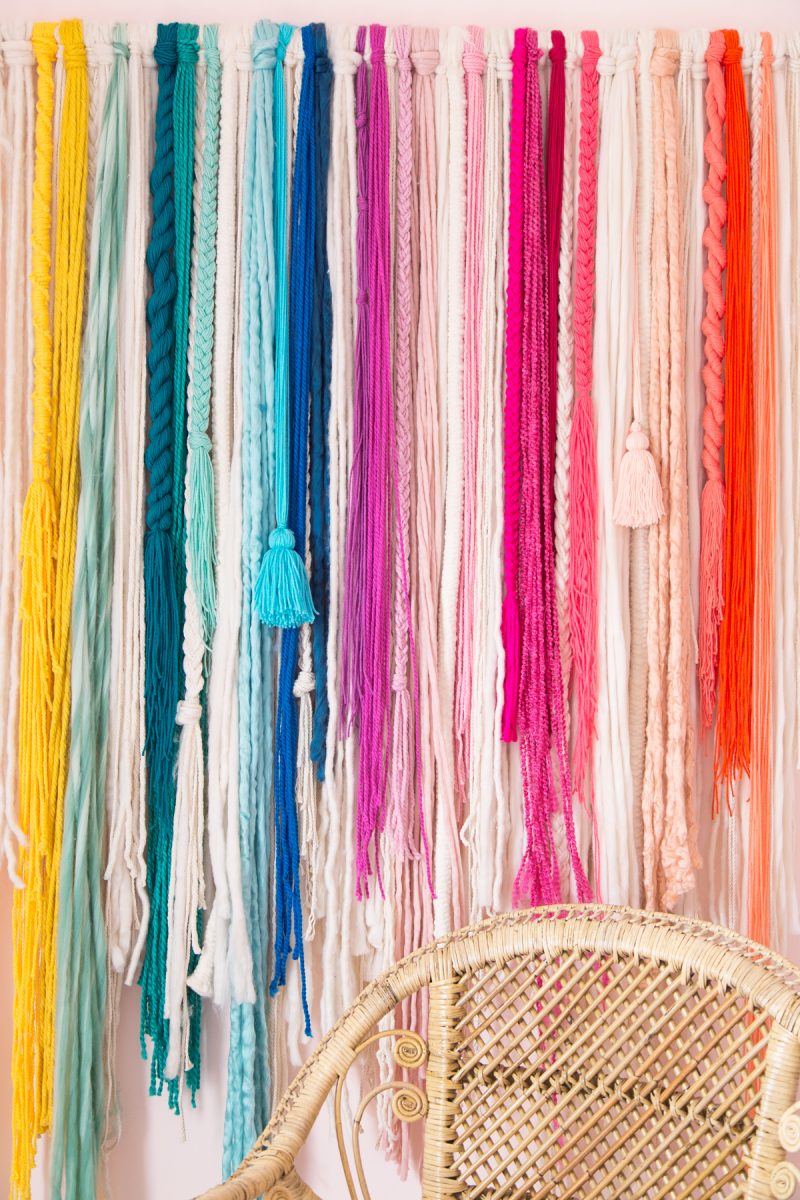
- To make the tassels, cut a piece of scrap cardboard into a two inch wide rectangle. Wrap thread around and around the cardboard, about 15-20 times.
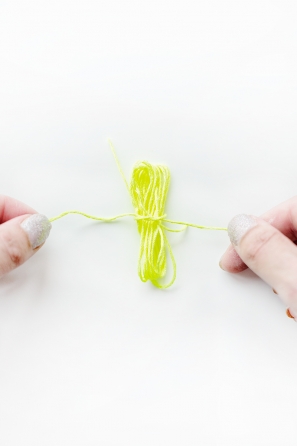
- Slip the looped thread off of the cardboard and tie a knot in the center with a separate piece of thread. Fold the tassel in half now, so that all the looped edges are facing towards the bottom.
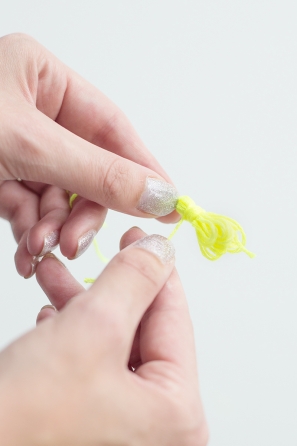
- Take a third piece of thread and wrap it around and around all the threads, about six times.
- Use a tiny bit of glue to glue to secure the final end in place. Lastly, cut all the loops so your tassel is fringed, and trim any strings that look longer than the rest. Tie the tassels in between the beads where desired.
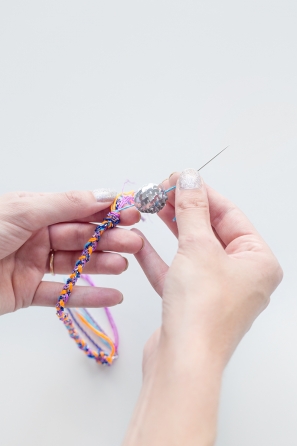
Braided Friendship Bracelet Tutorial
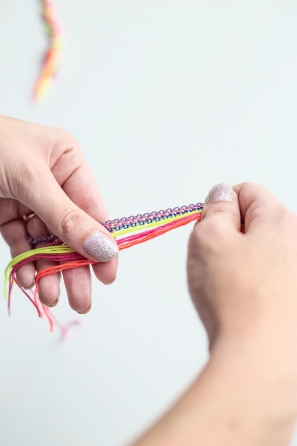

- You will need nine pieces, each cut to double the length of your wrist: two pieces of each of three embroidery colors and three pieces of chain.
- Tie all nine pieces together in a knot.
- Braid the pieces together, treating each color + one strand of chain as a section. Once you have a braid as long as needed to wrap around your wrist, tie another knot and trim the excess, leaving about two inches for tying.
- If you’d like, tie a bead onto the ends or glue a cabachon on top of the braid.
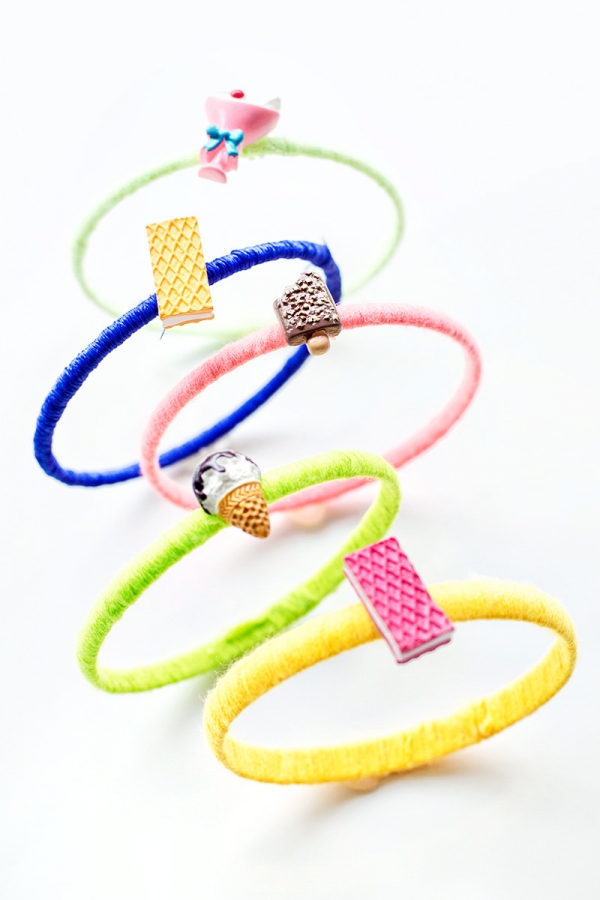
DIY Bangle Bracelet
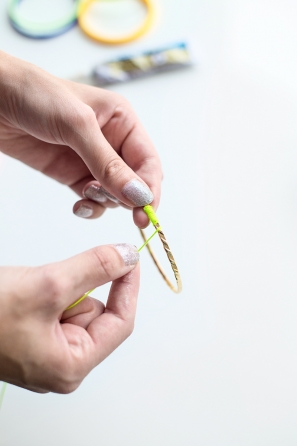
- Tightly wrap embroidery thread around and around the bangle until the bangle is completely covered.
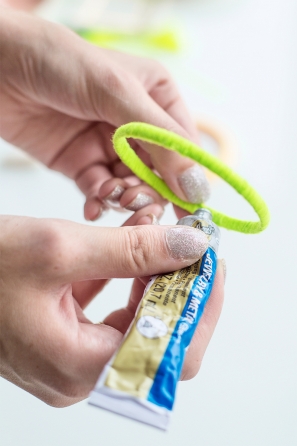
- Use a small bead of jewelry glue to secure the final end in place and trim the excess.
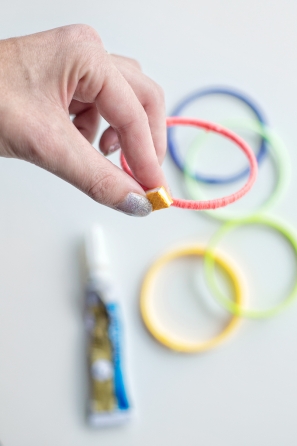
- Use another bead of glue to glue any cabachons or other charms to each bangle. Let set completely before wearing.
Photos by Jeff Mindell
This would be such a fun gift to give to those besties who’ve been around since childhood. And then you can wear them while watching Now & Then and playing Dream Phone and MAN who needs to be an adult!? Have FUN!
This post was created in partnership with Commonthread by DMC, All content and opinions are that of my own! Thank you for supporting the sponsors that keep the Studio DIY party going! Read more about my editorial policies here.
")

")


Monique | WritingMonique says
Oh gosh! These are absolutely incredible, so colourful!
Stephanie R says
These are really gorgeous. Im going to have to make some of these for my tweet daughter because she’s all about bracelets right now.
bailey says
Where did you get the bangles from?