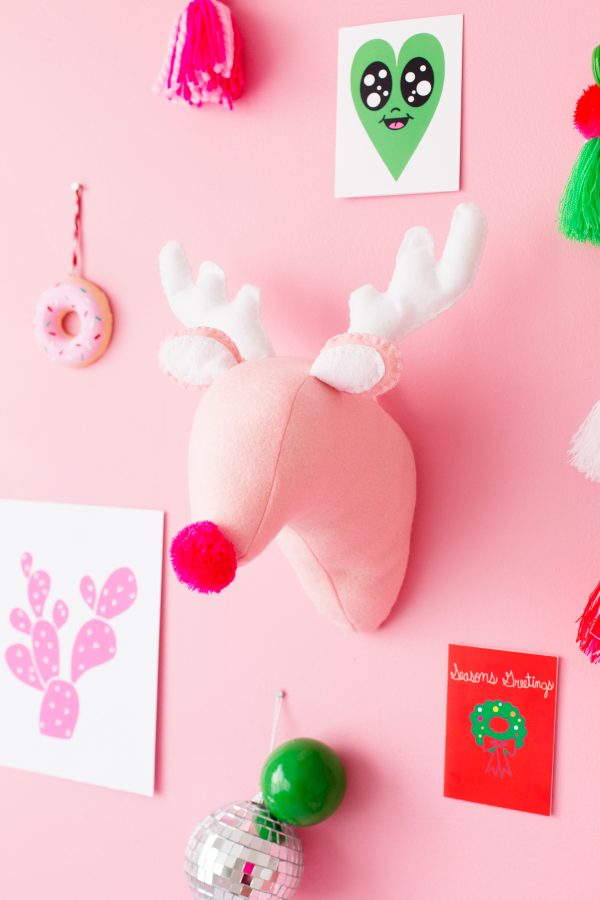
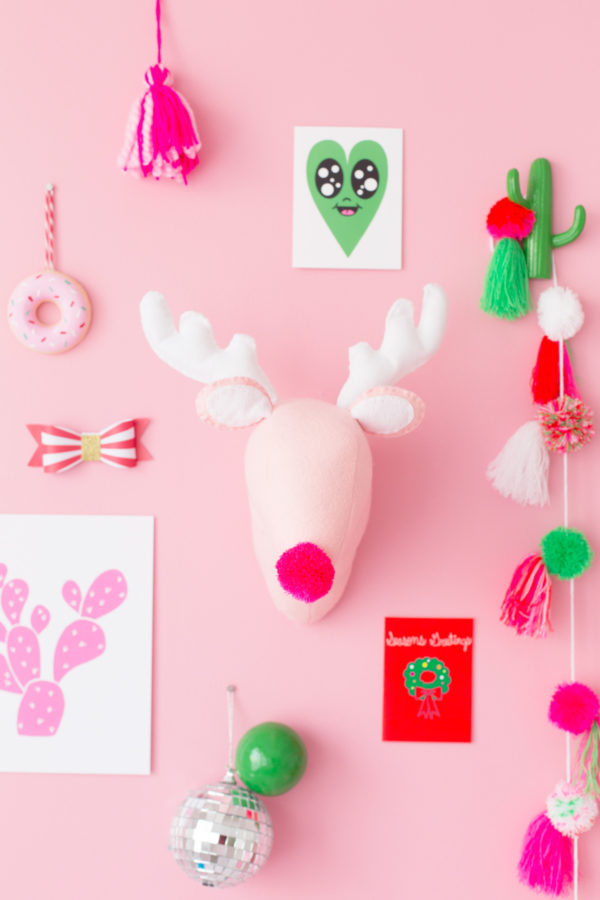
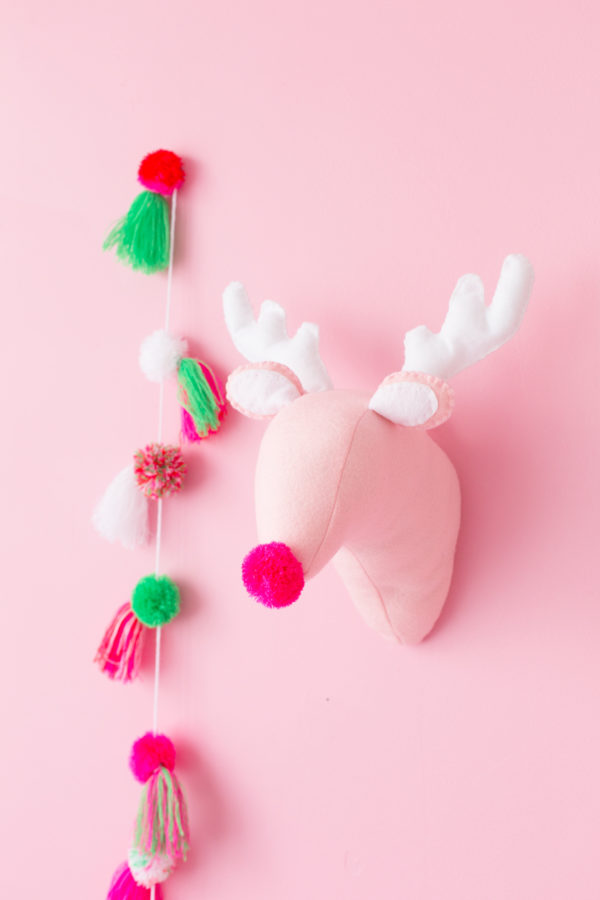
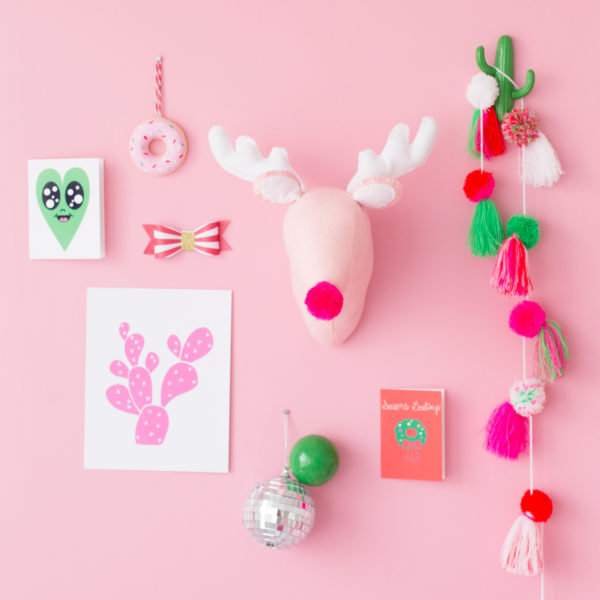
I like to make Christmas decorations for our home that we can re-use year after year. We have the Christmas village and now we have a plush reindeer head!
If you’re the sewing type, I’ve got the whole pattern and tutorial here for you today to make a plush reindeer head too! It actually comes together pretty easily and you could probably hand-sew the whole thing if you wanted.
I’m so happy with how it turned out.
Step-by-Step Tutorial

How To Make A Plush Reindeer Head
Make this fun plush reindeer head for your kids room at Christmas!
Yield: 0
Equipment
- Sewing Machine
- Scissors
- Needle & Thread
Materials
- Reindeer pattern
- 4 sheets pink felt
- 2 sheets white felt
- Pink and white embroidery floss
- Stuffing
- Pom Pom for nose
Instructions
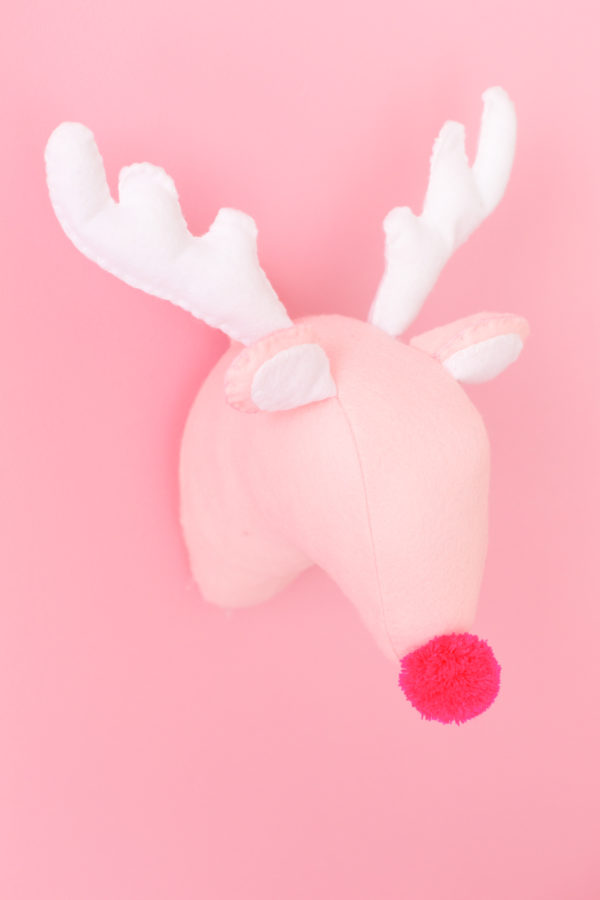
- Cut out the reindeer pieces from your desired felt colors. I used light pink for all the head pieces and the large ear shape, and white for the inner ear and antlers.
- Start with the ears. Use embroidery thread and a blanket stitch to stitch the inner ears to the outer ear shapes.
- Then, with good sides facing OUT, blanket stitch the front and back pieces of each ear together, leaving the bottom open for stuffing. Stuff each ear with just a little bit of stuffing.
- Blanket stitch together each the front and back of each antler, leaving the bottom open for stuffing. Stuff each antler with a little stuffing.
- Stitch the "neck" of the two main head pieces together, as shown. Use a 1/2" seam.
- Now you'll need to stitch the center head piece to the piece you just sewed. This is also where you'll stitch in the ears and antlers. Pin an ear and antler to each side of the head, making sure they are lined up with each other.
- Then, with good sides together, pin the center head piece all along the head and sew through all layers.
- Fold the small rectangle you cut out in half, lengthwise, and stitch with a 1/4" seam. You don't need to turn this piece right sides out, but you can if you want! This will be your hook for hanging.
- Pin both ends of the hook you just made to the top-back of the reindeer head. Then pin and sew on the back, leaving a few inches open for turning and stuffing.
- Turn the head so it is right side out and stuff it.
- Hand stitch together the opening you left. Tack the ears and/or antlers up if they are not sitting where desired. (Depending on how stuffed they are, they may "fall" a little, so you can just take them so they are more upright!)
- Hand stitch the pom pom on the front of the nose!
Where To Hang a Plush Reindeer Head
I like to swap out regular art for Christmas themed art. Add this reindeer head into a gallery wall in your home somewhere!
These reindeer busts would also look adorable in a kids room or playroom.
Photos by Jeff Mindell
Imagine making eight of them to make an entire Santa’s crew worth of reindeer?
p.s. DIY Rudolph Ornaments!


Michelle says
How absolutely adorable, I love the fluffy pink nose!
https://www.makeandmess.com/
Kelly says
Thank you, Michelle!! The nose is my favorite part too! =)
Nichelle says
I love the pom-pom nose! This is probably my favorite DIY Christmas decoration I’ve seen so far this year; it is so cute!
Kelly says
Aw, thank you Nichelle!! I’m so so glad you love it!!
Jen Koehl says
Actually screamed when I saw our cards in this post. This is the cutest. We love you guys and all the magic you make for the world. xoxo
Mia says
This is incredible!!!
Indya | TheSmallAdventurer says
Yet another Christmas post of yours that has absolutely blown me away!!! Seeing all the things you create makes me even more motivated to work hard and create more things myself. I hope you know how inspiring you and your mind are!
Indya || The Small Adventurer
Deborah says
Love it! How did you attach it to the wall?
Amanda says
The pattern has a loop that you sew on.
Deborah says
Thank you. Sorry, I clearly didn’t read all the instructions in order. Whoops!
Ci-san says
So pink and so cute!
Taryn B says
It’s so great! Do you use wool felt or polyester?
Amanda says
Okay…I made this tonight but with a red sparkly pom pom. It is DARLING. Thank you for the pattern. Its flipping cute. I’ve made your ornament pillows and your magic mold food ornaments and the animal cookie pillows. Keep em coming because you are my spirit animal.
mother’s day gifts says
What a cute top! I love the idea and I will do it for my son ^^
takashi says
Love it!
Pooja jain says
Its very nice information for me……………thank you for shating
picknpac in says
this information is very good simple good use for