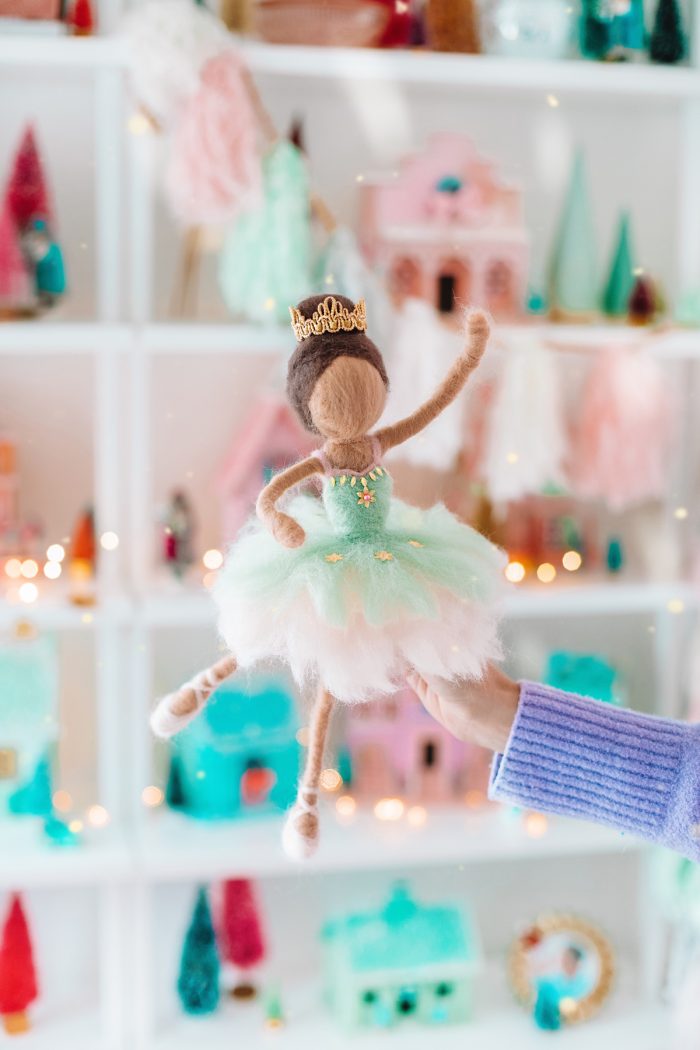
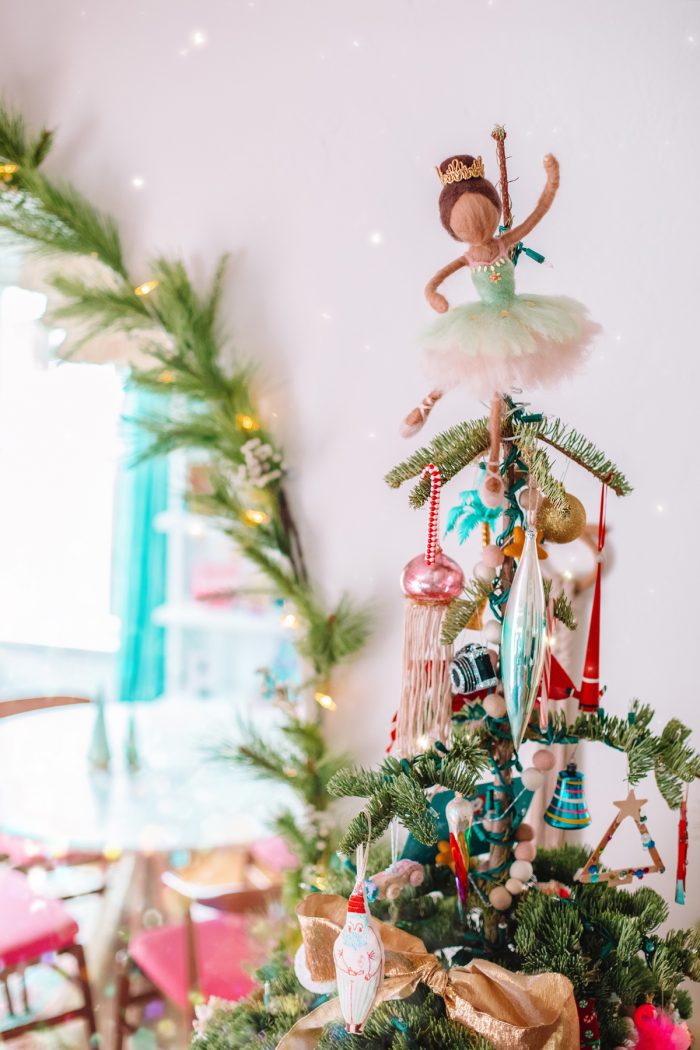
I have a running list of heirloom holiday crafts I’d like to make over the years. I started with my felted stockings and our DIY advent calendar, but I’ve been stumped for years on what to make for a tree topper. This year I finally came up with the solution: a sugar plum fairy! Today I’m sharing how I made these needle felted doll and turned it into a tree topper I hope we have forever!
We have a tradition of watching The Nutcracker every year while we decorate our tree, so adding a bit of Nutcracker magic to the top of our tree made perfect sense, and I’m so thrilled with how she turned out! However, this tutorial will teach you how to make the needle felted doll which could be turned into a heirloom doll to display in your favorite ballerina’s room, too!
They are quite delicate but so beautiful and if there’s one thing I learned about needle felting, it’s that it is rather forgiving. I’m no expert, but I found it was quite easy to pivot if something didn’t look right or if I needed to make a change, so I hope that gives you confidence to give this project a try! You can view the full video tutorial below.
Supplies You’ll Need for Your Needle Felted Doll
Here are the supplies you’ll need to make one needle felted Sugar Plum Fairy doll:
- Felting needle
- Foam (Note: In the video I use styrofoam which is NOT recommend, but was all I had at the time of filming. I recommend using a foam block or piece of soft foam instead.)
- Sculpting wire (This wire is quite thick, so if you can only find a slightly thinner wire, that will absolutely work too!)
- Yarn (This won’t be seen, but using a color similar to the skin tone you’re using makes things easier in case any happens to “peek” out.)
- Wool roving
- Skin Tone – 2-3 oz Roving (I used the color ‘Cookie’)
- Hair Color – 1/8 oz Roving (I used the color ‘Brown Bear’)
- Primary Costume Color – 1 oz Roving (I used the color ‘Mint’)
- Accent Tutu & Ballet Slipper Color – 1 oz Roving (I used the color ‘Cherub’)
- Costume Trim/Strap Color – 1/8 oz Roving (I used the color ‘Cherry Blossom’)
- Sequins and/or Pearls for embellishments (I used gold flower sequins from my son’s giant sequin jar and pearls I popped off of sewing pins!)
- Glitter (Gold or iridescent) and Mod Podge for embellishment
- Gold trim for the crown (This is similar to what I used!)
- Glue
- Scissors
Tips Before You Start
Below you’ll find both a video tutorial and a photo tutorial. Please note: The two are the same, except for the head which I did in two different ways.
In the photos, I made a felt ball to use as the head. This looks best, in my opinion, but is a bit trickier to accomplish. I will explain the basics in the written tutorial below.
In the video, I made the head by wrapping the felt around the wire which was much more straight forward, but the head wasn’t quite as perfectly round. I wanted to share both options so you could choose what you liked best!
Additionally, beware that the needles are VERY sharp. They are also very delicate. Be careful to avoid hitting the wire when you are felting as if you hit the wire too hard, the needle could break. As a result, it’s always good to have some replacement needles on hand just in case.
Needle Felted Doll Tutorial Steps
You can view the video tutorial here below, followed by the written tutorial below that!
Follow these steps to create the body of the doll:
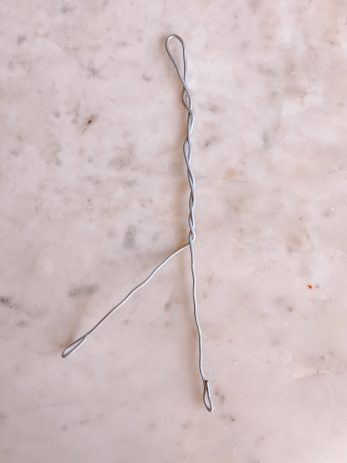
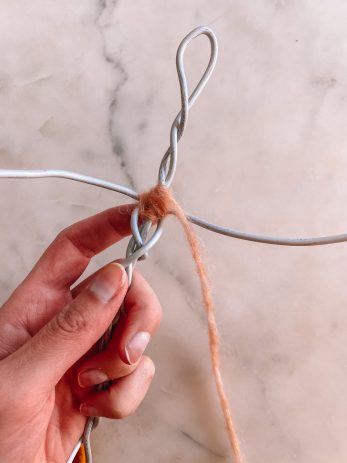
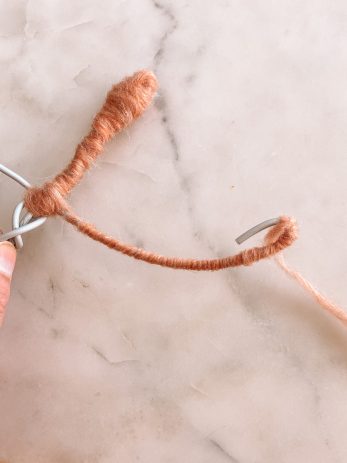
1. Cut a piece of wire to 30″ and fold in half. Starting about 1.5″ down from the top fold, twist the wire together for about 4″ to begin to form the doll’s “torso.” The remaining pieces of wire will become the legs. Fold the end up slightly on each to form the feet.
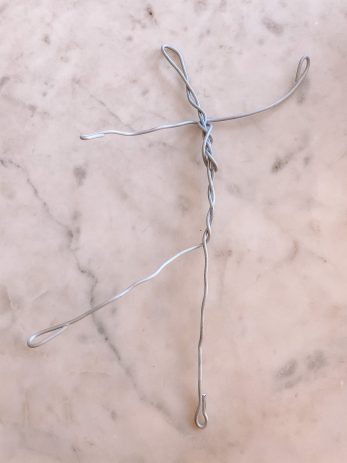
2. Cut another piece of wire, about 15″ and twist it around the torso you just created. This will form the arms. Fold the end up slightly on each to form the hands.
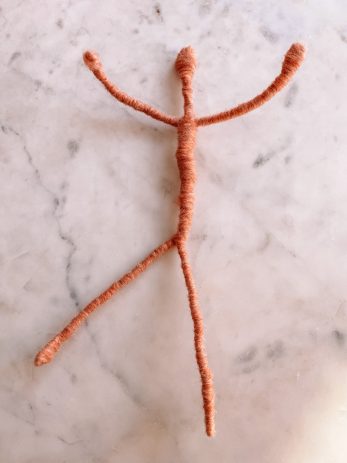
3. Wrap the entire doll frame with yarn. Begin at the torso and wrap the head, neck, arms, remaining torso and legs until completely covered. NOTE: If you are following the tutorial for the doll’s head in the video, you will leave the head unwrapped and skip to step 6.
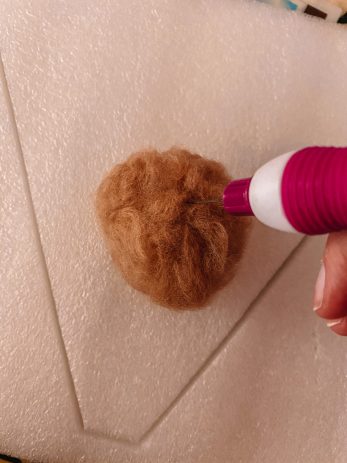
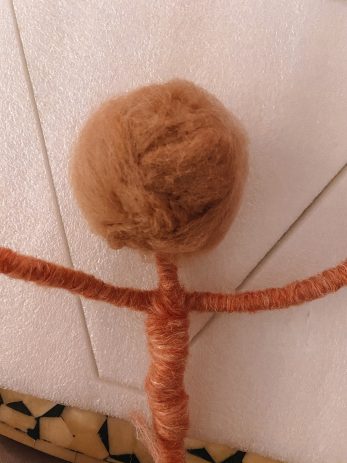
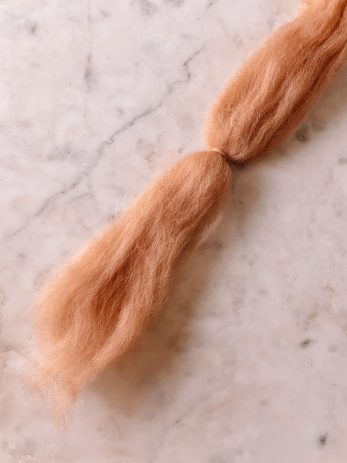
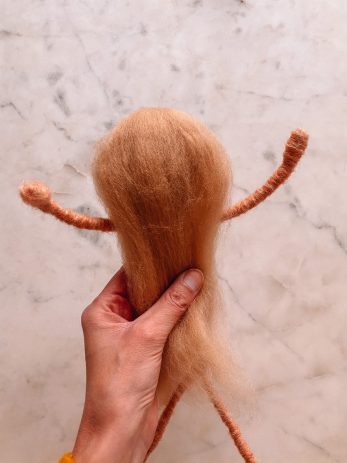
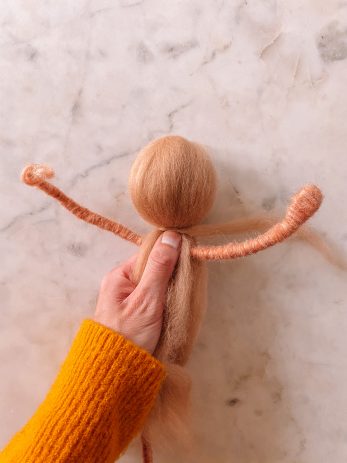
4. Roll a piece of skin tone roving into a ball that is about the size you’d like the final doll head to be. Use your needle and foam to felt it together, pushing the needle over and over into the ball, until it becomes solid and holds together.
5. Place the ball atop the “head” of your wire frame.
6. Pull a piece of skin tone roving off the skein that is approximately 12″ long. Use another strand to tie a knot around the middle of the roving you just pulled.
7. Place the knot at the top of the “head” and wrap the roving around the head. Grab a thin strand and wrap that around and around the “neck” of the doll.
8. Use the needle to felt around the neck and around the head to hold in place.
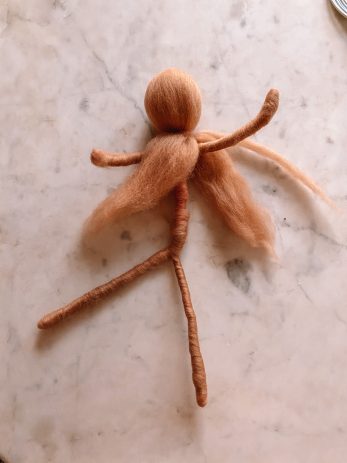
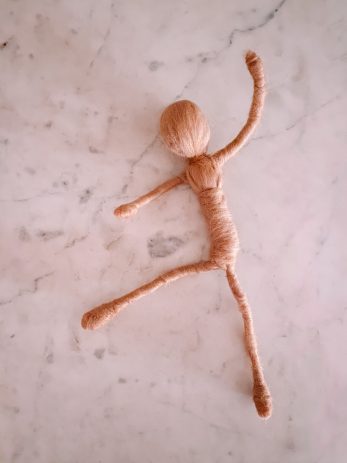
9. Pull a long, thin strand of roving off the skein and wrap it around one arm, starting at the shoulder, working your way down and around the hand. The most important thing here is to not TWIST the roving as you’re wrapping, it should remain “flat” as you’re wrapping. Use your needle to felt the ends into place, and to felt around the hand. Repeat with the other arm.
10. Now, do the same with the legs. Pull a long, thin strand of roving off the skein and wrap it around one leg, starting at the “hip”, working your way down and around the foot. Use your needle to felt the ends into place, and to felt around the foot. Repeat with the other leg.
11. Pull another long thin strand of roving off the skein and wrap the torso, wrapping over the ends of the roving you used to cover the head. Wrap until you have the desired torso size for your doll. Felt together and felt ends in place with the needle.
Creating The Details of the Sugar Plum Fairy
Follow these steps to create the hair and costume of the Sugar Plum Fairy
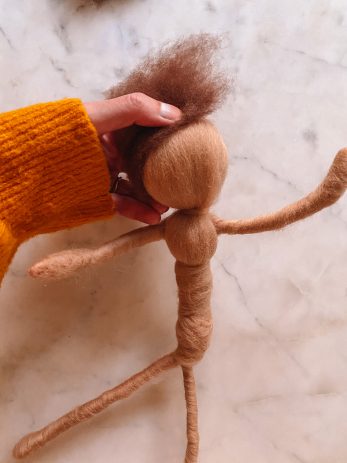
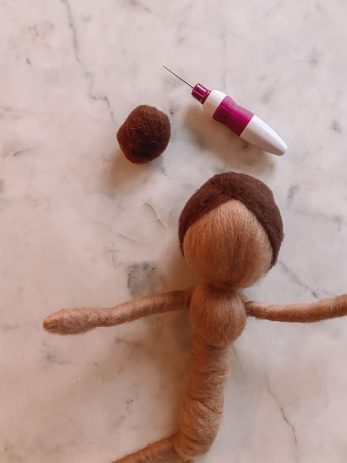
To create her hair: Wrap a piece of roving diagonally, across one side of her head. Needle felt in place around the front and back of her head. Wrap a second piece on the opposite side of her head and felt in place again. Create a small “ball” of roving by felting it slightly and then felt on top of her head to create her bun.
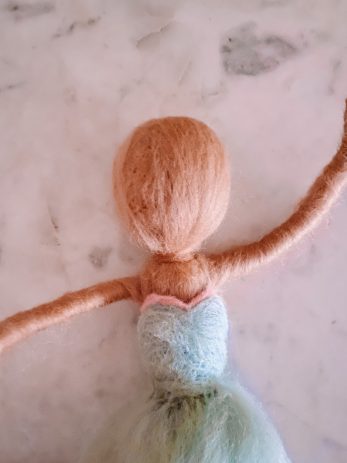
To create the bodice of her costume: Wrap a piece of green roving around her body and needle felt in place. Shape accordingly across the top as desired. Use a small strand of pink to create the detailing along the top of the bodice, and to create straps, needle felting each in place.
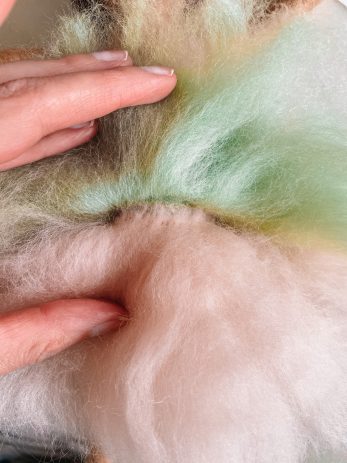
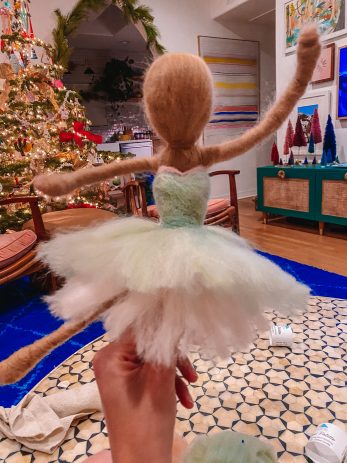
To create the tutu: Cut a piece of roving 4″ long. Needle felt one end to the bodice. Repeat with as many as desired to create as full a tutu as you’d like. Fold the layers up and create additional, contrasting layers underneath using the same method. Trim to desired length (the shorter it is, the better it will stick out like a tutu) and gently pull the ends to “fluff” it.
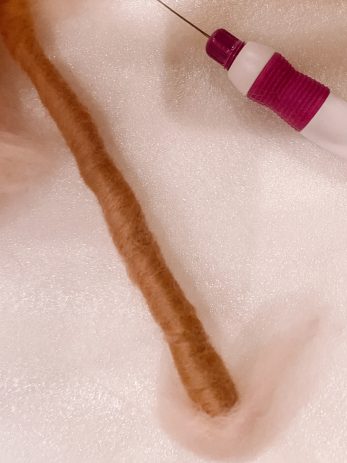
To create the ballet slippers: Pull a small piece of pink roving and wrap it around the foot. Felt in place, shaping as you go to create a ballet slipper shape. Pull another strand and twist it to create the shoes ribbon. Wrap around the leg and felt in place. Repeat on other foot.
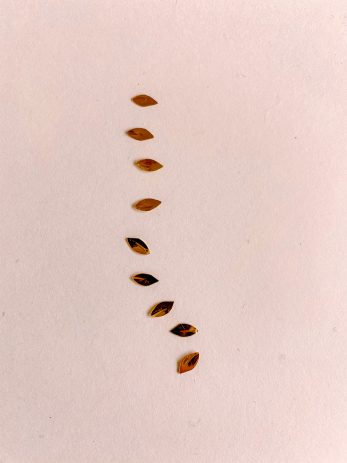
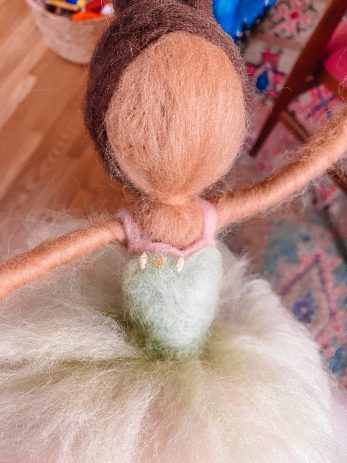
Embellishment ideas: Trim floral shape sequins to create diamond shape embellishments, or use them in their entirety. I coated with mod podge and sprinkled glitter on each to make them sparkle. Let dry. Then use a strong glue to adhere to the costume. I added a pink “pearl” as a finishing touch. Create a crown out of gold trim and place around her bun.
What Color Does the Sugar Plum Fairy Wear?
This turns out to be a great debate! The Sugar Plum Fairy wears two ensembles in the Nutcracker (She’s actually the only character in the ballet that changes!) and they tend to vary between pink and purple shades.
However, our personal favorite version of the ballet is New York City Ballet’s version. She wears a more romantic “ballet pink” tutu in act one, and a green classic tutu for her Pas de Deux in the second act. The latter is what I chose to model my Sugar Plum Fairy after as I think it is the most beautiful costume.
If you’re interested in learning more, you can check out this amazing behind the scenes video of the NYC Ballet Sugar Plum Fairy costumes.

Photos by Jeff Mindell
This needle felted doll tutorial could easily be adapted into other ballerinas, fairies, princes and princesses and even more characters from The Nutcracker… which is what I may do. I would love to build a whole collection over the years!
Have you needle felted before?
Needle Felted Doll: Sugar Plum Fairy
Materials
- Felting needle
- Foam In the video I use styrofoam which is NOT recommend, but was all I had at the time of filming. I recommend using a foam block or piece of soft foam instead.
- Sculpting wire This wire is quite thick, so if you can only find a slightly thinner wire, that will absolutely work too!
- Yarn This won't be seen, but using a color similar to the skin tone you're using makes things easier in case any happens to "peek" out.
- Skin Tone Wool Roving - 2-3 oz Roving I used the color 'Cookie'
- Hair Color Wool Roving - 1/8 oz Roving I used the color 'Brown Bear'
- Primary Costume Color - 1 oz Roving I used the color 'Mint'
- Accent Tutu & Ballet Slipper Color - 1 oz Roving I used the color 'Cherub'
- Costume Trim/Strap Color - 1/8 oz Roving I used the color 'Cherry Blossom'
- Sequins and/or Pearls for embellishments (I used gold flower sequins from my son's giant sequin jar and pearls I popped off of sewing pins!)
- Glitter (Gold or iridescent)
- Mod Podge
- Gold trim for the crown (This is similar to what I used!)
- Glue
- Scissors
Instructions
Needle Felted Doll Steps
- Cut a piece of wire to 30" and fold in half. Starting about 1.5" down from the top fold, twist the wire together for about 4" inches to begin to form the doll's "torso." The remaining pieces of wire will become the legs. Fold the end up slightly on each to form the feet.
- Cut another piece of wire, about 15" and twist it around the torso you just created. This will form the arms. Fold the end up slightly on each to form the hands.
- Wrap the entire doll frame with yarn. Begin at the torso and wrap the head, neck, arms, remaining torso and legs until completely covered. NOTE: If you are following the tutorial for the doll's head in the video, you will leave the head unwrapped and skip to step 6.
- Roll a piece of skin tone roving into a ball that is about the size you'd like the final doll head to be. Use your needle and foam to felt it together, pushing the needle over and over into the ball, until it becomes solid and holds together.
- Place the ball atop the "head" of your wire frame.
- Pull a piece of skin tone roving off the skein that is approximately 12". Use another strand to tie a knot around the middle of the roving you just pulled.
- Place the knot at the top of the "head" and wrap the roving around the head. Grab a thin strand and wrap that around and around the "neck" of the doll.
- Use the needle to felt around the neck and around the head to hold in place.
- Pull a long, thin strand of roving off the skein and wrap it around one arm, starting at the shoulder, working your way down and around the hand. The most important thing here is to not TWIST the roving as you're wrapping, it should remain "flat" as you're wrapping. Use your needle to felt the ends into place, and to felt around the hand. Repeat with the other arm.
- Now, do the same with the legs. Pull a long, thin strand of roving off the skein and wrap it around one leg, starting at the "hip", working your way down and around the foot. Use your needle to felt the ends into place, and to felt around the foot. Repeat with the other leg.
- Pull another long thin strand of roving off the skein and wrap the torso, wrapping over the ends of the roving you used to cover the head. Wrap until you have the desired torso size for your doll. Felt together and felt ends in place with the needle.
Turning Your Doll into a Sugar Plum Fairy
- To create her hair: Wrap a piece of roving diagonally, across one side of her head. Needle felt in place around the front and back of her head. Wrap a second piece on the opposite side of her head and felt in place again. Create a small "ball" of roving by felting it slightly and then felt on top of her head to create her bun.
- To create the bodice of her costume: Wrap a piece of green roving around her body and needle felt in place. Shape accordingly across the top as desired. Use a small strand of pink to create the detailing along the top of the bodice, and to create straps, needle felting each in place.
- To create the tutu: Cut a piece of roving 4" long. Needle felt one end to the bodice. Repeat with as many as desired to create as full a tutu as you'd like. Fold the layers up and create additional, contrasting layers underneath using the same method. Trim to desired length (the shorter it is, the better it will stick out like a tutu) and gently pull the ends to "fluff" it.
- To create the ballet slippers: Pull a small piece of pink roving and wrap it around the foot. Felt in place, shaping as you go to create a ballet slipper shape. Pull another strand and twist it to create the shoes ribbon. Wrap around the leg and felt in place. Repeat on other foot.
- Embellishment ideas: Trim floral shape sequins to create diamond shape embellishments, or use them in their entirety. I coated with mod podge and sprinkled glitter on each to make them sparkle. Let dry. Then use a strong glue to adhere to the costume. I added a pink "pearl" as a finishing touch. Create a crown out of gold trim and place around her bun.



Marissa O says
she’s beautiful!
gmail email login says
Oh so beautiful~ Thank you for the tutorial. I’m interested in needle felted recently, gotta try this!
Candice S says
Super cute! Would love to try making one of these.
Sally says
Beautiful!