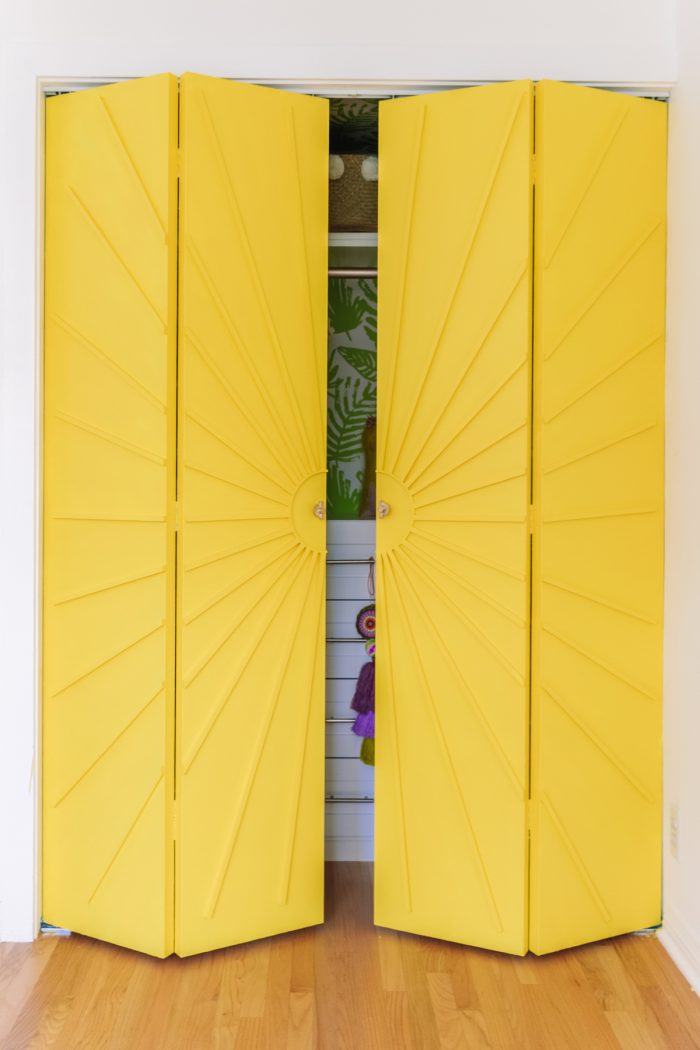
Need some bifold closet door ideas? They can be quite boring, even an eyesore, but they don’t have to be!
In Los Angeles, there are a TON of houses that have sunburst screen doors and I absolute love them! Every time I passed one, I’d tuck the inspiration away for a future project, and when we finally started working on the second nursery closet I knew that was my chance!
Originally, this space had mirrored closet doors but with the help of our awesome handyman, we easily swapped them out for bi-fold doors which became the canvas for making these sunburst closet doors!
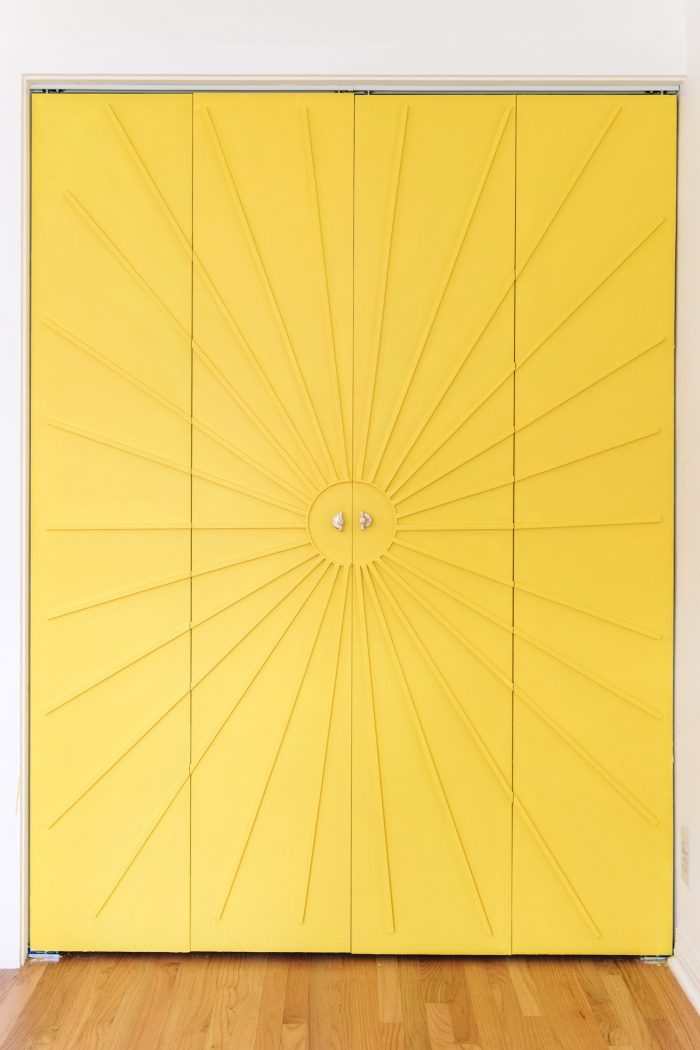
The supplies for this were simple: an embroidery hoop and some square wooden dowels! The project does, however, require a lot of precise cutting to ensure everything lines up properly from door to door, but the best part about the sunburst is if you’re overall lines shift a bit… it’s quite forgiving!
From Sliding Mirrored Doors to Bi-Fold Doors
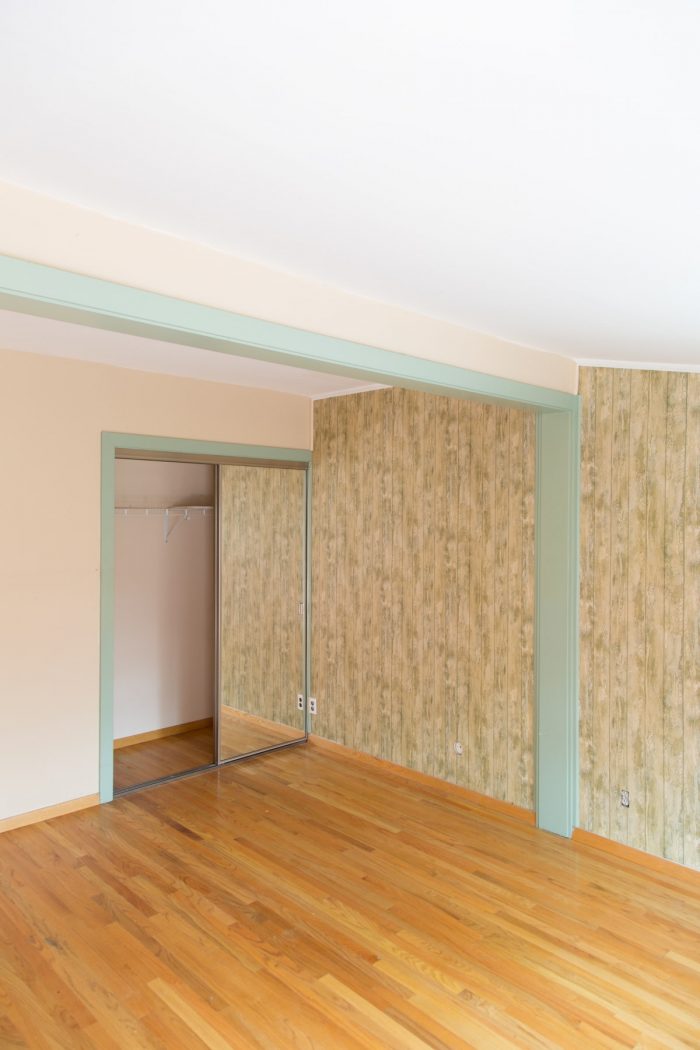
Above you can see what the room looked like when we bought the home. We were able to find plain primed bifold doors that fit almost perfectly in the space the previous mirrored doors left.
We were able to keep the same framing and our handyman removed the old tracks and doors and with a few slightly size adjustments, was able to swap in the bifold ones. The only gap that we didn’t fix was a small one in the molding along the side wall, but it was minimal and not noticeable so it hasn’t bothered us!
Supplies and Equipment
Here’s everything we used to create the starburst closet doors:
- Bi-Fold Doors
- 1/2″ Square Dowels (Quantity depends on door size, design. Our doors were 8’x6′ and how many rays you want on your sun. We had 26 rays on ours, each ranging between 2′ and 3′ long, for a total of about 78′ worth of dowels needed. We bought longer dowels locally and cut them down.)
- 8″ Wood Embroidery Hoop
- Washi Tape (optional)
- Pencil
- Yardstick
- Saw
- Sandpaper
- Wood Glue
- Nail Gun (See below)
- Wood Filler
- Paint and Primer (We used Dunn Edwards “Radiant Sunshine”)
The most tedious part of this project is the measuring, for which we used a yardstick, tape and pencil. It helped us to see and then mark each line visually prior to attaching the dowels.
A power saw would come in handy for this project if you have one. We did not, so we cut all the pieces with a hand saw, and sanded them by hand, and it worked just fine.
We did, however, choose to rent a nail gun and it was definitely the best move. There are dozens of pieces to nail to the doors and while you could do it by hand or use glue, the nail gun makes the process go much quicker.
How To Make Sunburst Closet Doors
I decided to use washi tape to map out my sunburst before drawing the lines on the door that I would eventually follow when nailing on the dowels. I did this so I could easily move and adjust the design before finalizing it. This is not a necessary step, and it adds time to the process, but I found it helpful!
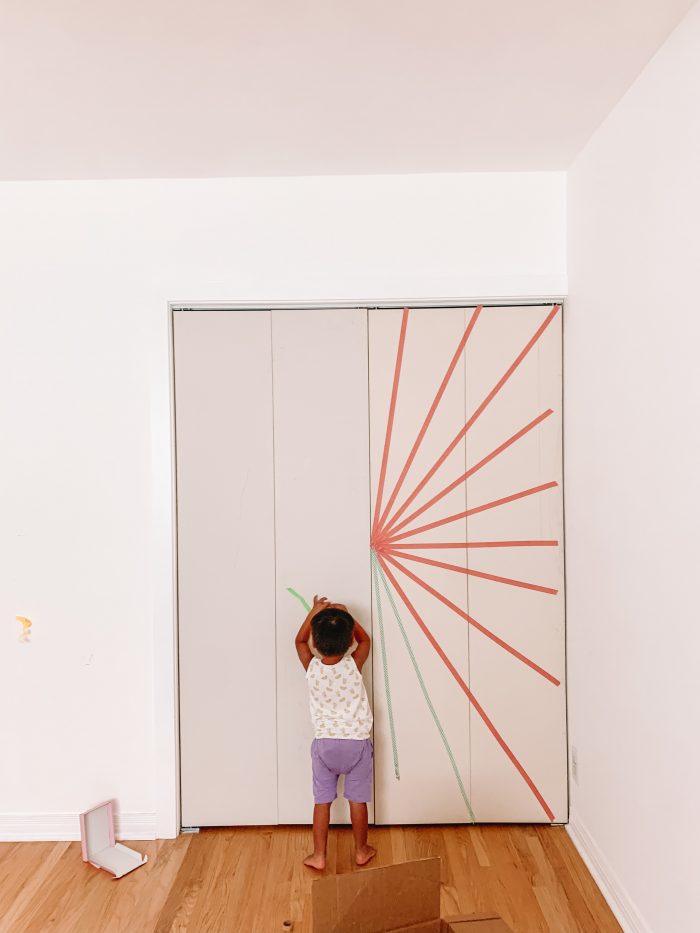
Whether you’re starting with tape or just a yardstick and pencil, you’ll want to mark out your sunburst on the doors first.
Begin by deciding where you want the center of your starburst to be and, with the doors closed, trace the embroidery hoop where you’ll eventually attach it.
From there, you’ll plan out your starburst rays. Use washi tape OR a pencil and yardstick to map out each ray on the door. To make the rays evenly spaced, I measured 12″ out from my embroidery hoop for each ray and used that point as my spacing guideline. From that 12″ marker, I made sure the rays were spaced approximately 3″ apart.
If you chose to start with washi tape, you’ll want to simply trace a line on the door, along one side of your washi tape to make the final markers for your washi tape. If you just used a pencil to start, you’re good to start attaching your dowels!
Begin by sawing your embroidery hoop in half. Sand the edges as necessary. Use wood glue to glue each half of the embroidery hoop in place on the doors.
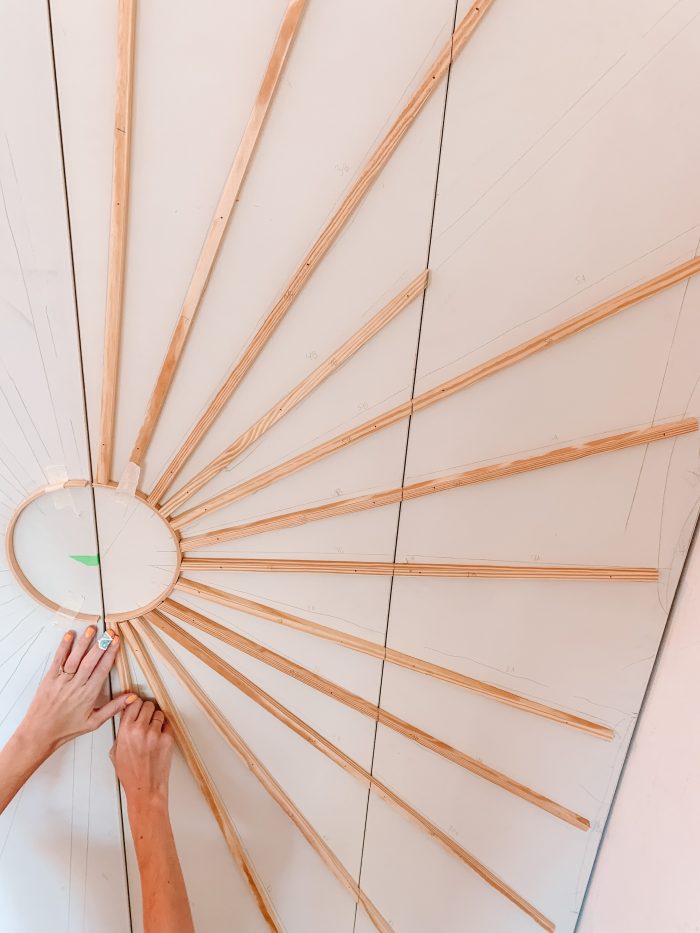
Each ray will need to be cut to size, we cut each ray to be about 1-2″ short from the outer edge of the door. I wanted them all to be slightly different lengths, but you can make yours more uniform if you choose! Just ensure you are taking into account the door OPENING and make sure it can open with appropriately with the rays in place. Adjust length as needed/accordingly!
To cut each ray, I simply held the dowel up to its corresponding line on the door and made a mark exactly where I wanted it to be cut. I am a visual person and this was easiest for me, especially if I wanted to make last minute adjustments. You can also just measure the guideline you drew and cut lengths accordingly. Sand the edges until smooth.
The rays that extend over both halves of one door will need an additional cut. To do this, once we cut the overall dowel to size, I would hold it up against the door and draw a line exactly where the “fold” in the door would hit. Cut and sand. Because of the different angles of the rays, all the cuts will also be at different angles on the dowels.
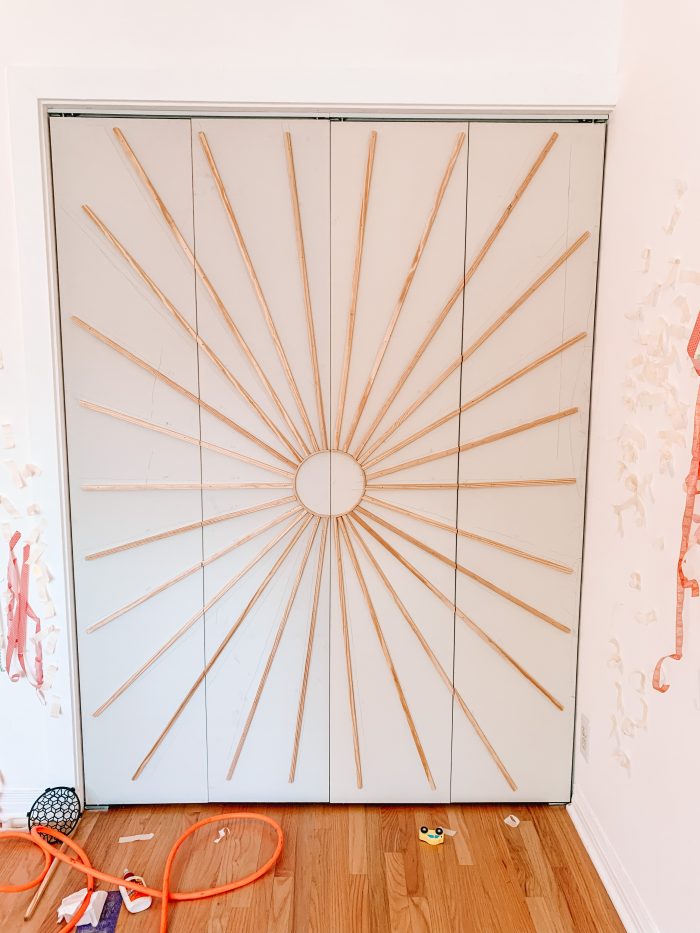
Using a nail gun (or wood glue if you prefer), nail each dowel in place using your guidelines. You want to be especially precise and careful when doing this on the rays that extend over both halves of the door, as you want those to line up perfectly. Definitely a two person job!
Fill in and cover any nails/nail holes with wood filler so you have a smooth finish on each ray once you paint. Follow package instructions!
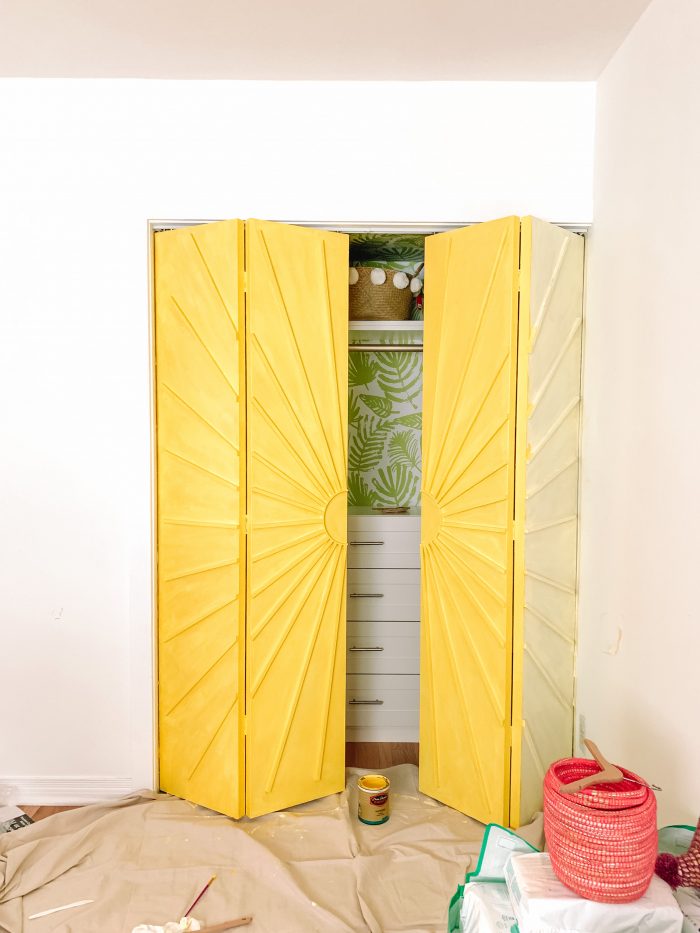
Now you’re ready to paint! We did one coat of primer and two coats of paint, sanding lightly between each coat. I chose to make it all one color, but if you want the sunburst to stand out even more, you could paint it a contrasting color or slightly darker or later shade of your main color!
As far as handles goes, I chose to add brass handles in the center of the hoop for decorative purposes but they are not functional handles. As you may know, for handles to function on bi-fold doors, they need to be centered on the inner two doors.
We use the rays themselves to open the doors, since they function just like a handle would in my opinion, and then use the actual handles to close them. Haven’t had any issues! You could also add an additional piece of the dowel (painted) where a handle would go and it would be a great option for a discreet handle.
Looking for more closet inspiration?
- How To Make Our Pink Closet French Doors
- The Mindwelling: Colorful Nursery Closet Reveal
- The Mindwelling: Our Colorful Entry Closet Makeover
- Kids Closet Reading Nook Makeover
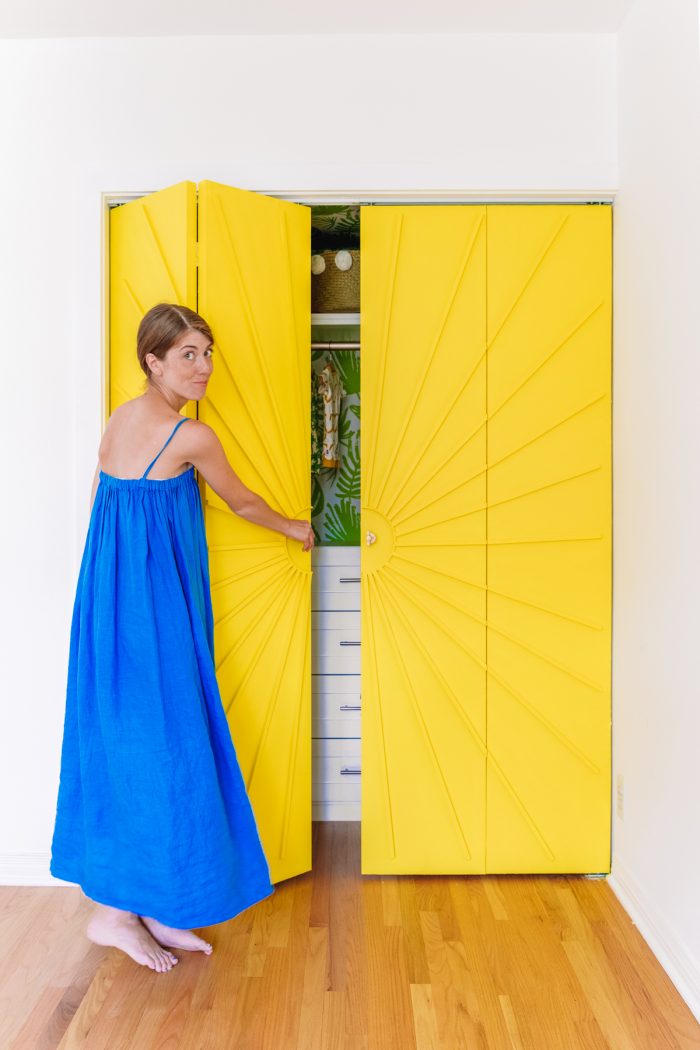
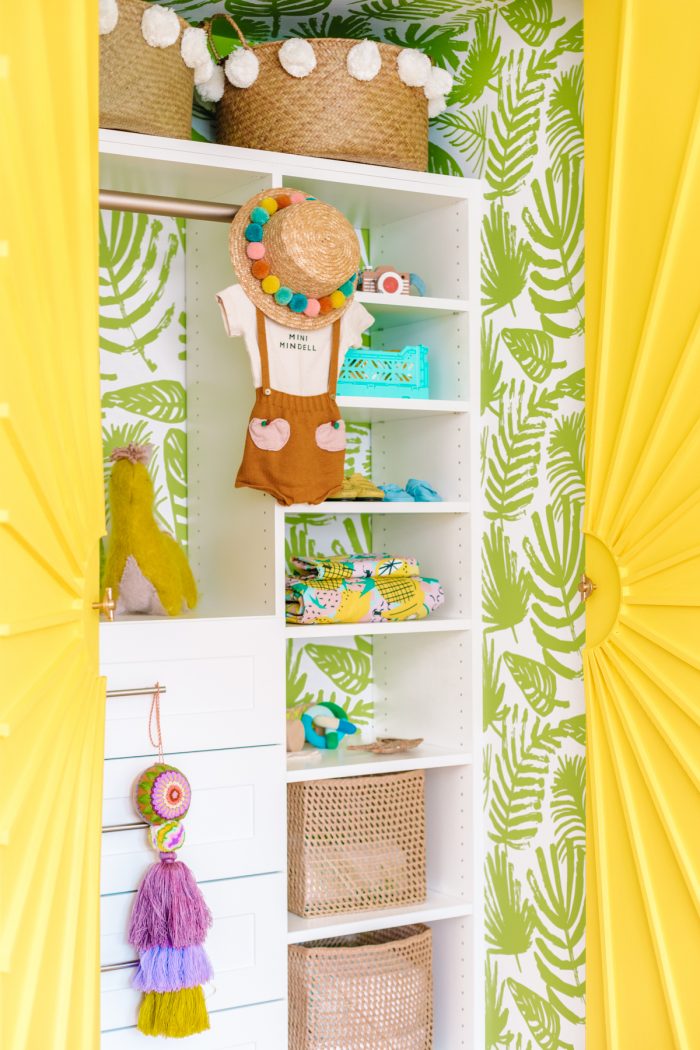
These doors really brightened up this room and this closet and I’m so happy with how they turned out! If you’re looking for ideas for bifold closet doors, I hope this sparks some inspiration!
If you’re looking for other sources for the closet pictured above, you can see the full closet reveal here!
How To Make Sunburst Closet Doors
Materials
- Bi-Fold Doors
- 1/2" Square Dowels (Quantity will depending on the size of your doors. Our doors were 8'x6' and how many rays you want on your sun. We had 26 rays on ours, each ranging between 2' and 3' long, for a total of about 78' worth of dowels needed. We bought longer ones and cut them down.)
- 1 Wood Embroidery Hoop (I used an 8" hoop, you can use any size you'd like!)
- Yard Stick
- Pencil
- Washi Tape (Not necessary, but you can use it to help you visualize the sunburst!)
- Saw
- Sandpaper
- Nail Gun (We rented a nail gun for this, but you could use wood glue or nail them in by hand instead. It would be longer and more tedious but possible!)
- Wood Glue
- All necessary safety equipement dependign on tools used!
- Wood Filler
- Paint and Primer of Choice (We used Dunn Edwards "Radiant Sunshine")
Instructions
- I decided to use washi tape to map out my sunburst before drawing the lines on the door that I would eventually follow when nailing on the dowels. I did this so I could easily move and adjust the design before finalizing it. This is not a necessary step, and it adds time to the process, but I found it helpful! Whether you're starting with tape or just a yardstick and pencil, you'll want to mark out your sunburst on the doors first.Begin by deciding where you want the center of your starburst to be and, with the doors closed, trace the embroidery hoop where you'll eventually attach it.
- Use washi tape OR a pencil and yardstick to map out each ray on the door. To make the rays evenly spaced, I measured 12" out from my embroidery hoop for each ray and used that point as my spacing guideline. From that 12" marker, I made sure the rays were spaced approximately 3" apart.
- If you chose to start with washi tape, you'll want to simply trace a line on the door, along one side of your washi tape to make the final markers for your washi tape. If you just used a pencil to start, you're good to start attaching your dowels!
- Cut your embroidery hoop in half. Sand the edges as necessary. Use wood glue to glue each half of the embroidery hoop in place on the doors.
- Now you will cut each ray to the size needed. We cut each ray so that it would end 1-2" from the outer edge of the door. I wanted them all to be slightly different lengths, but you can make yours more uniform if you choose! Just ensure you are taking into account the door OPENING and make sure it can open with appropriately with the rays in place. Adjust length as needed/accordingly!To cut each ray, I simply held the dowel up to its corresponding line on the door and made a mark exactly where I wanted it to be cut. I am a visual person and this was easiest for me, especially if I wanted to make last minute adjustments. You can also just measure the guideline you drew and cut lengths accordingly. Sand the edges until smooth.
- The rays that extend over both halves of one door will need an additional cut. To do this, once we cut the overall dowel to size, I would hold it up against the door and draw a line exactly where the "fold" in the door would hit. Cut and sand. Because of the different angles of the rays, all the cuts will also be at different angles on the dowels.
- Using a nail gun (or wood glue if you prefer), nail each dowel in place using your guidelines. You want to be especially precise and careful when doing this on the rays that extend over both halves of the door, as you want those to line up perfectly. Definitely a two person job!
- Fill in and cover any nails/nail holes with wood filler so you have a smooth finish on each ray once you paint. Follow package instructions!
- Time to prime/paint. We did one coat of tinted primer and two coats of paint, sanding lightly between each coat.
- We added decorative ONLY handles in the middle of the embroidery hoop. These are NOT placed to be able to actually open the door, they are for visual purposes only. They wil function to close the door but not to open it. We simply use the dowels/rays to open the closet doors, but you could add a simple narrow wood handle (also paitned) along one of the rays, in the center of each door instead.



Maritza says
Love the doors, love the dress! Cute little helper too! 🙂
Joseph says
Great article about closet doors. Its very informative.
On Subtitlematch says
Very informative piece of write-up. i love how you chose your colors too
Julia Hinkle says
These closet doors are beautiful! I saw them in this month’s issue of HGTV Magazine! Instructions sound do-able and I cannot wait to try it! Thank you!
Ashley Phillips says
How bad do you think it would look on panel doors?
Kate says
Love these doors. Thanks for instructions. When you painted did you do it with a brush, or combination brush and roller, or did you spray it? Did you take the doors off to paint them? Thanks
Kelly says
We used a brush and painted the doors while they were hung (mostly because we didn’t want to have to remove and re-hang them), but you could do this either way!
Elliot Doyle says
All Closet doors are amazing and very lovely. https://www.wellcaremedicare.net/